July 6, 2023
The latest release includes minor bug fixes, UI improvements, and a highly anticipated addition: Table Variable.
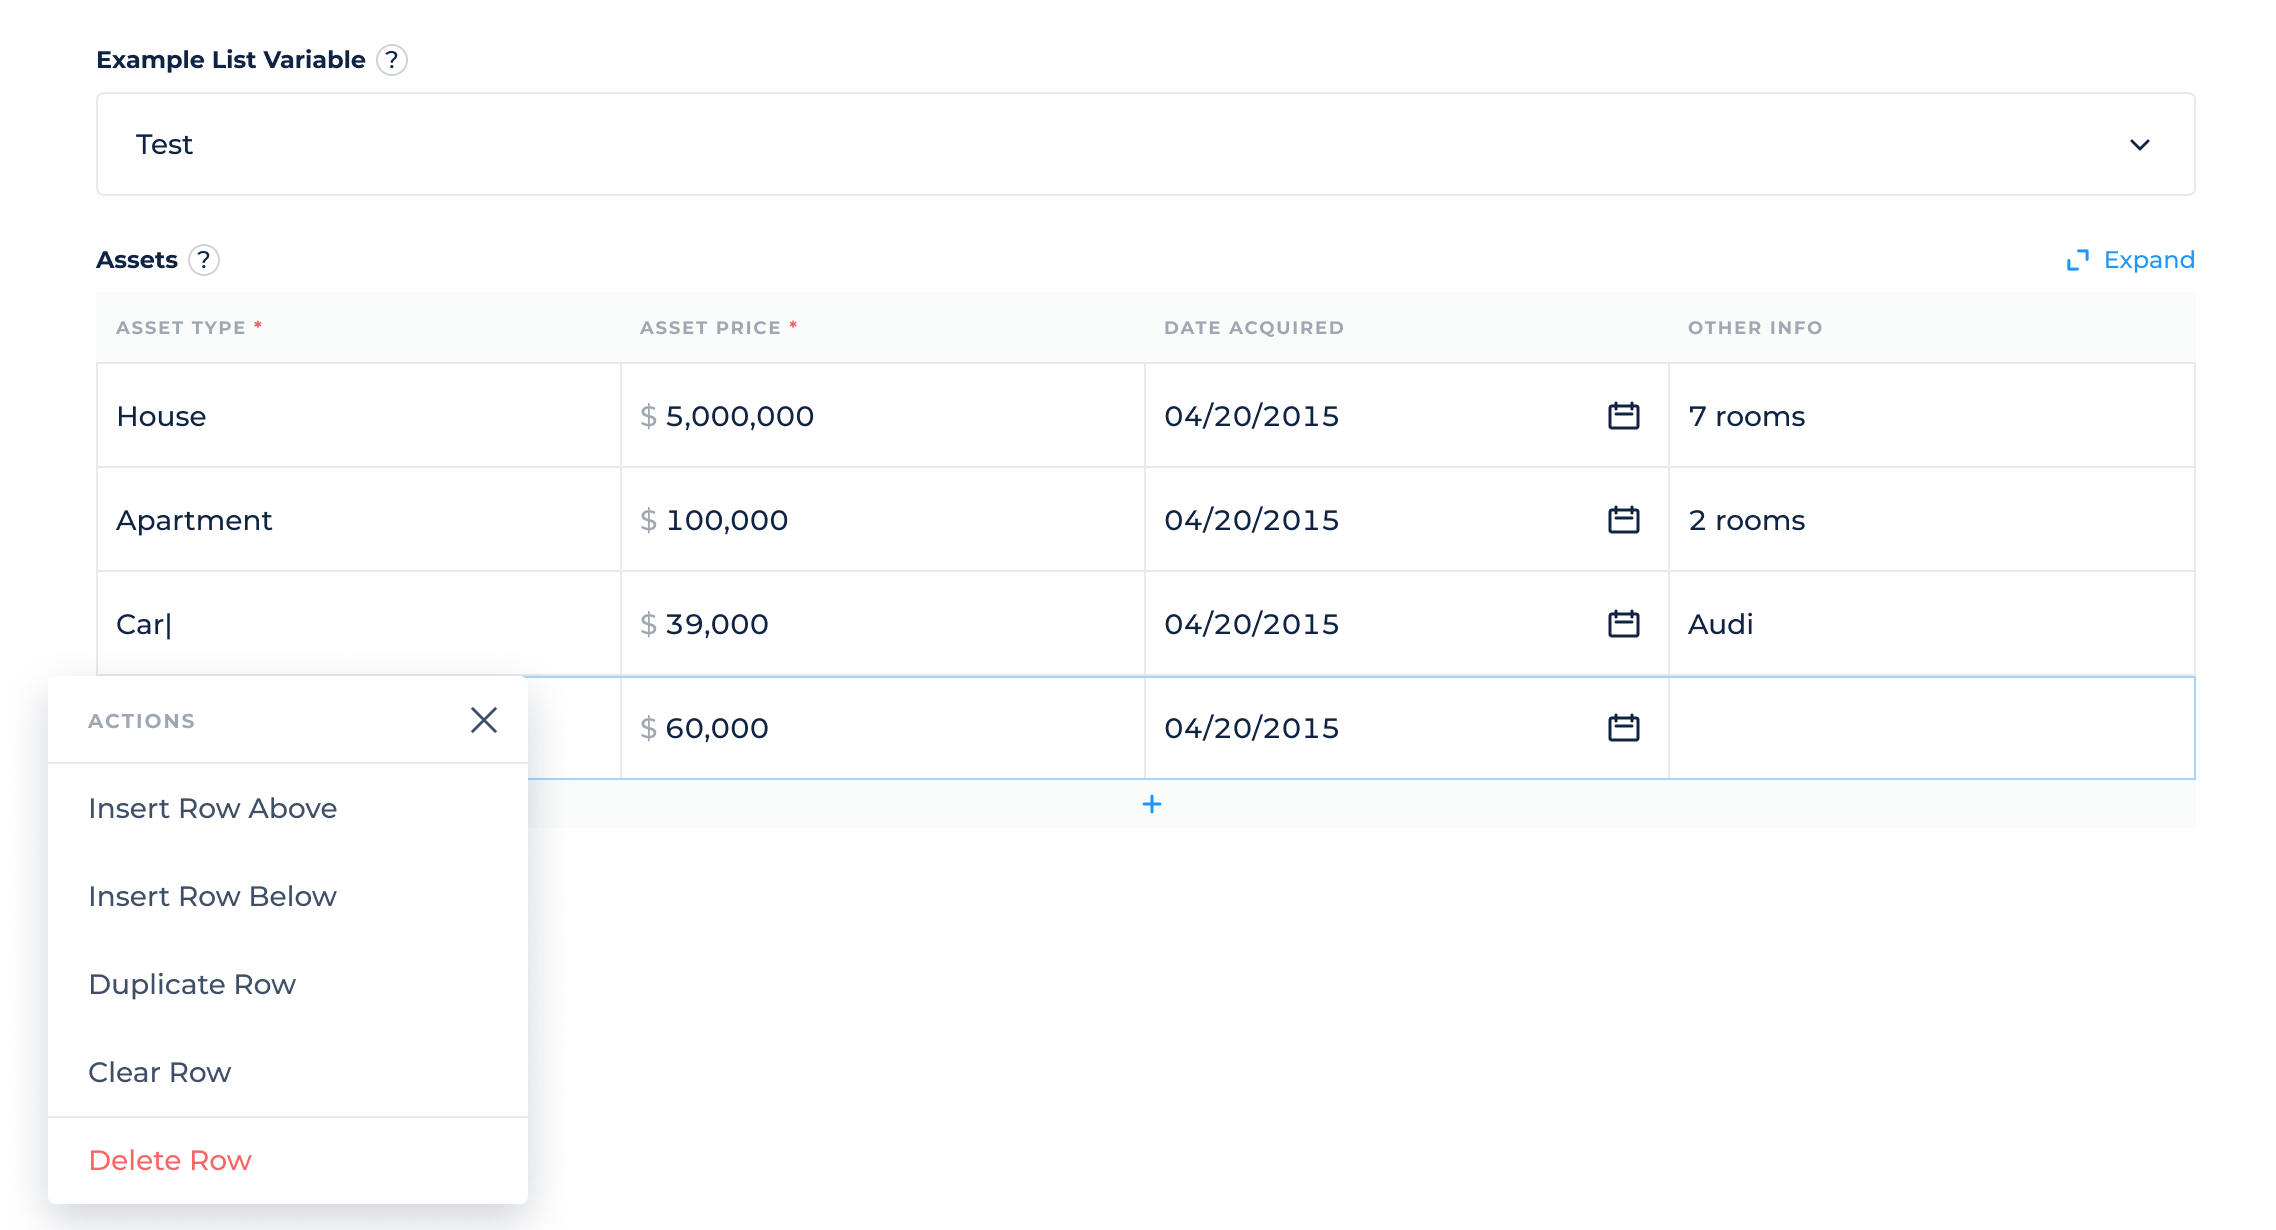
The Table Variable has been designed to improve your data organization, particularly when dealing with groups of information sharing similar parameters.
It stores the data in the database in an "array of objects" format and presents the information in a neat and organized table format within the user interface.
Release Details
Here are the key highlights of the table variable feature, along with instructions on how to effectively utilize this variable type.
How To Create A Table Variable:
To create a new table variable go to Lending Setup > Variables > Add Variables.
While choosing the variable type “Table”, you’ll get a prompt to configure table columns. Here are the details about the configuration:
- Columns can be created with their own data types, which can be chosen from a list of options.
- You can choose any type except for the “Table”.
- Columns can be designated as either "Required" or "Optional".
- Certain data types, such as "Monetary" or "Phone number", require sub-options to be selected.
- Columns can be easily added, removed, and edited, and their sequence can be rearranged using a drag-and-drop feature.

How To Refer To Table or Table Variable Cell:
Specific cells from the table variable can be used in calculations within the platform.
The format for referring to a specific column cell in the table is:
table_variable_system_name[row_number].column_system_nameReferring To Table Variables via API:
Note that while working with tables via API, a unique string _id field must be provided for each row in the table.
Table Variable Limits:
- maximum 30 columns;
- maximum 100 rows;
- all column names within 1 table should be unique.
Using Table Variables in Decision Strategies:
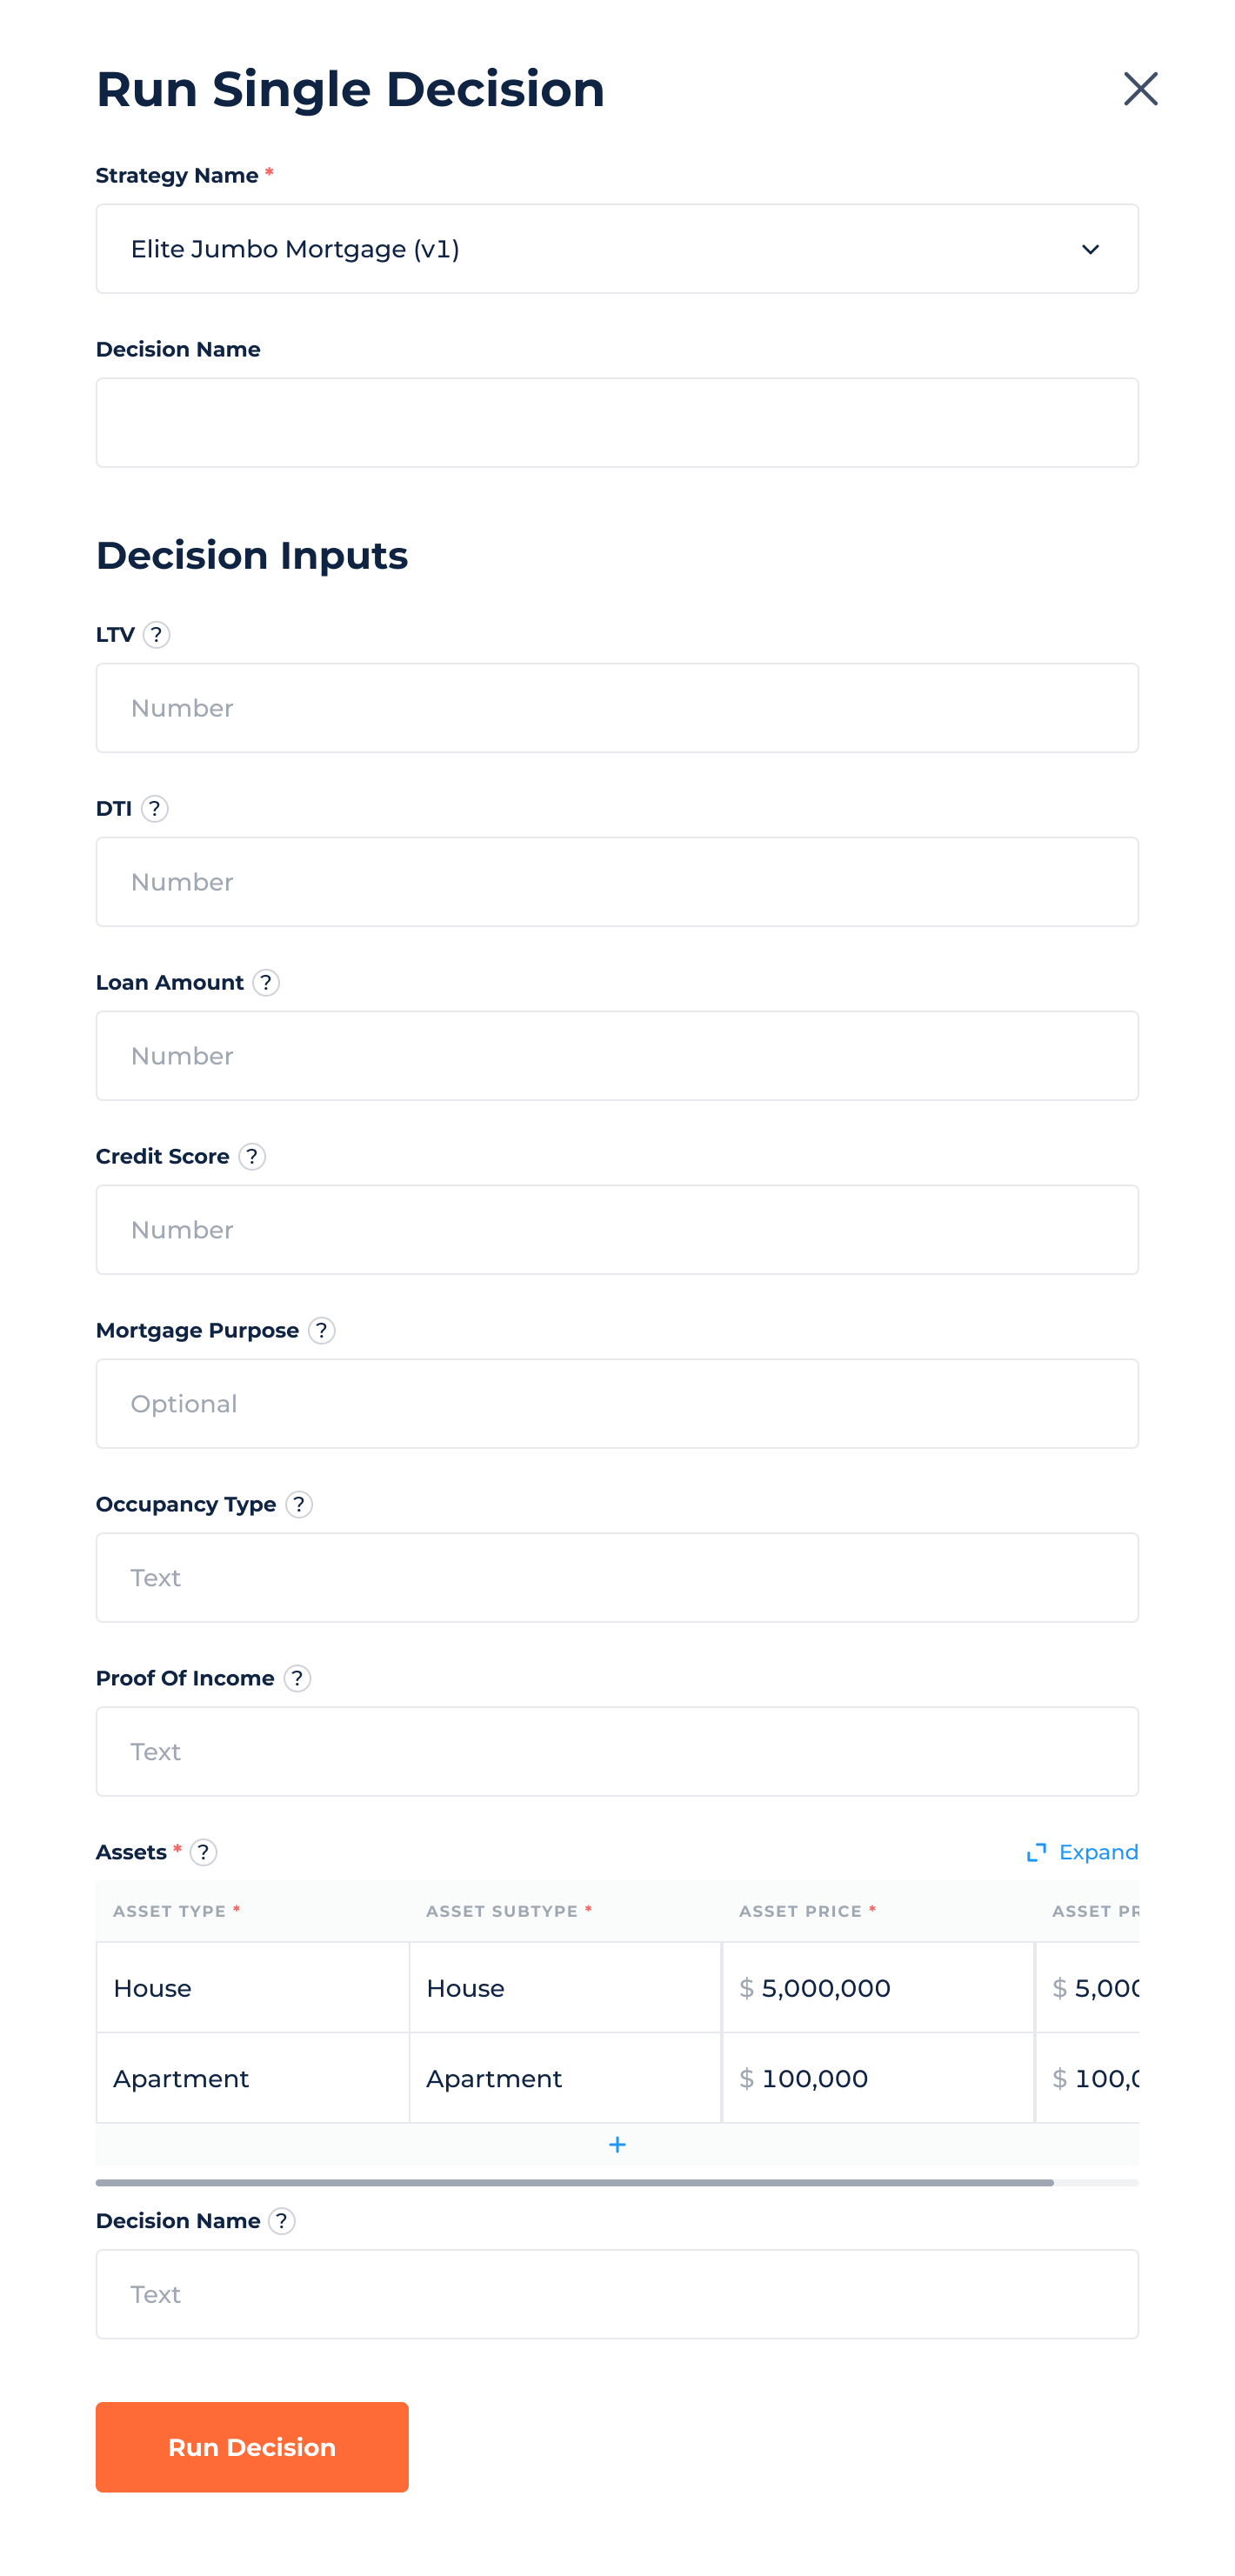
Various decision engine modules, such as the Rules Module, can leverage table variables as input variables. By including table variables and assigning values to their columns, you can create decision-making conditions and rules.
By referring to specific rows in your table, you can apply conditions and rules that deliver the outcomes.
If the values for your table variable were received via a Decision Strategy run, they will be reflected in the Decision details view. You will find a "Show Table" button. Clicking on this button opens a modal displaying the table, allowing you to easily visualize and analyze the array of objects.

How To Use Variables with Integrations
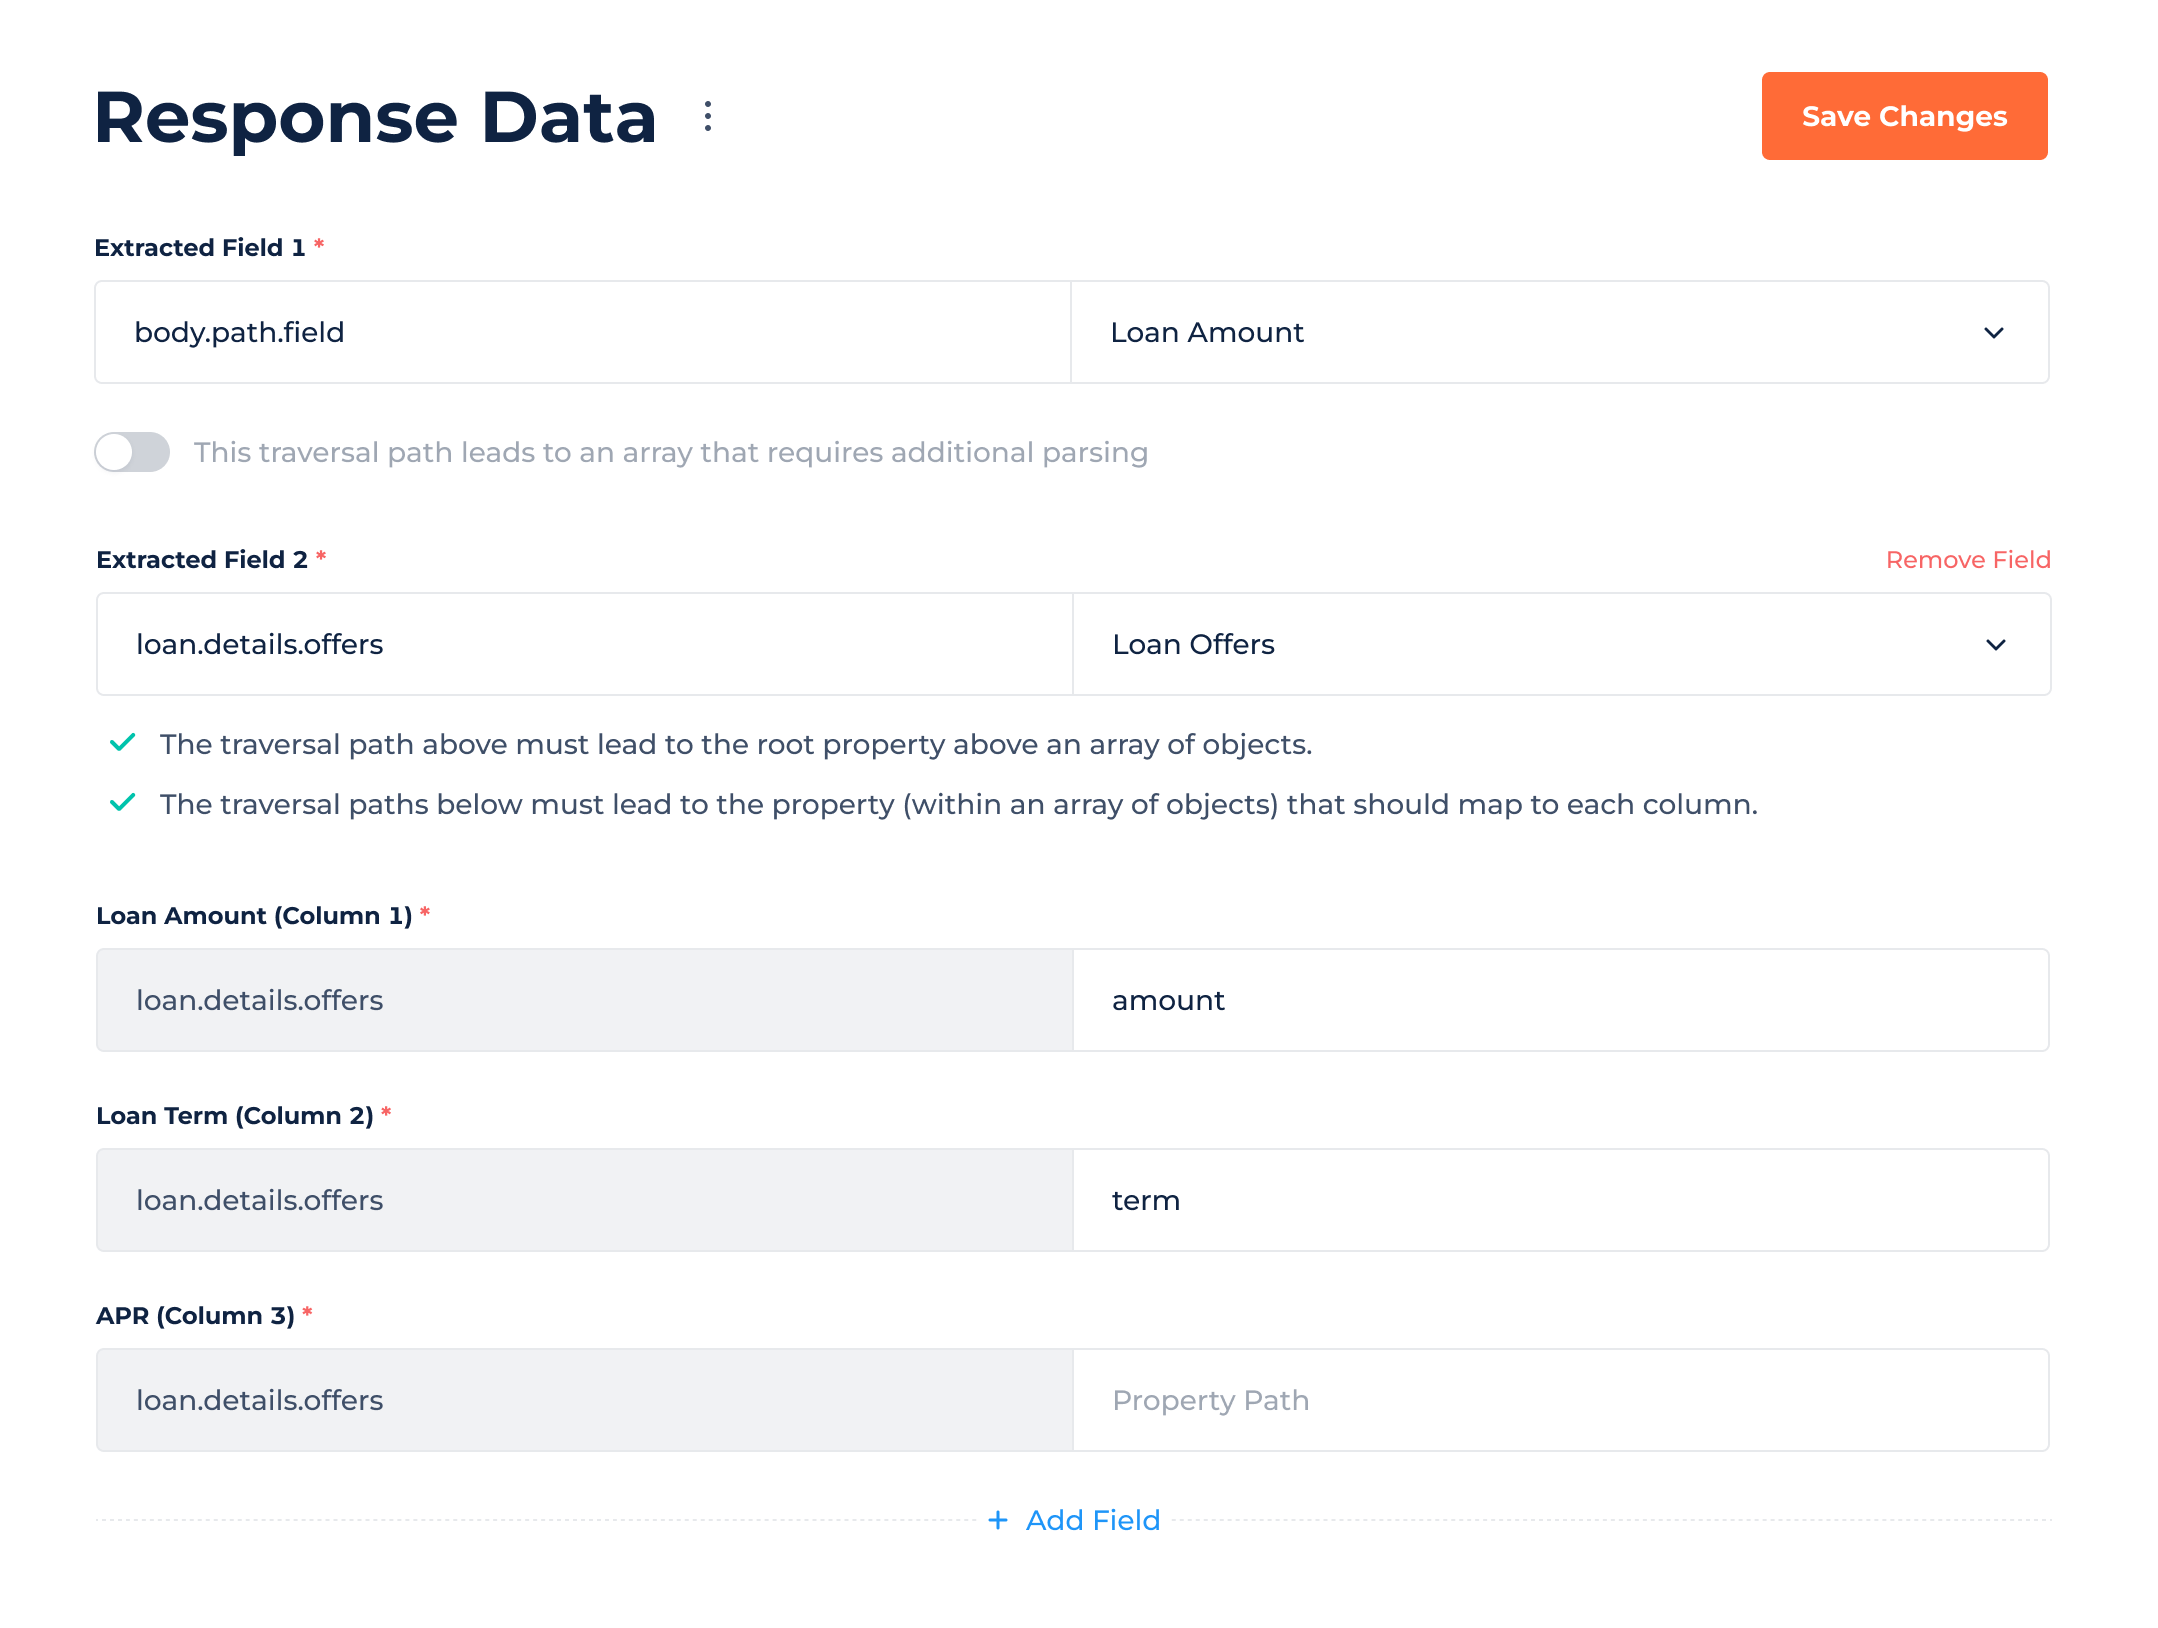
The Integrations parser tool has been upgraded to allow the parsing of results into a table. By choosing the appropriate table variable to match the result from the response file, you can see all the columns listed immediately.
To configure the traversal path for each column, provide the traversal path to the main object. This ensures that the data is extracted correctly. Lastly, don't forget to add the property path to map the values accurately.
When running the integration, the response file will be parsed into the table according to the configured settings.

New Table functions added
Find the list of new Table Functions in the Developer Guide. These functions are specifically designed to work with variables that have the data type of Table.
You can now utilize Table functions to easily calculate aggregates such as the sum, maximum, minimum, average of rows within the table and more!
