Application Documents
How to organize and manage application documents.
Overview of Application Documents
DigiFi's platform includes comprehensive document management capabilities, including the ability to upload, download, view and organize documents in folders.
DigiFi places a strong emphasis on security. All uploaded files are screened to prevent any potentially harmful content from being accessed, and suspicious files are flagged and prevented from being opened or downloaded.
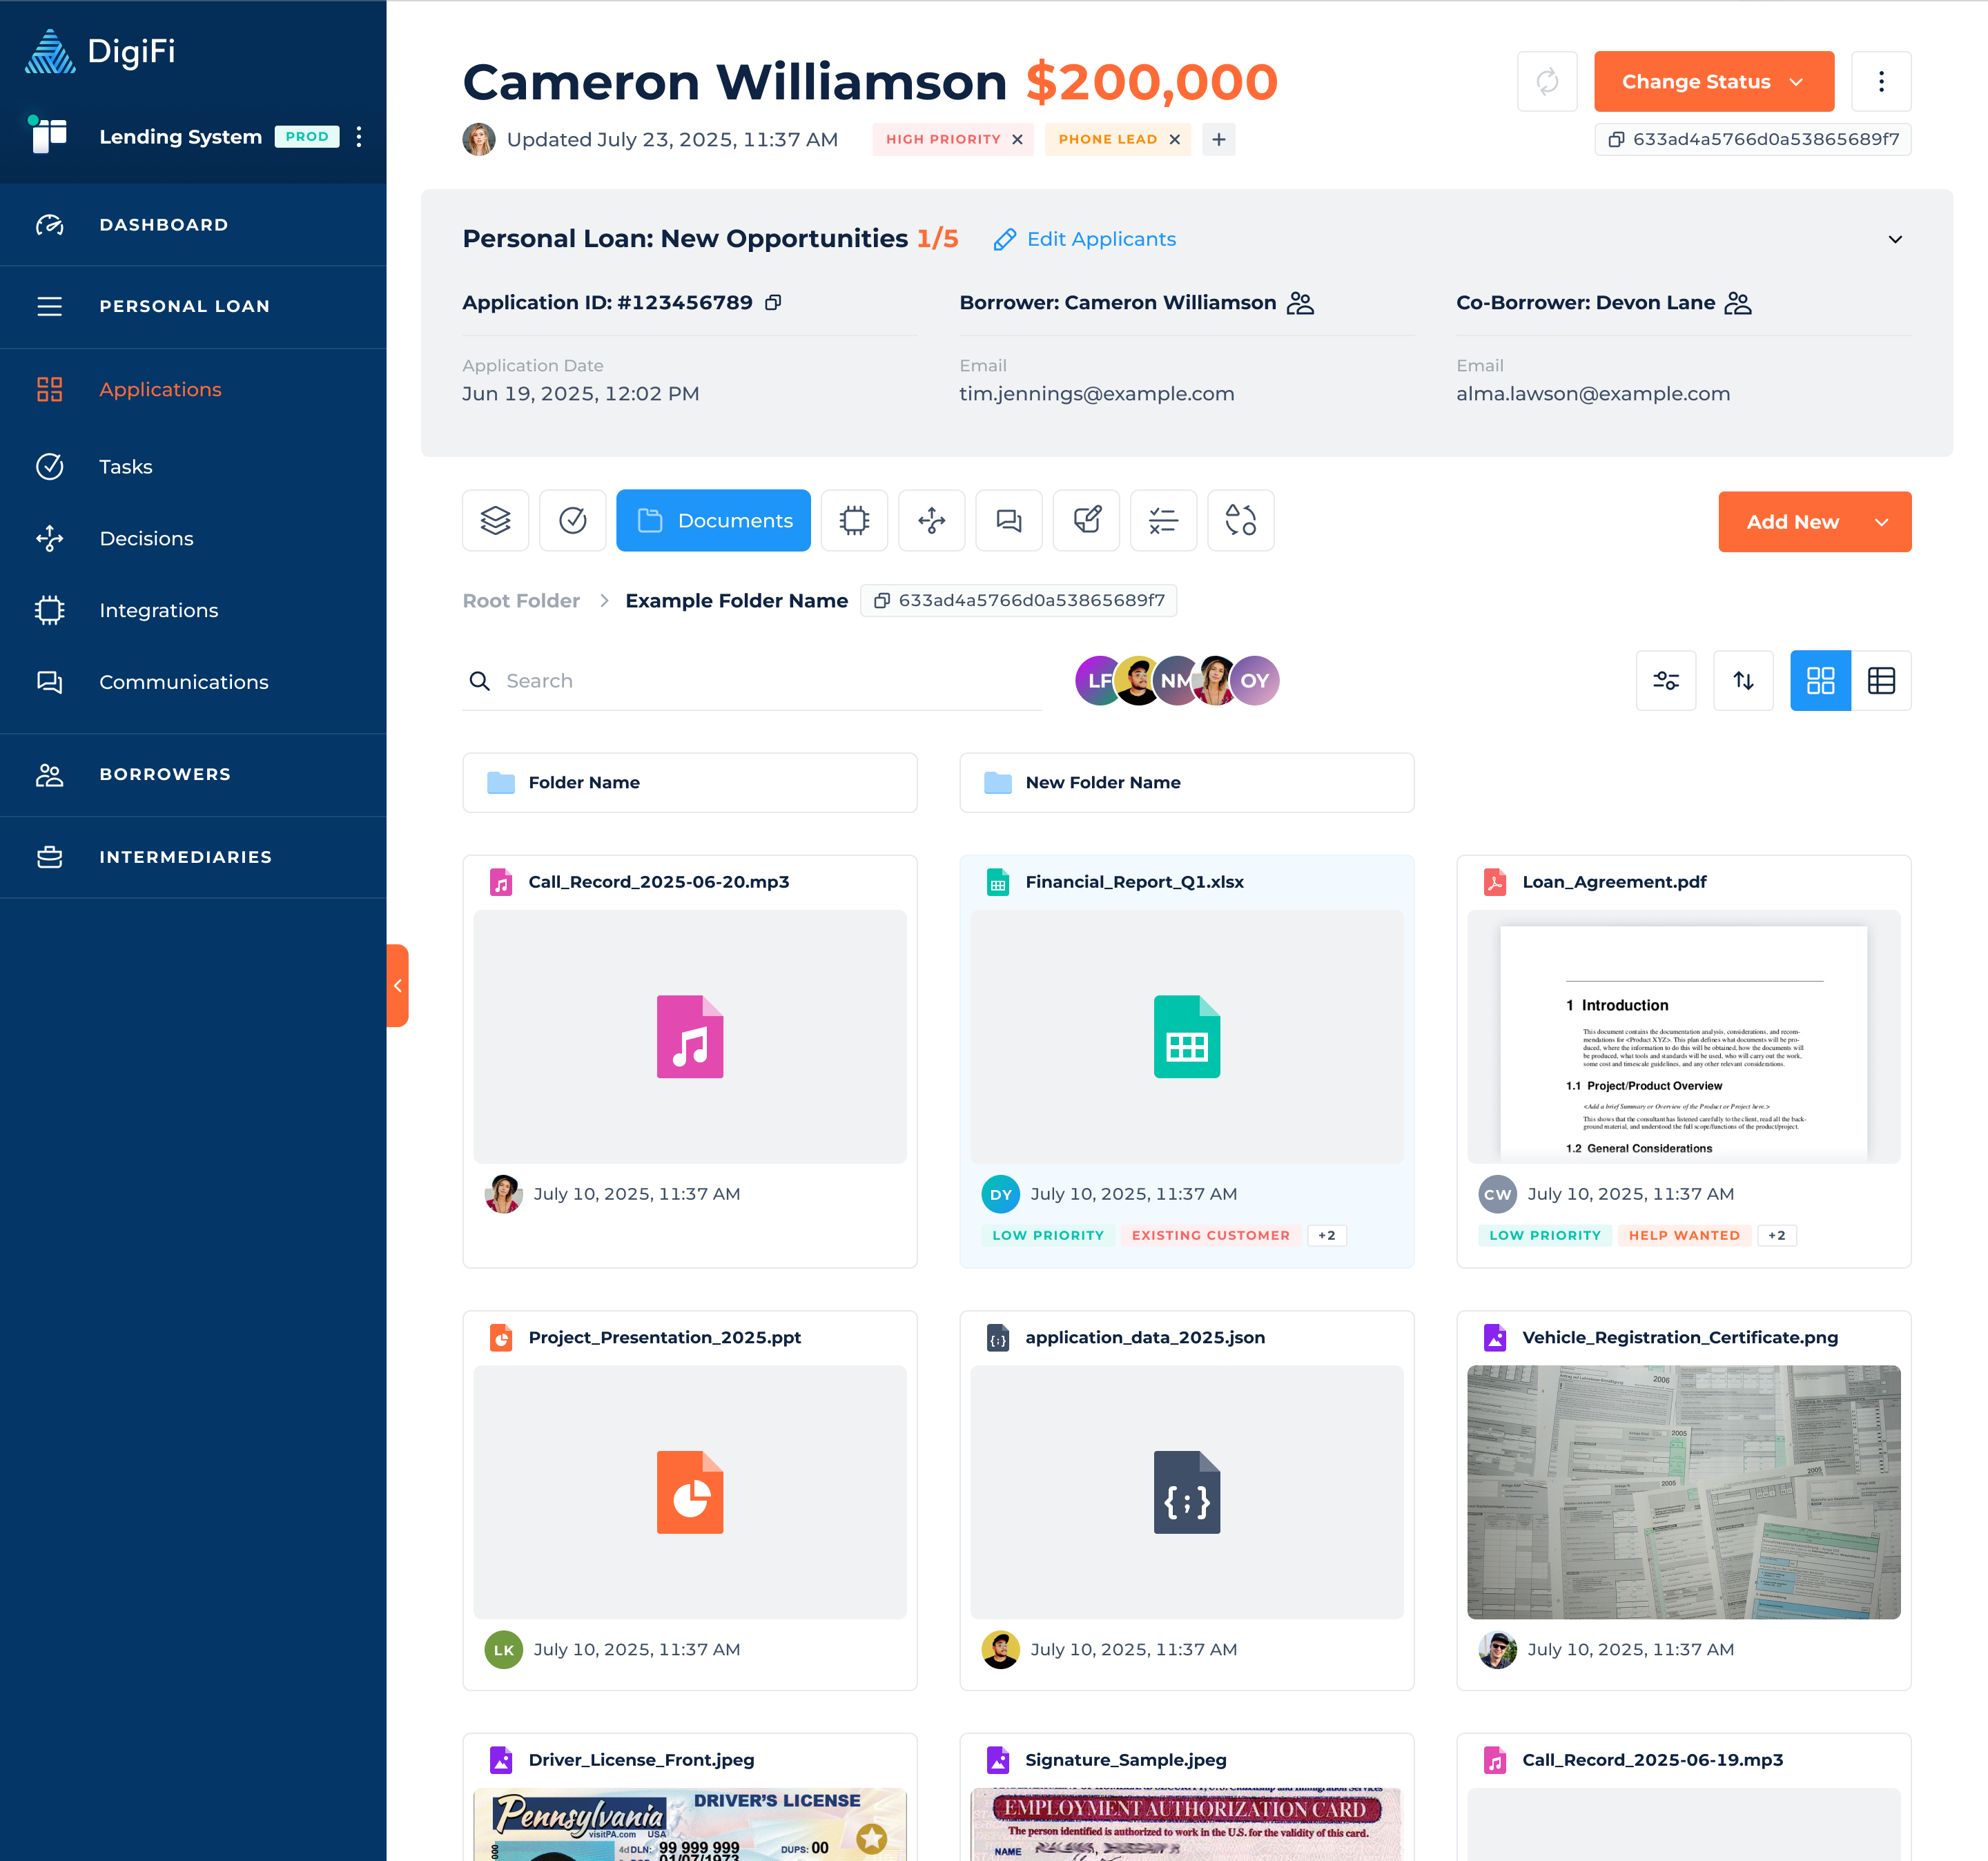
How To Upload A Document To An Application
To upload a document to an application:
- Navigate to the "Documents" tab of an application.
- Click on the "Add New" button.
- Click on the "Upload Document" option.
- Select your file, add document labels, enable external access permissions if required and click the "Upload Document" button.
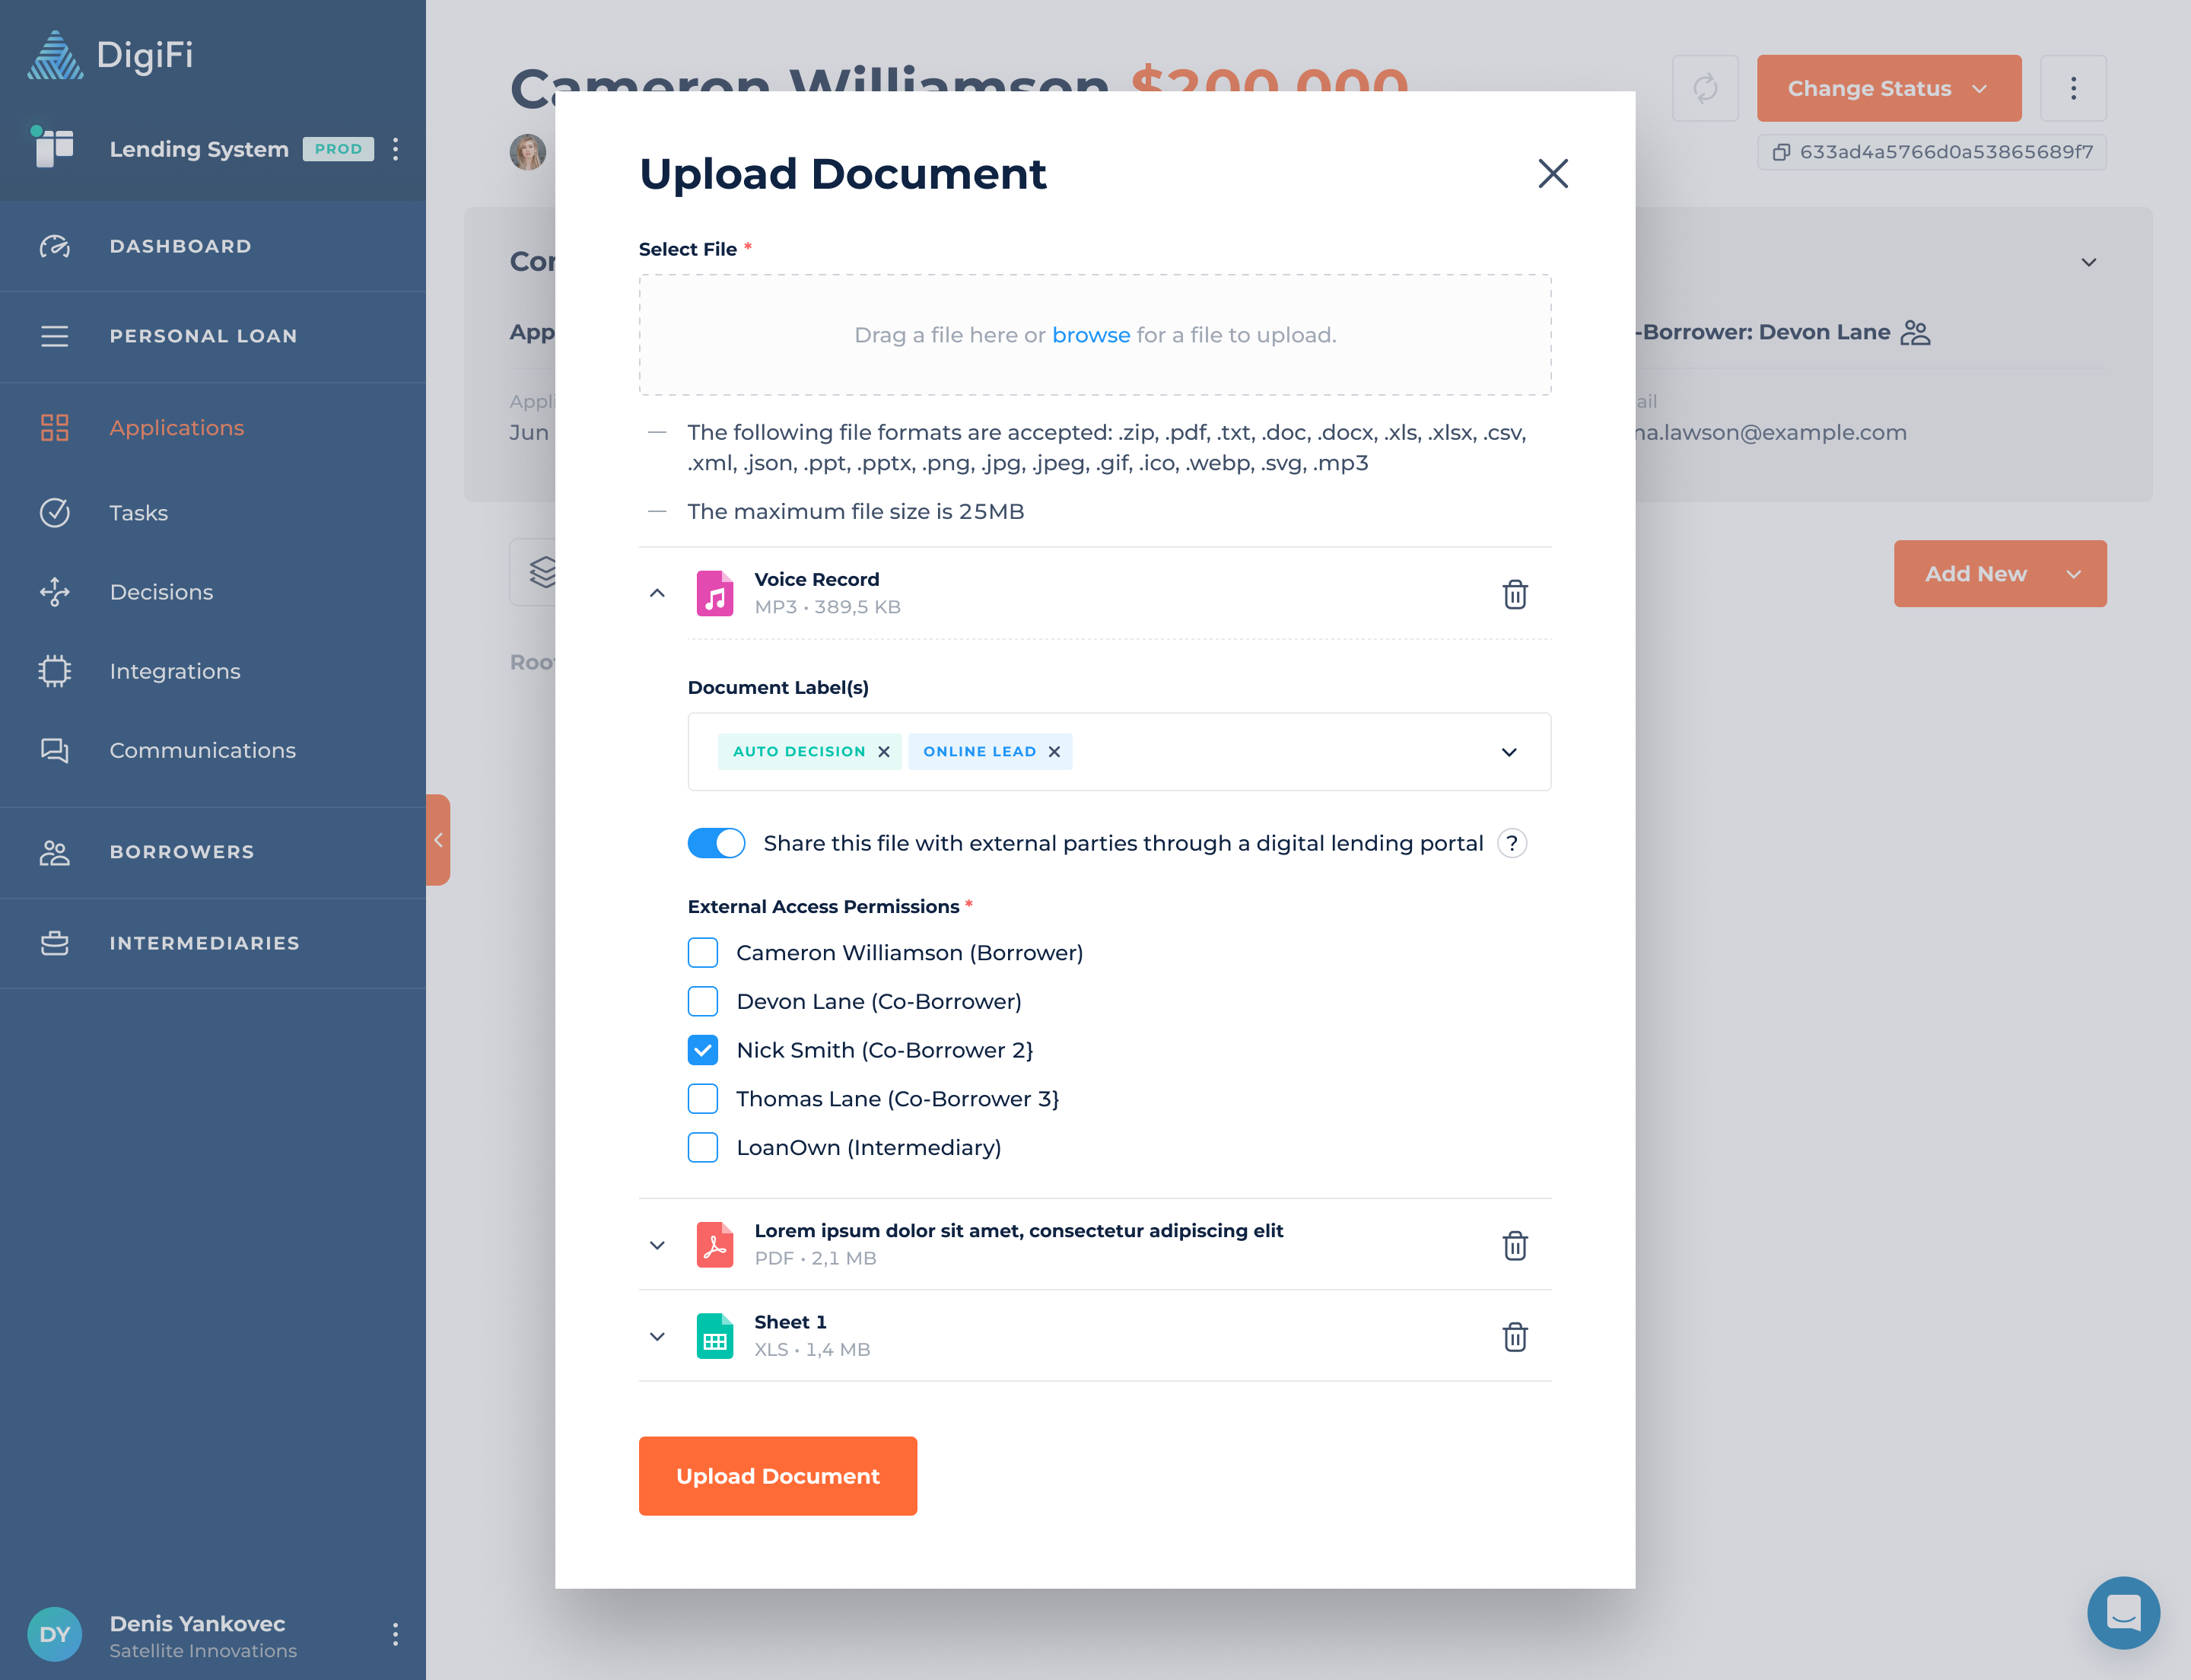
Setting up external access permissions allows you to restrict or enable file sharing with external parties, such as borrower or intermediaries, through a digital lending portal.
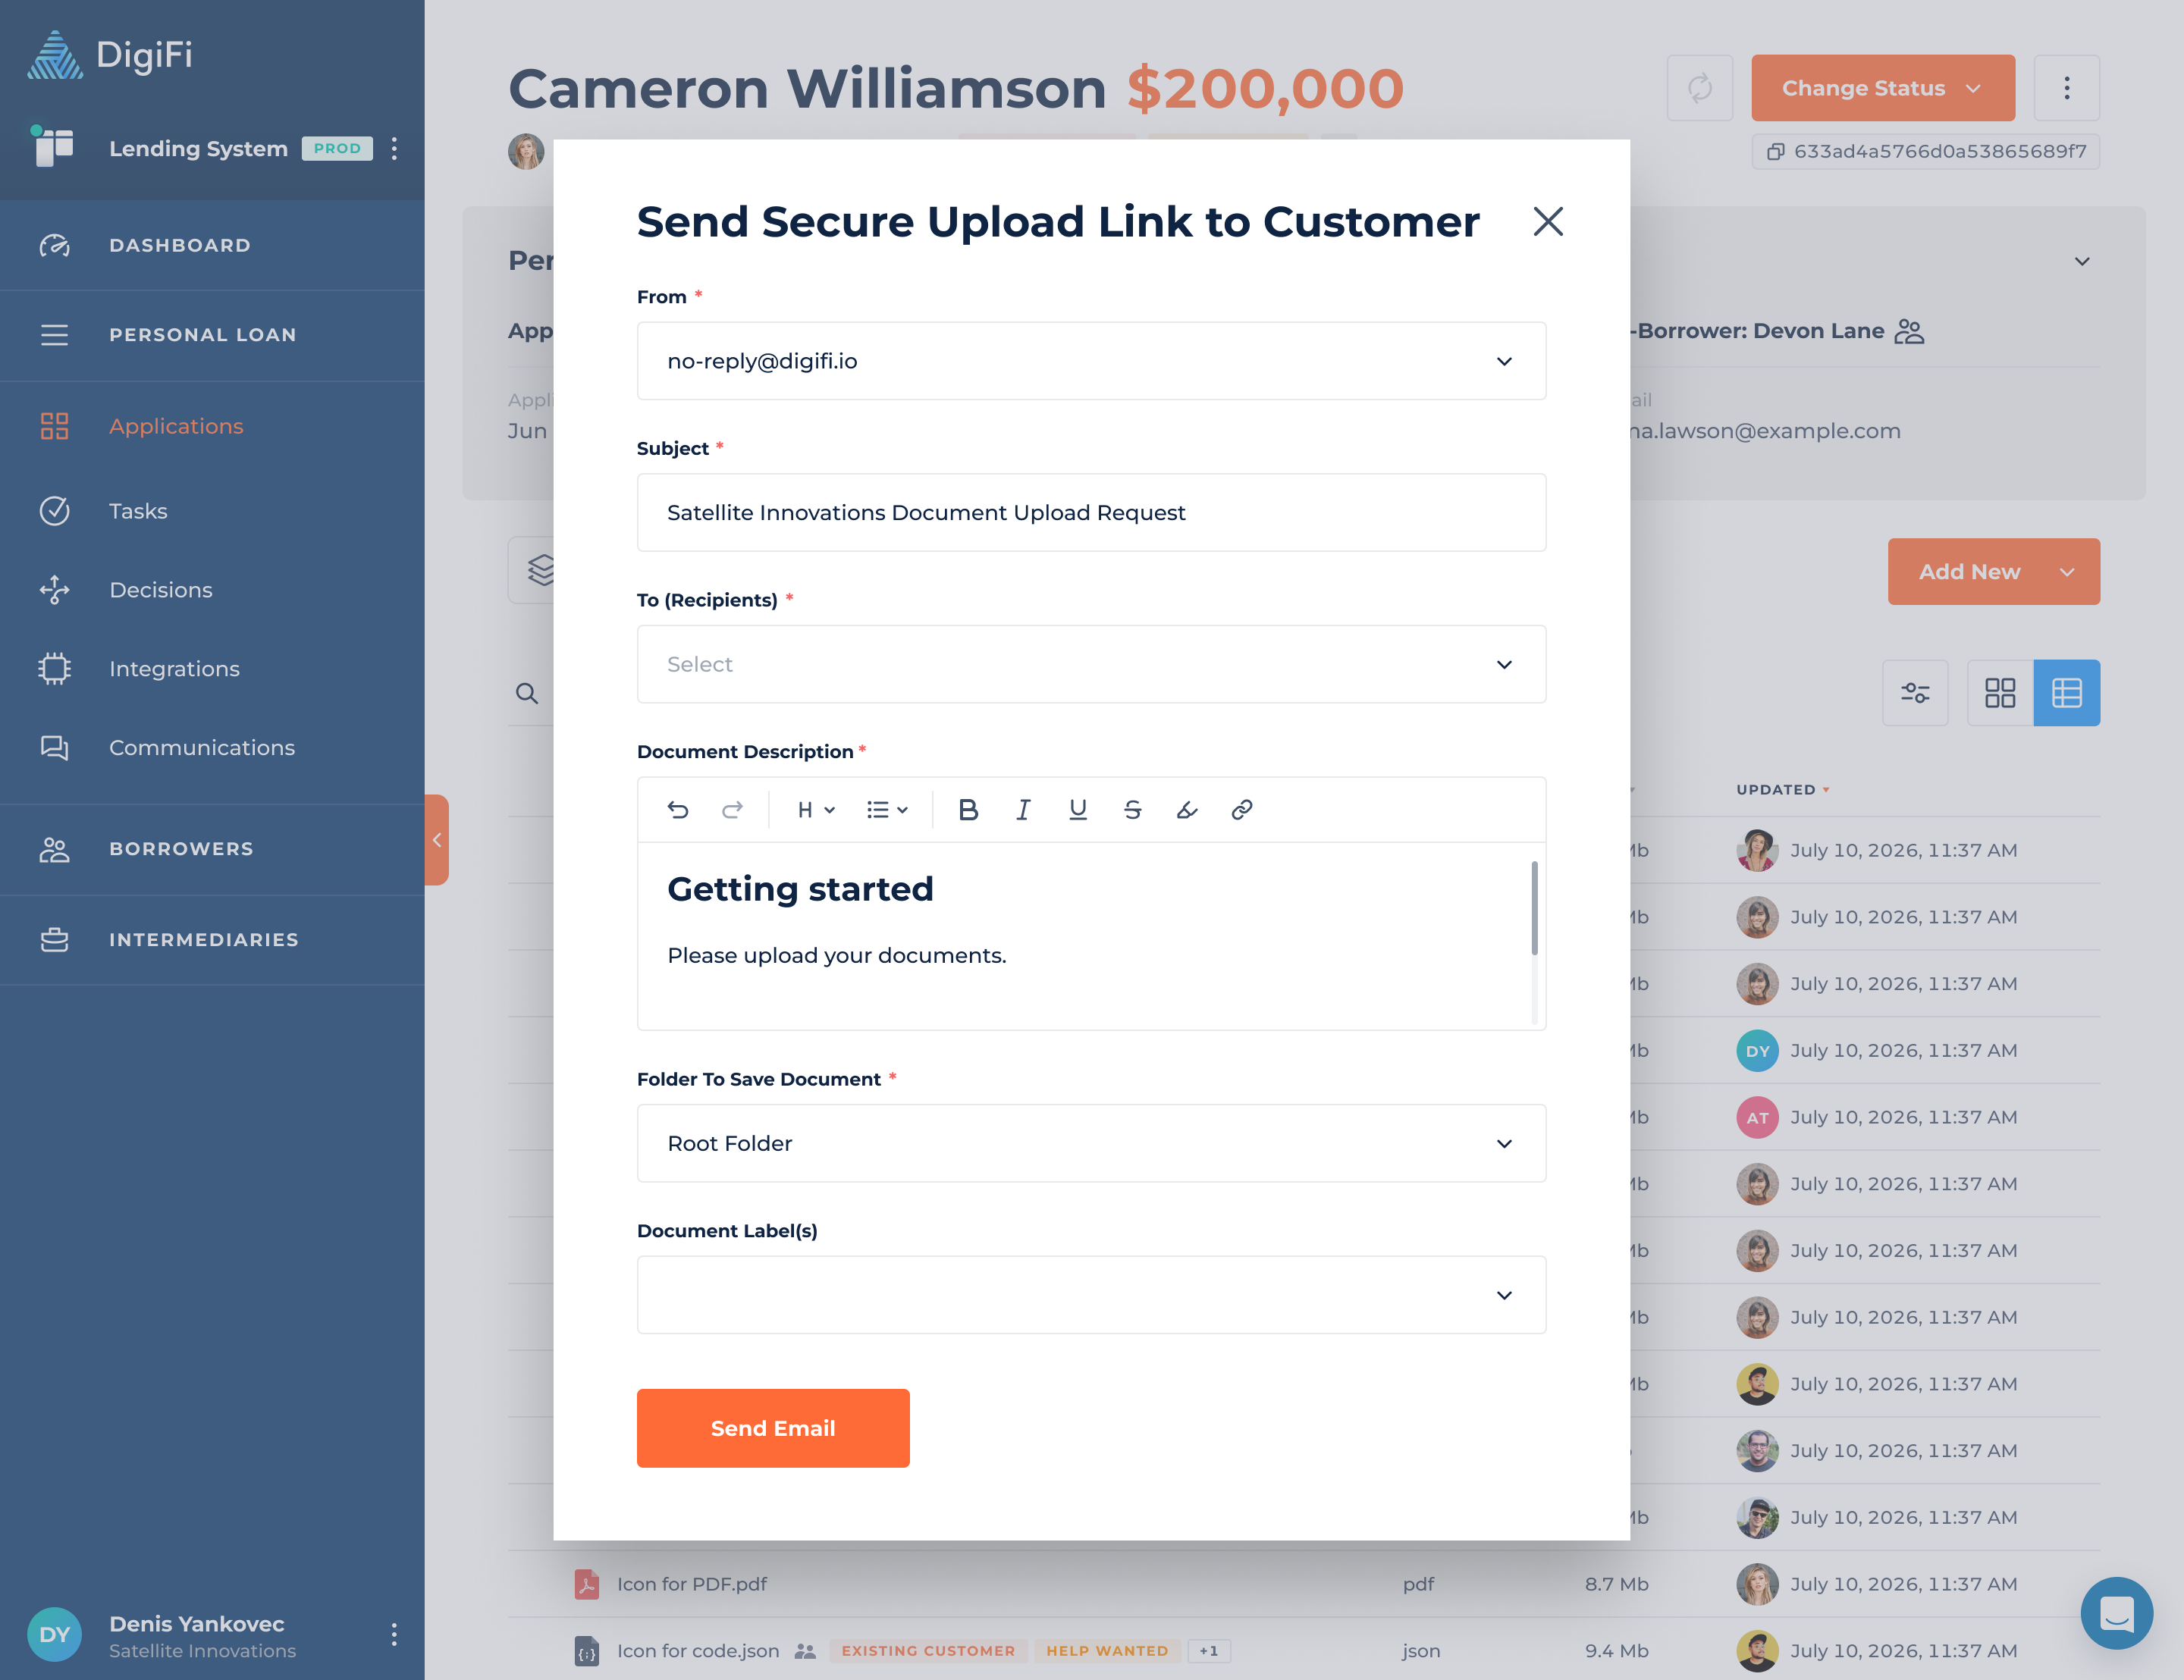
How To Request Application Documents From Borrowers/Intermediary
DigiFi's document management functionality includes the ability to email a secure upload link to a borrower. This provides a safe and convenient way to request additional documents during the loan origination process.
To request a document:
- Navigate to the "Documents" tab of on application.
- Click on the "Add New" button.
- Click on the "Request Customer Upload" option.
- Select the sender email (if you have more than one option).
- Provide a subject of the email.
- Choose the recipients (Borrower, Co-Borrower, Co-Borrower 2, Co-Borrower 3, Intermediary, or enter a custom email).
- Provide a description of the document (which the borrower will see).
- Choose a folder to save the document.
- Choose the document label(s).
- Click on the "Send Email" button.
This process will trigger an automated email to the customer, which includes a link to where they can upload the document. The email will include your company's branding settings.
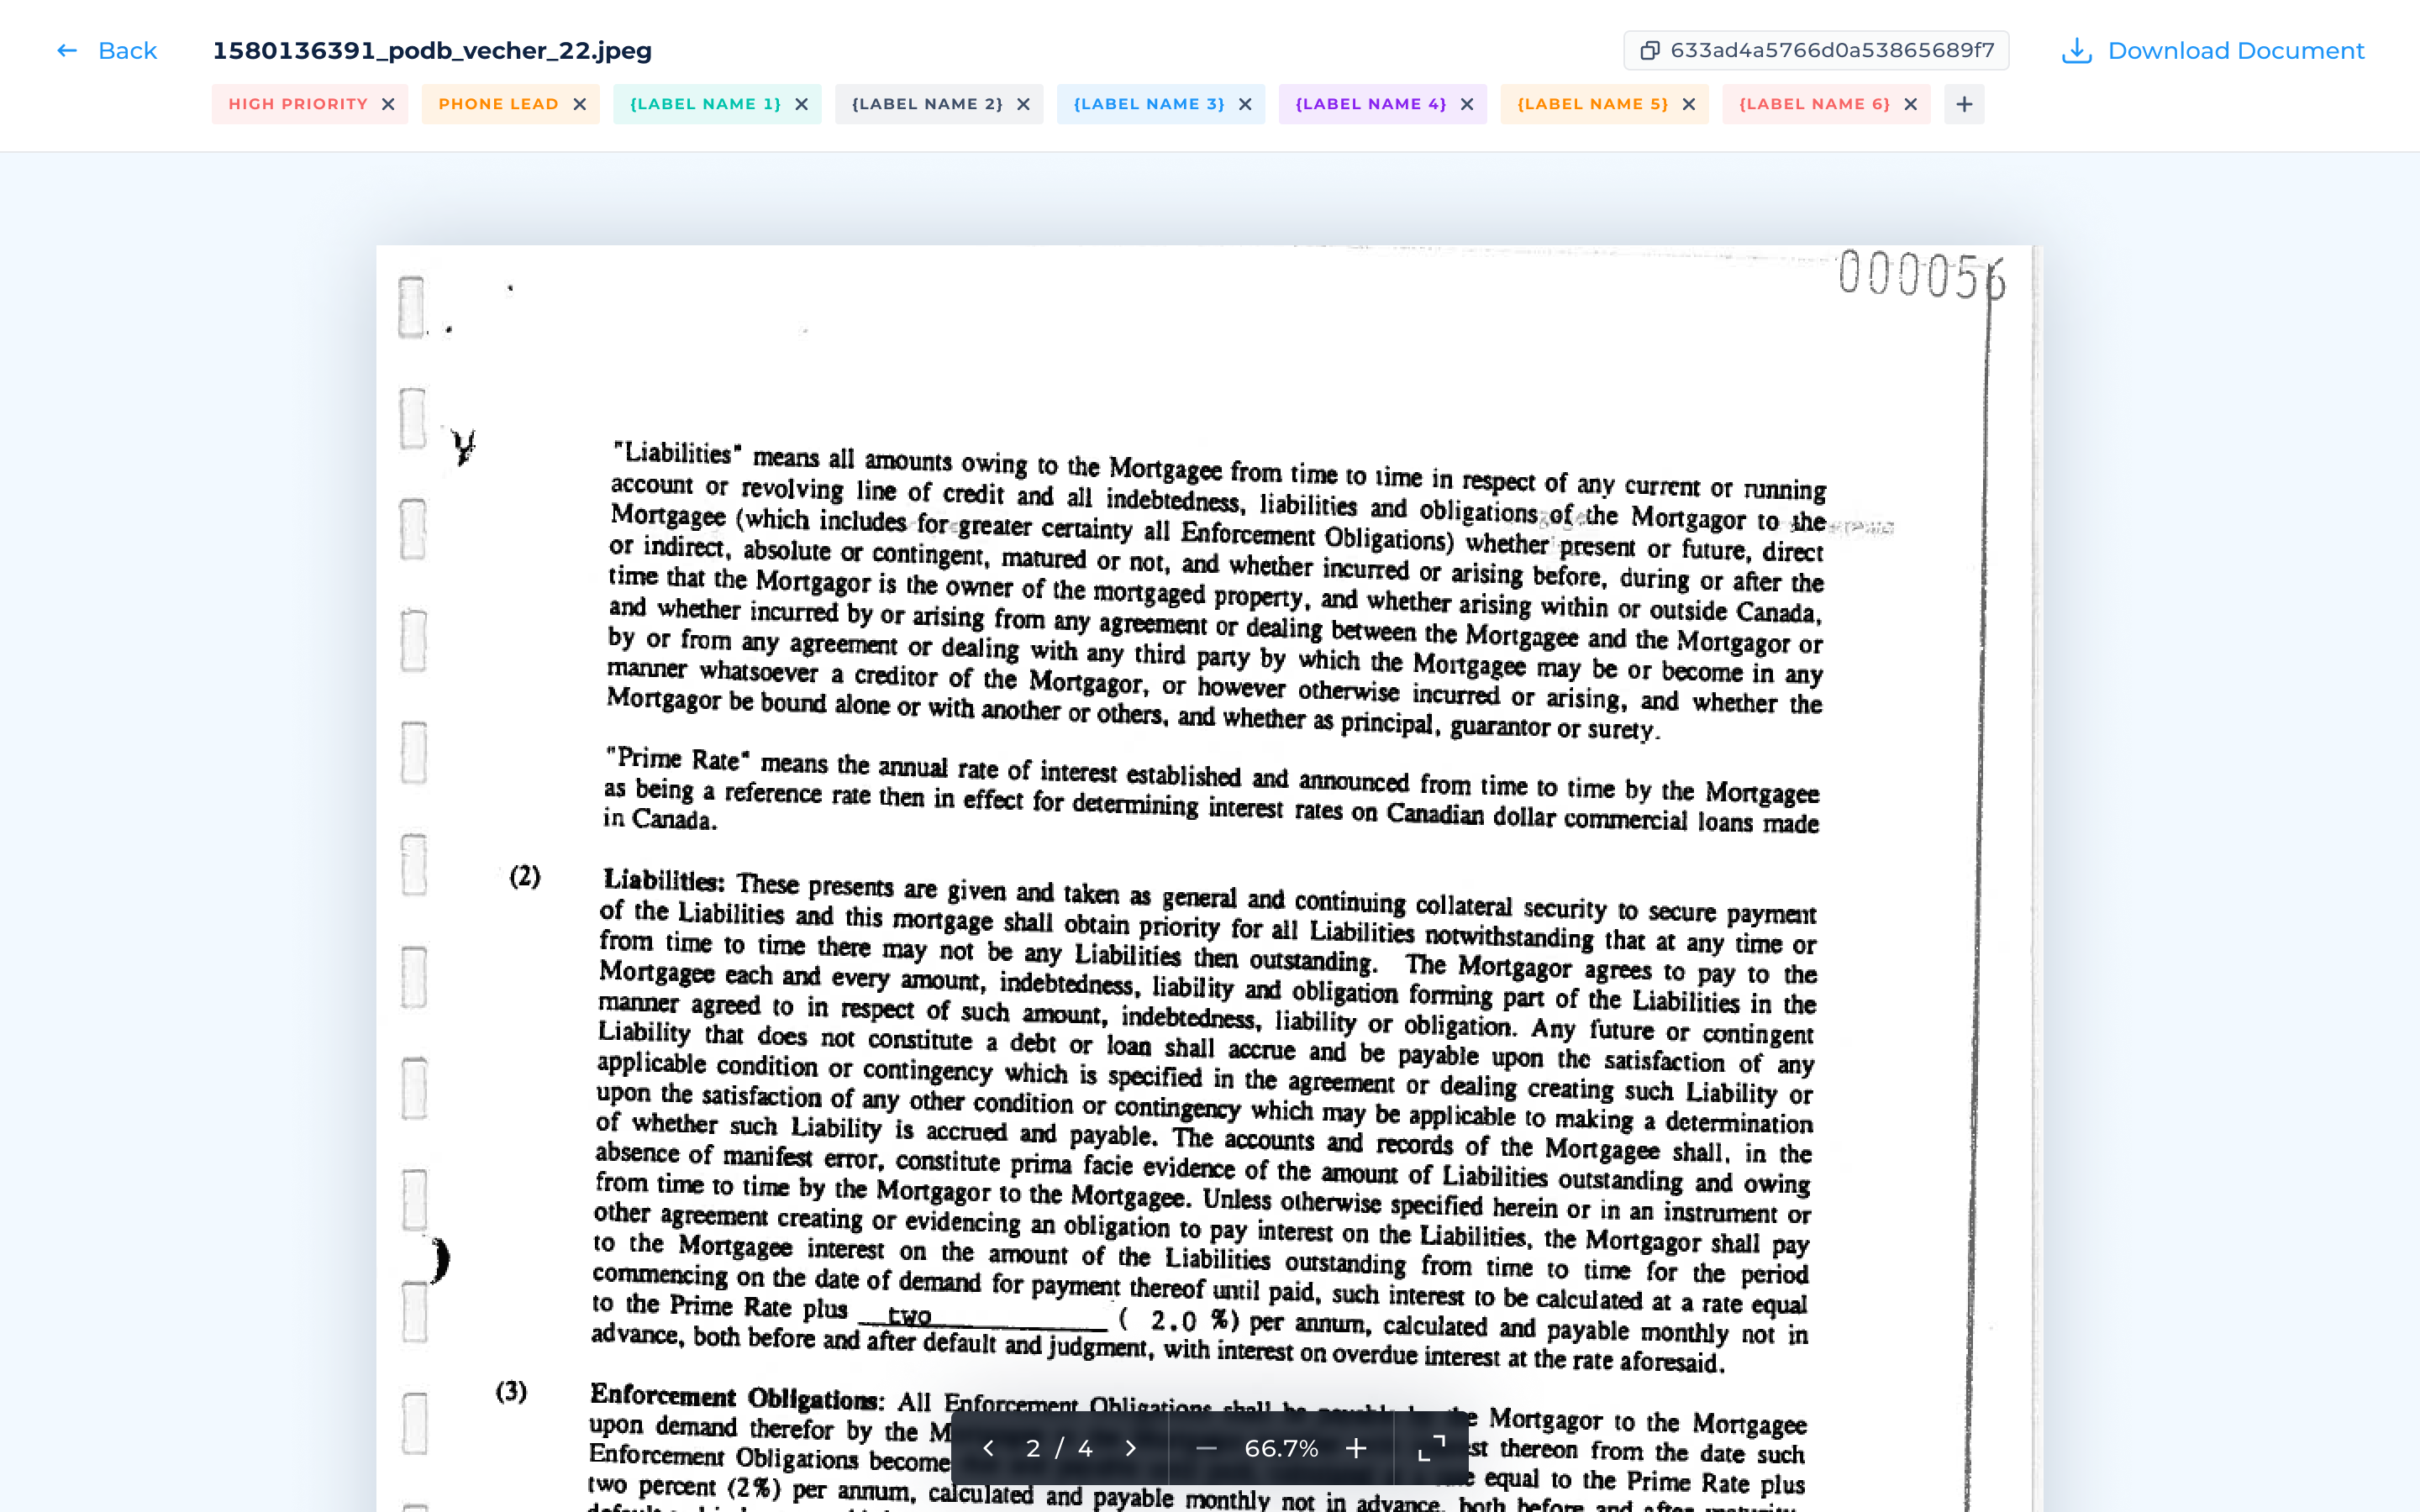
How To View Documents
To streamline workflow and increase security, the DigiFi platform includes the ability to view documents. The following document types can be viewed: .zip, .pdf, .txt, .doc, .docx, .heic, .xls, .xlsx, .csv, .xml, .json, .ppt, .pptx, .png, .jpg, .jpeg, .gif, .ico, .webp, .svg, and .mp3
To view a document:
- Navigate to the "Documents" tab of on application.
- Click the document's row in the table.
If the uploaded file is in MP3 format, you can open it and listen to it using the built-in player within the application.
How To Filter and Sort Documents
DigiFi provides flexible filtering and sorting options to help you quickly find the right documents in both List View and Tiles View.
Available Filters:
- Label: Filter by one or more document labels.
- File Type: Filter by one or more file types.
- Created Date: Filter documents by the date they were uploaded.
- Updated Date: Filter documents by the date they were last modified.
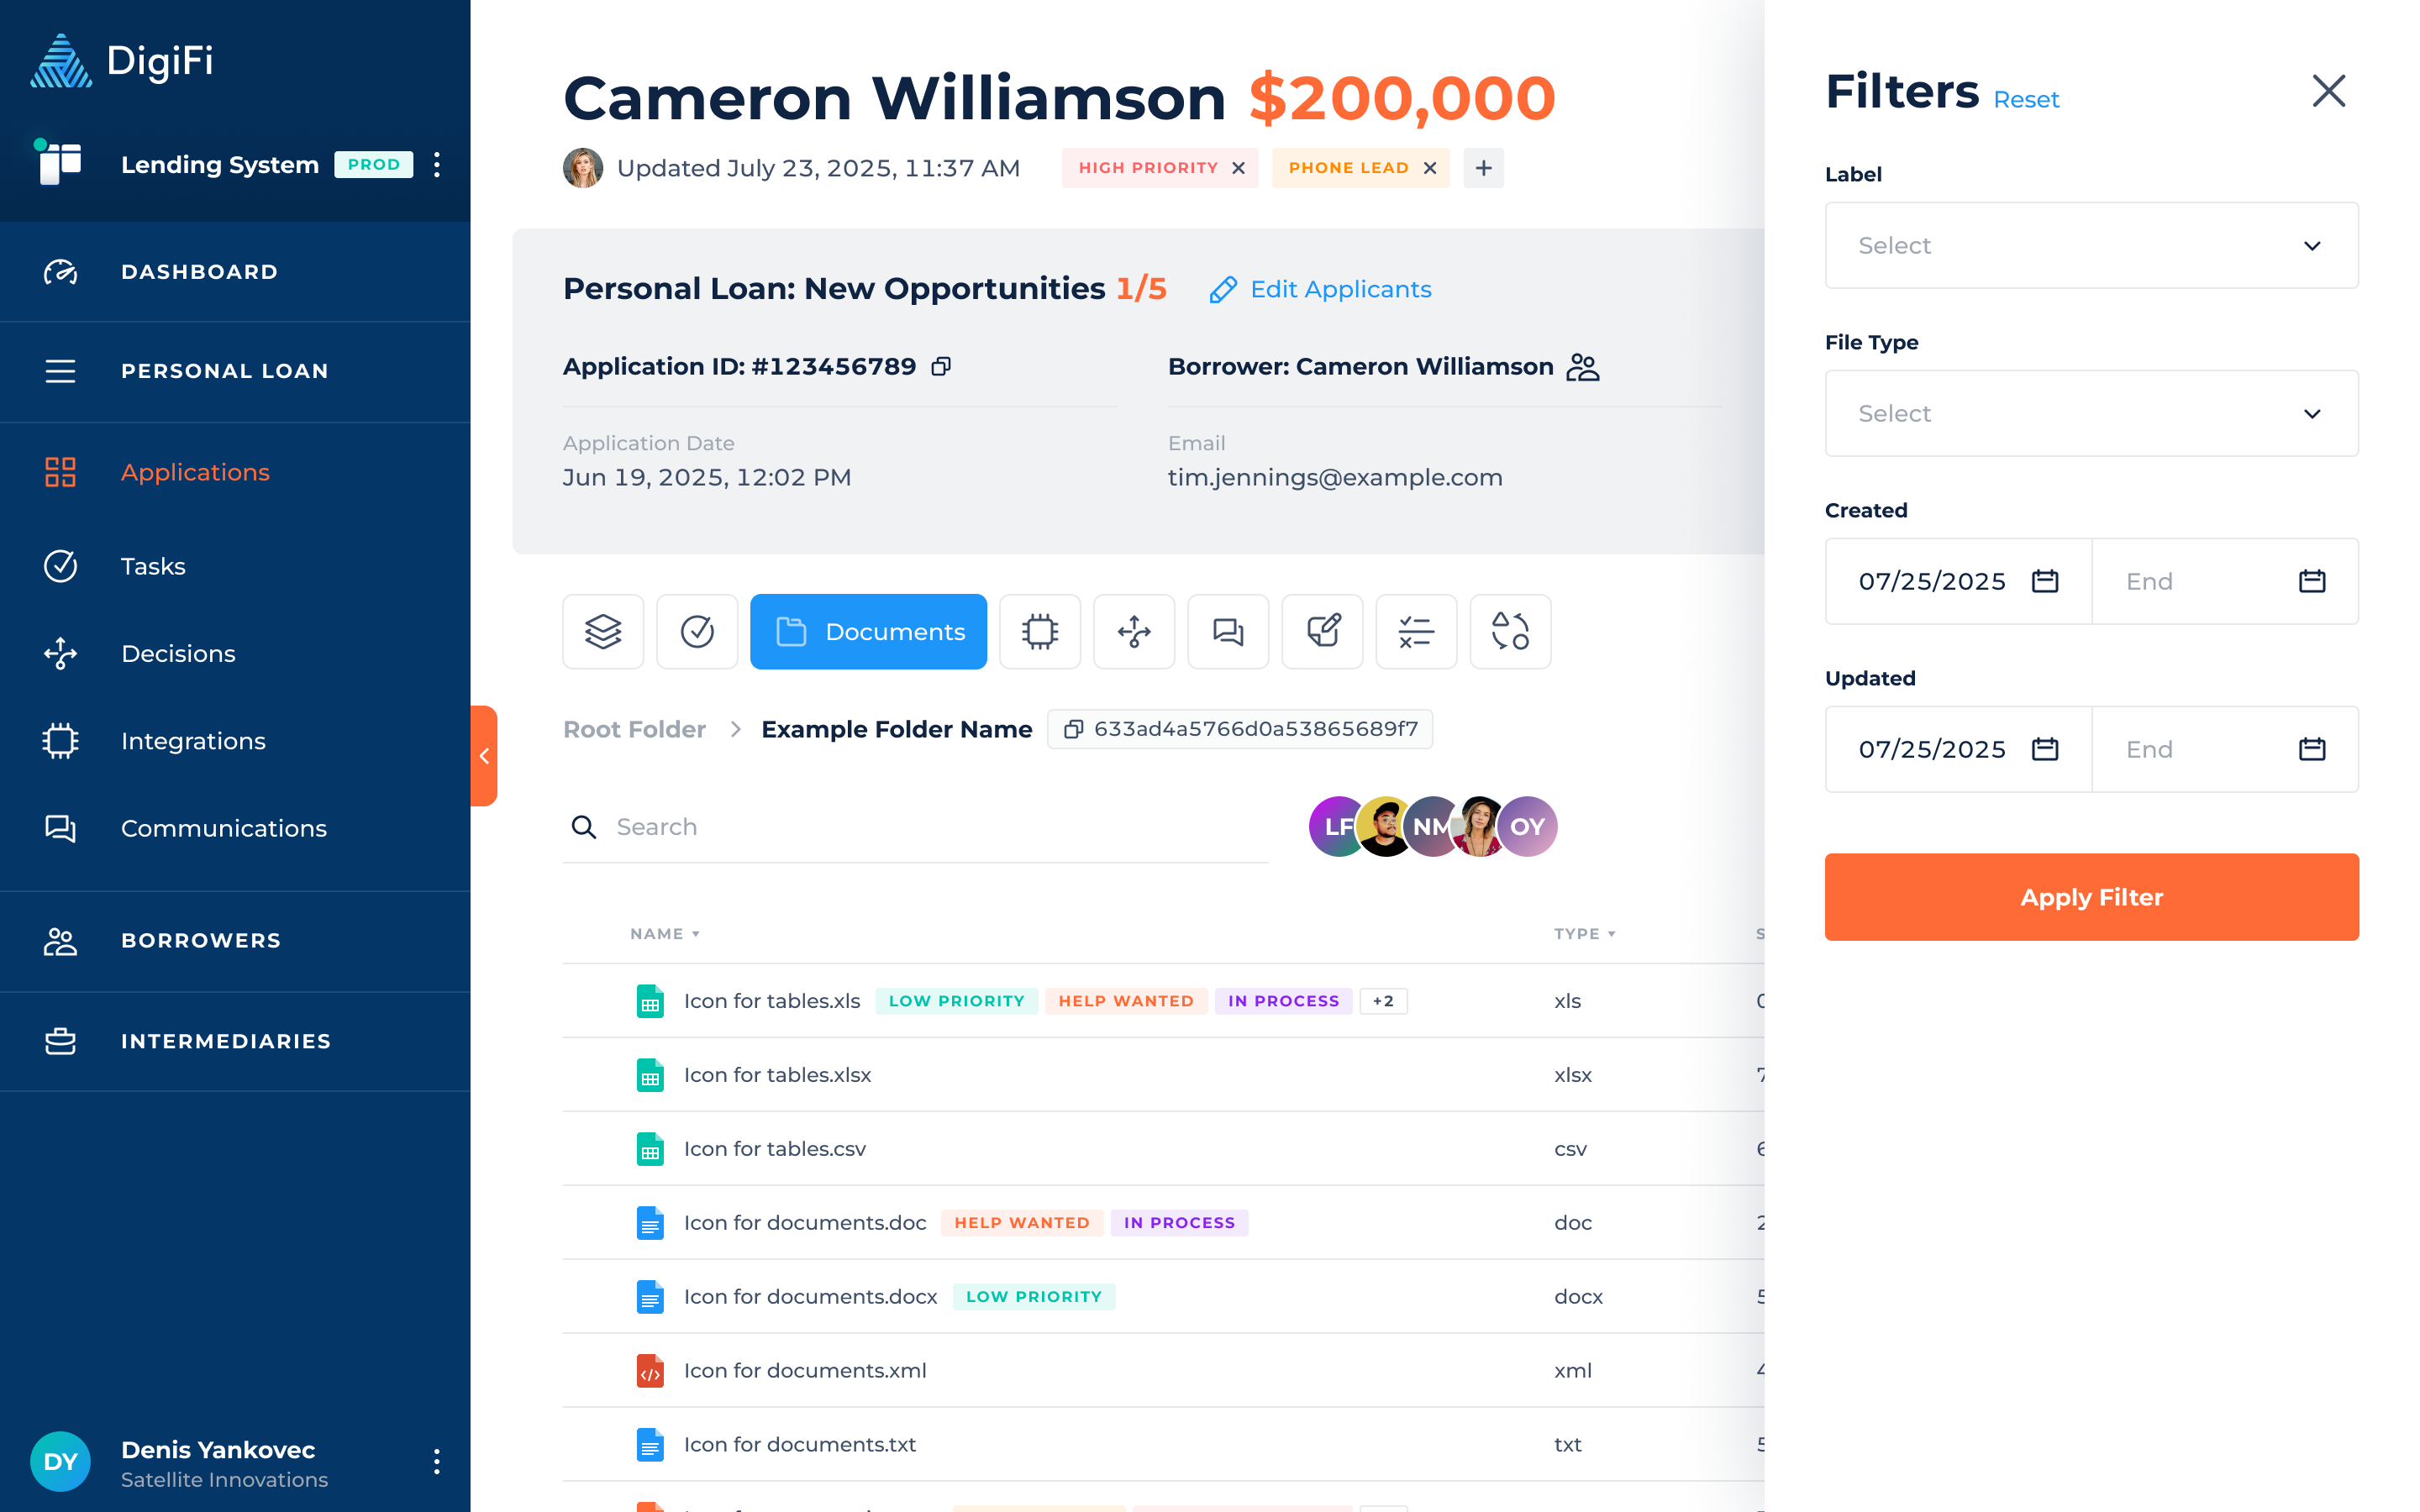
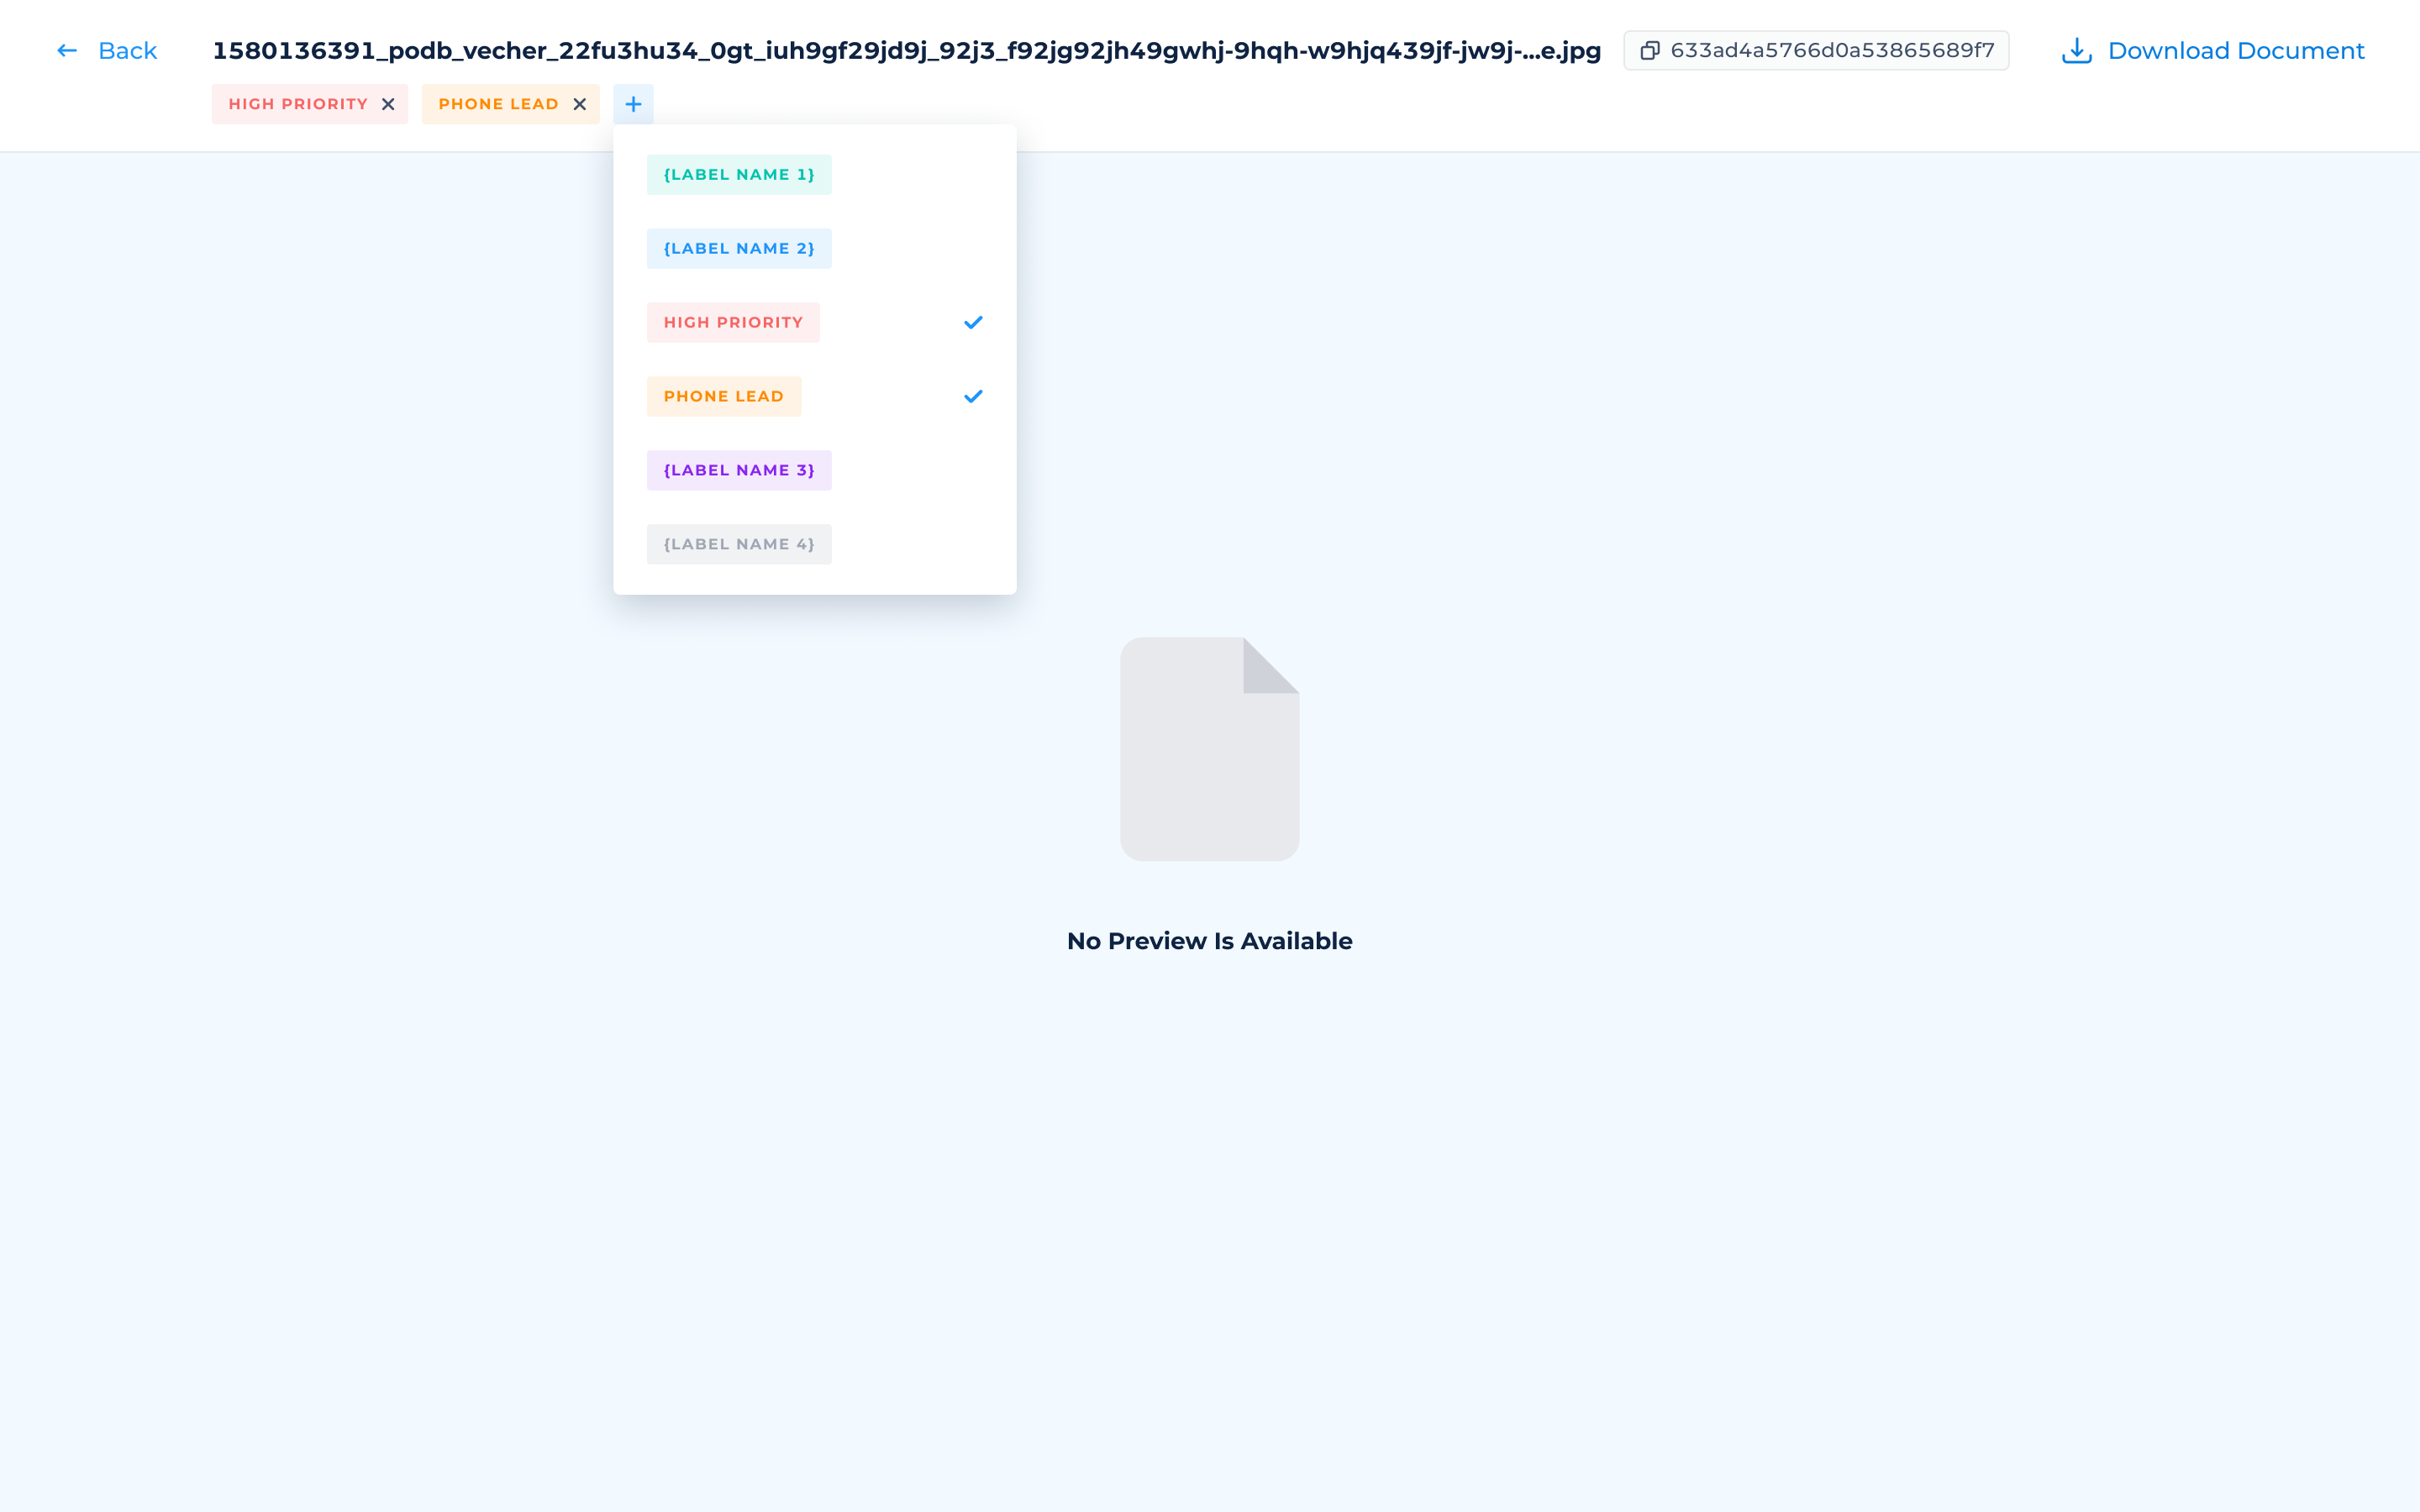
How To Add Labels To Documents
Labels are simple visual elements that help you categorize documents effectively. They are color-coded and appear as small elements in the documents table and as larger colored text elements in the document's detail view.
To add a label:
- Navigate to the "Documents" tab of on application.
- Click the document's row in the table.
- Click the "+" button located under the name of the document.
- Select the labels you would like for the document.
How To Download Documents
To download a document:
- Navigate to the "Documents" tab of on application.
- Hover over the document you want to download.
- Click the 3-dots on the right-hand side of the table.
- Select "Download Document".
To download all of an application's documents at once:
- Navigate to the "Documents" tab of on application.
- Click the "Download All Documents" button.
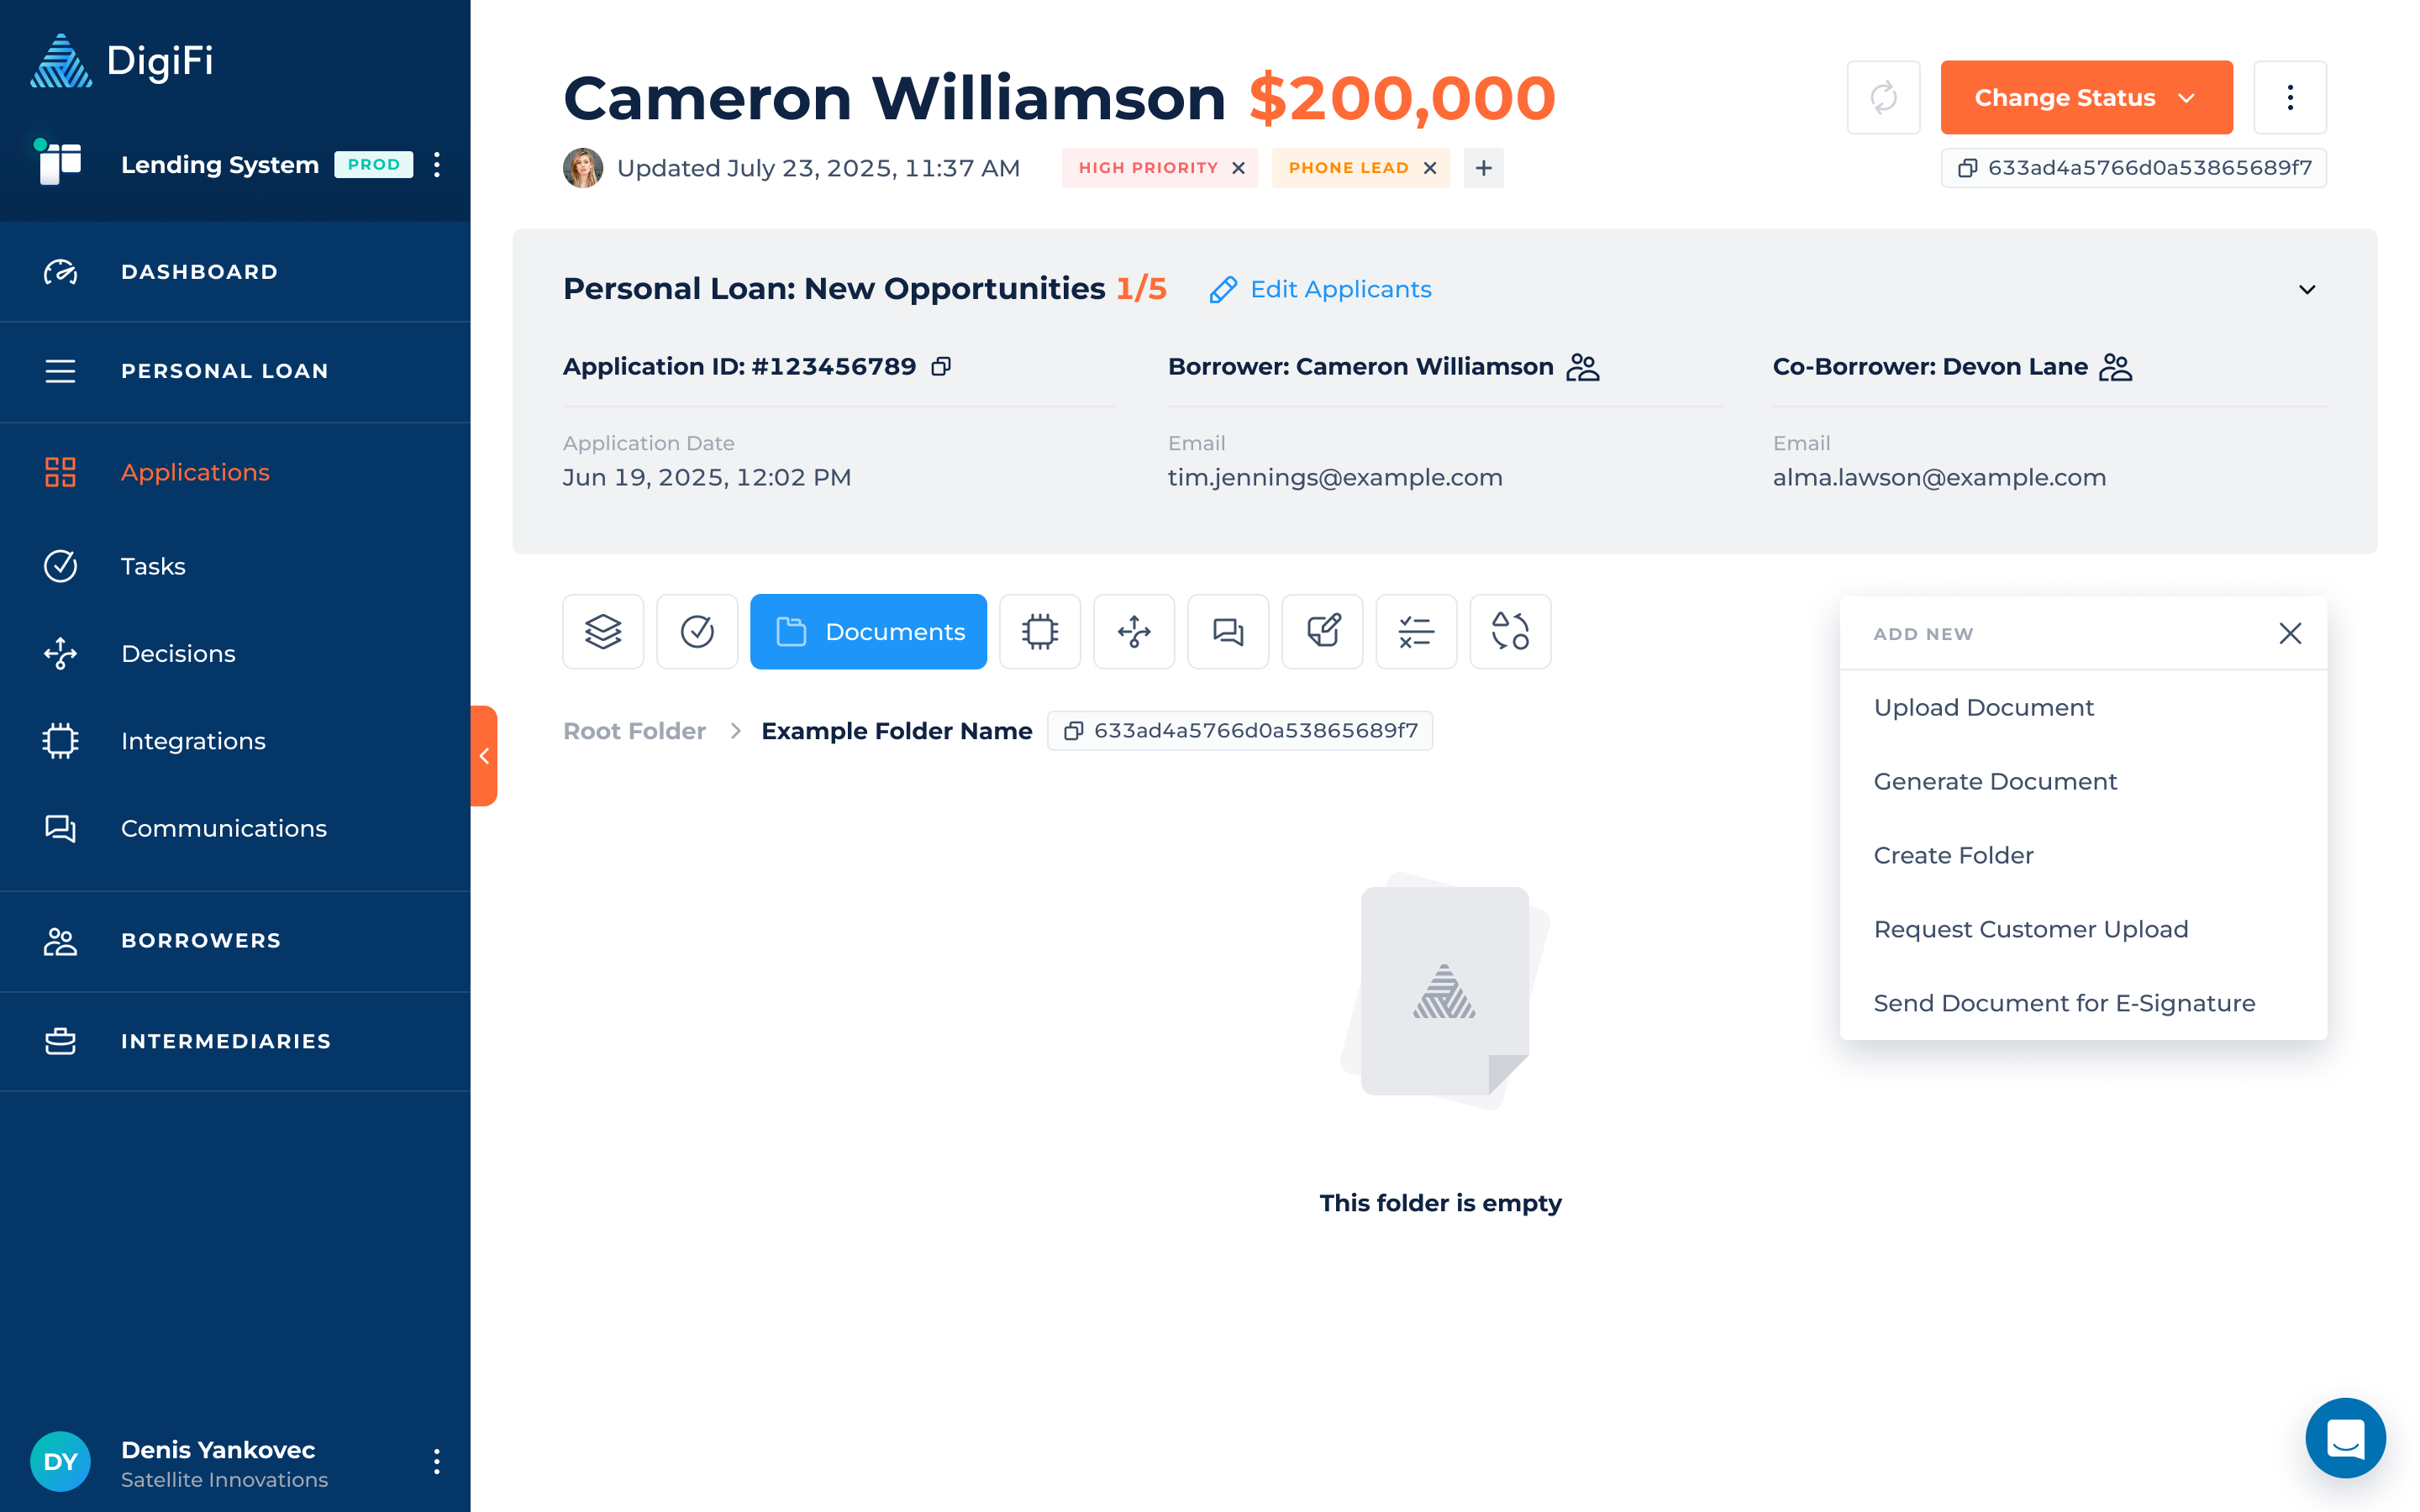
How To Use Document Folders
Document folders are a useful way to organize application documents.
To create a new folder for an application:
- Navigate to the "Documents" tab of on application.
- Click the "Add New" button.
- Click the "Create Folder" button.
- Provide a folder name.
- Click the "Save Changes" button.
If your platform administrator set up standard folders, those folders will always appear on each application.
To move a document into a folder:
- Navigate to the "Documents" tab of on application.
- Drag and drop the document into the folder
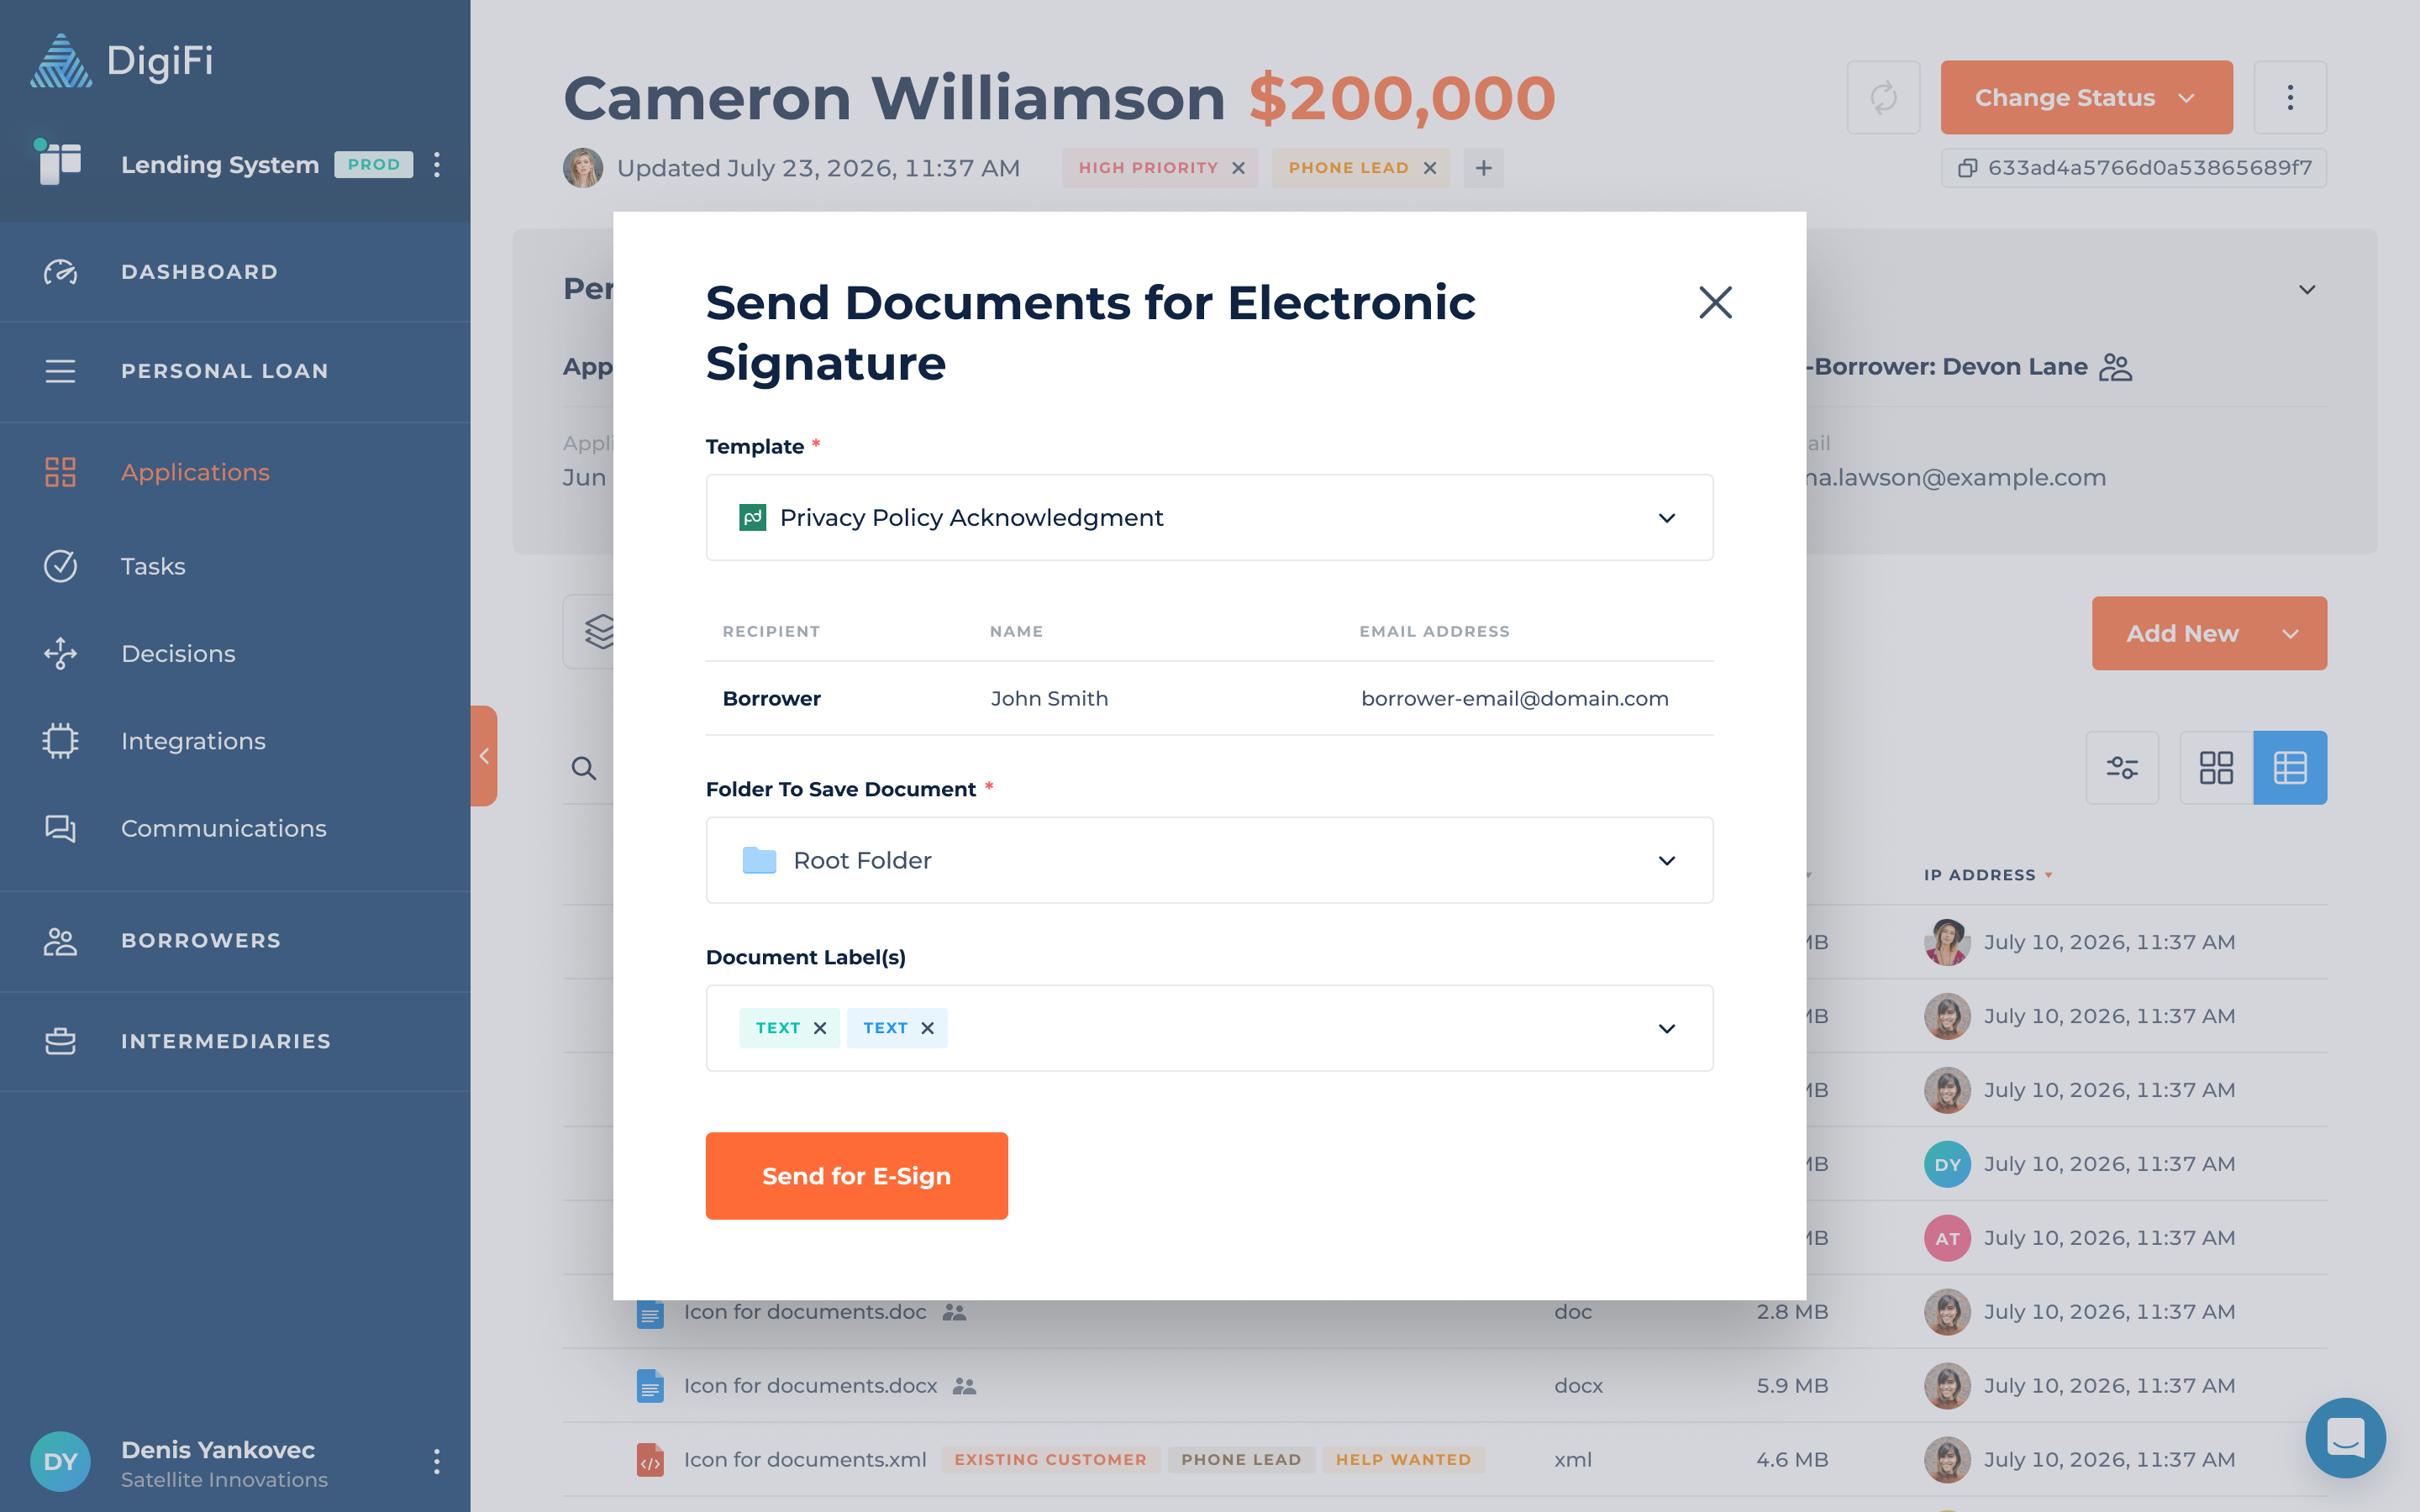
How To Use E-Signature
DigiFi's platform includes standard e-sign integrations supporting both Docusign and PandaDoc. Please refer to the respective integration guides for details on setting them up.
Once your credentials have been added, you'll be able to trigger automated e-signature processes directly through DigiFi's user interface. To start an e-sign process:
- Click .
- Select "Send Document for E-Signature", and a pop-up will appear.
- Choose the template you want to use (from Docusign or PandaDoc). The recipient(s) and required variables will automatically populate based on your template mapping.
- Click .
This will trigger an email-based process directly through the selected provider, based on your configuration. Once the e-sign process is complete the signed document will be automatically imported back into DigiFi.
How To Generate Documents
DigiFi’s platform lets you generate dynamically populated documents. Please refer to the Document Templates for details on setting it up.
Once your templates are ready, you’ll be able to trigger automated document generation through DigiFi’s user interface.
To generate a document:
- Click on “Add New”.
- Click on “Generate Document”. A pop-up will appear.
- Choose a template from the dropdown list. (PDF or HTML)
- Click on “Generate Document”.
You will be redirected to a page with the document generation process. Once the process is complete, the generated document will be automatically added to the application.
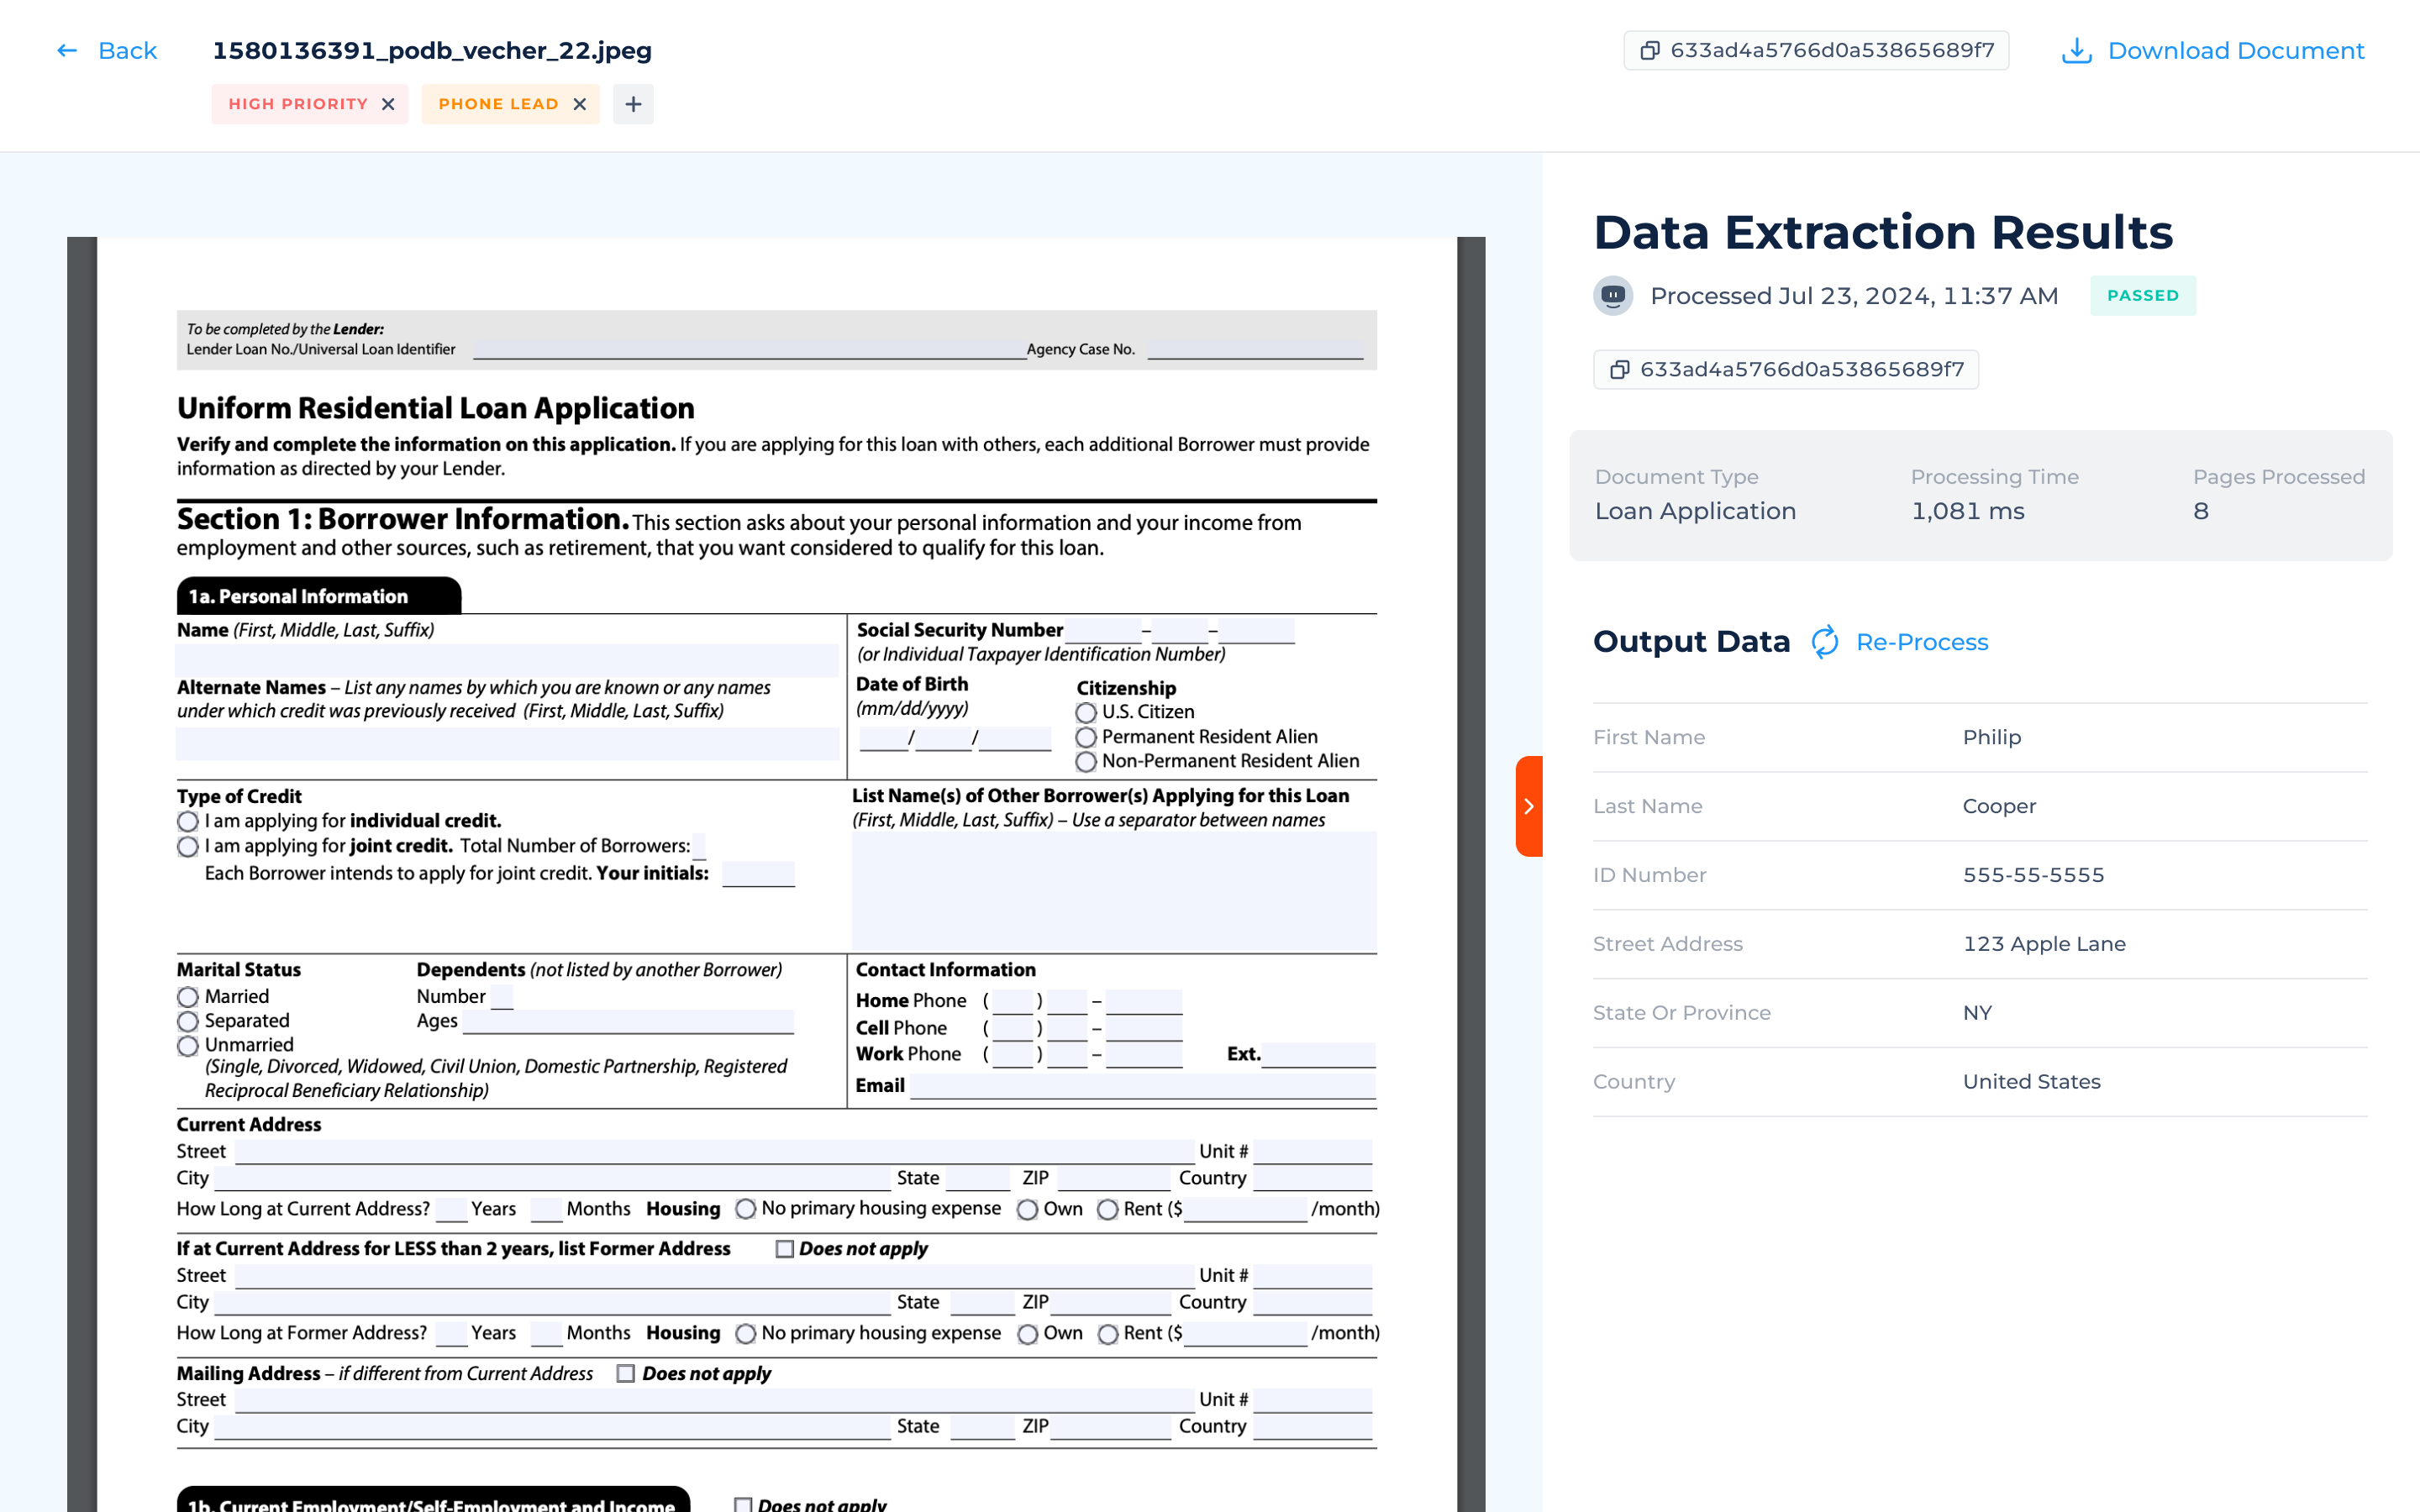
How to Extract Data From Documents
The DigiFi platform features a built-in integration with Synthetiq, a tool that utilizes AI for OCR to facilitate automated data extraction. To learn how to set this up, please refer to our Synthetiq Data Extraction guide.
After configuring the document types in the Synthetiq integration, you can initiate automated data extraction through the DigiFi user interface. To start an extraction process:
- Locate the three dots next to the date when the document was last updated and click on them to reveal a menu.
- From the menu, choose "Extract Document Data."
- Select the "Document Type" and "Processing Mode."
- Click on "Analyze Document."
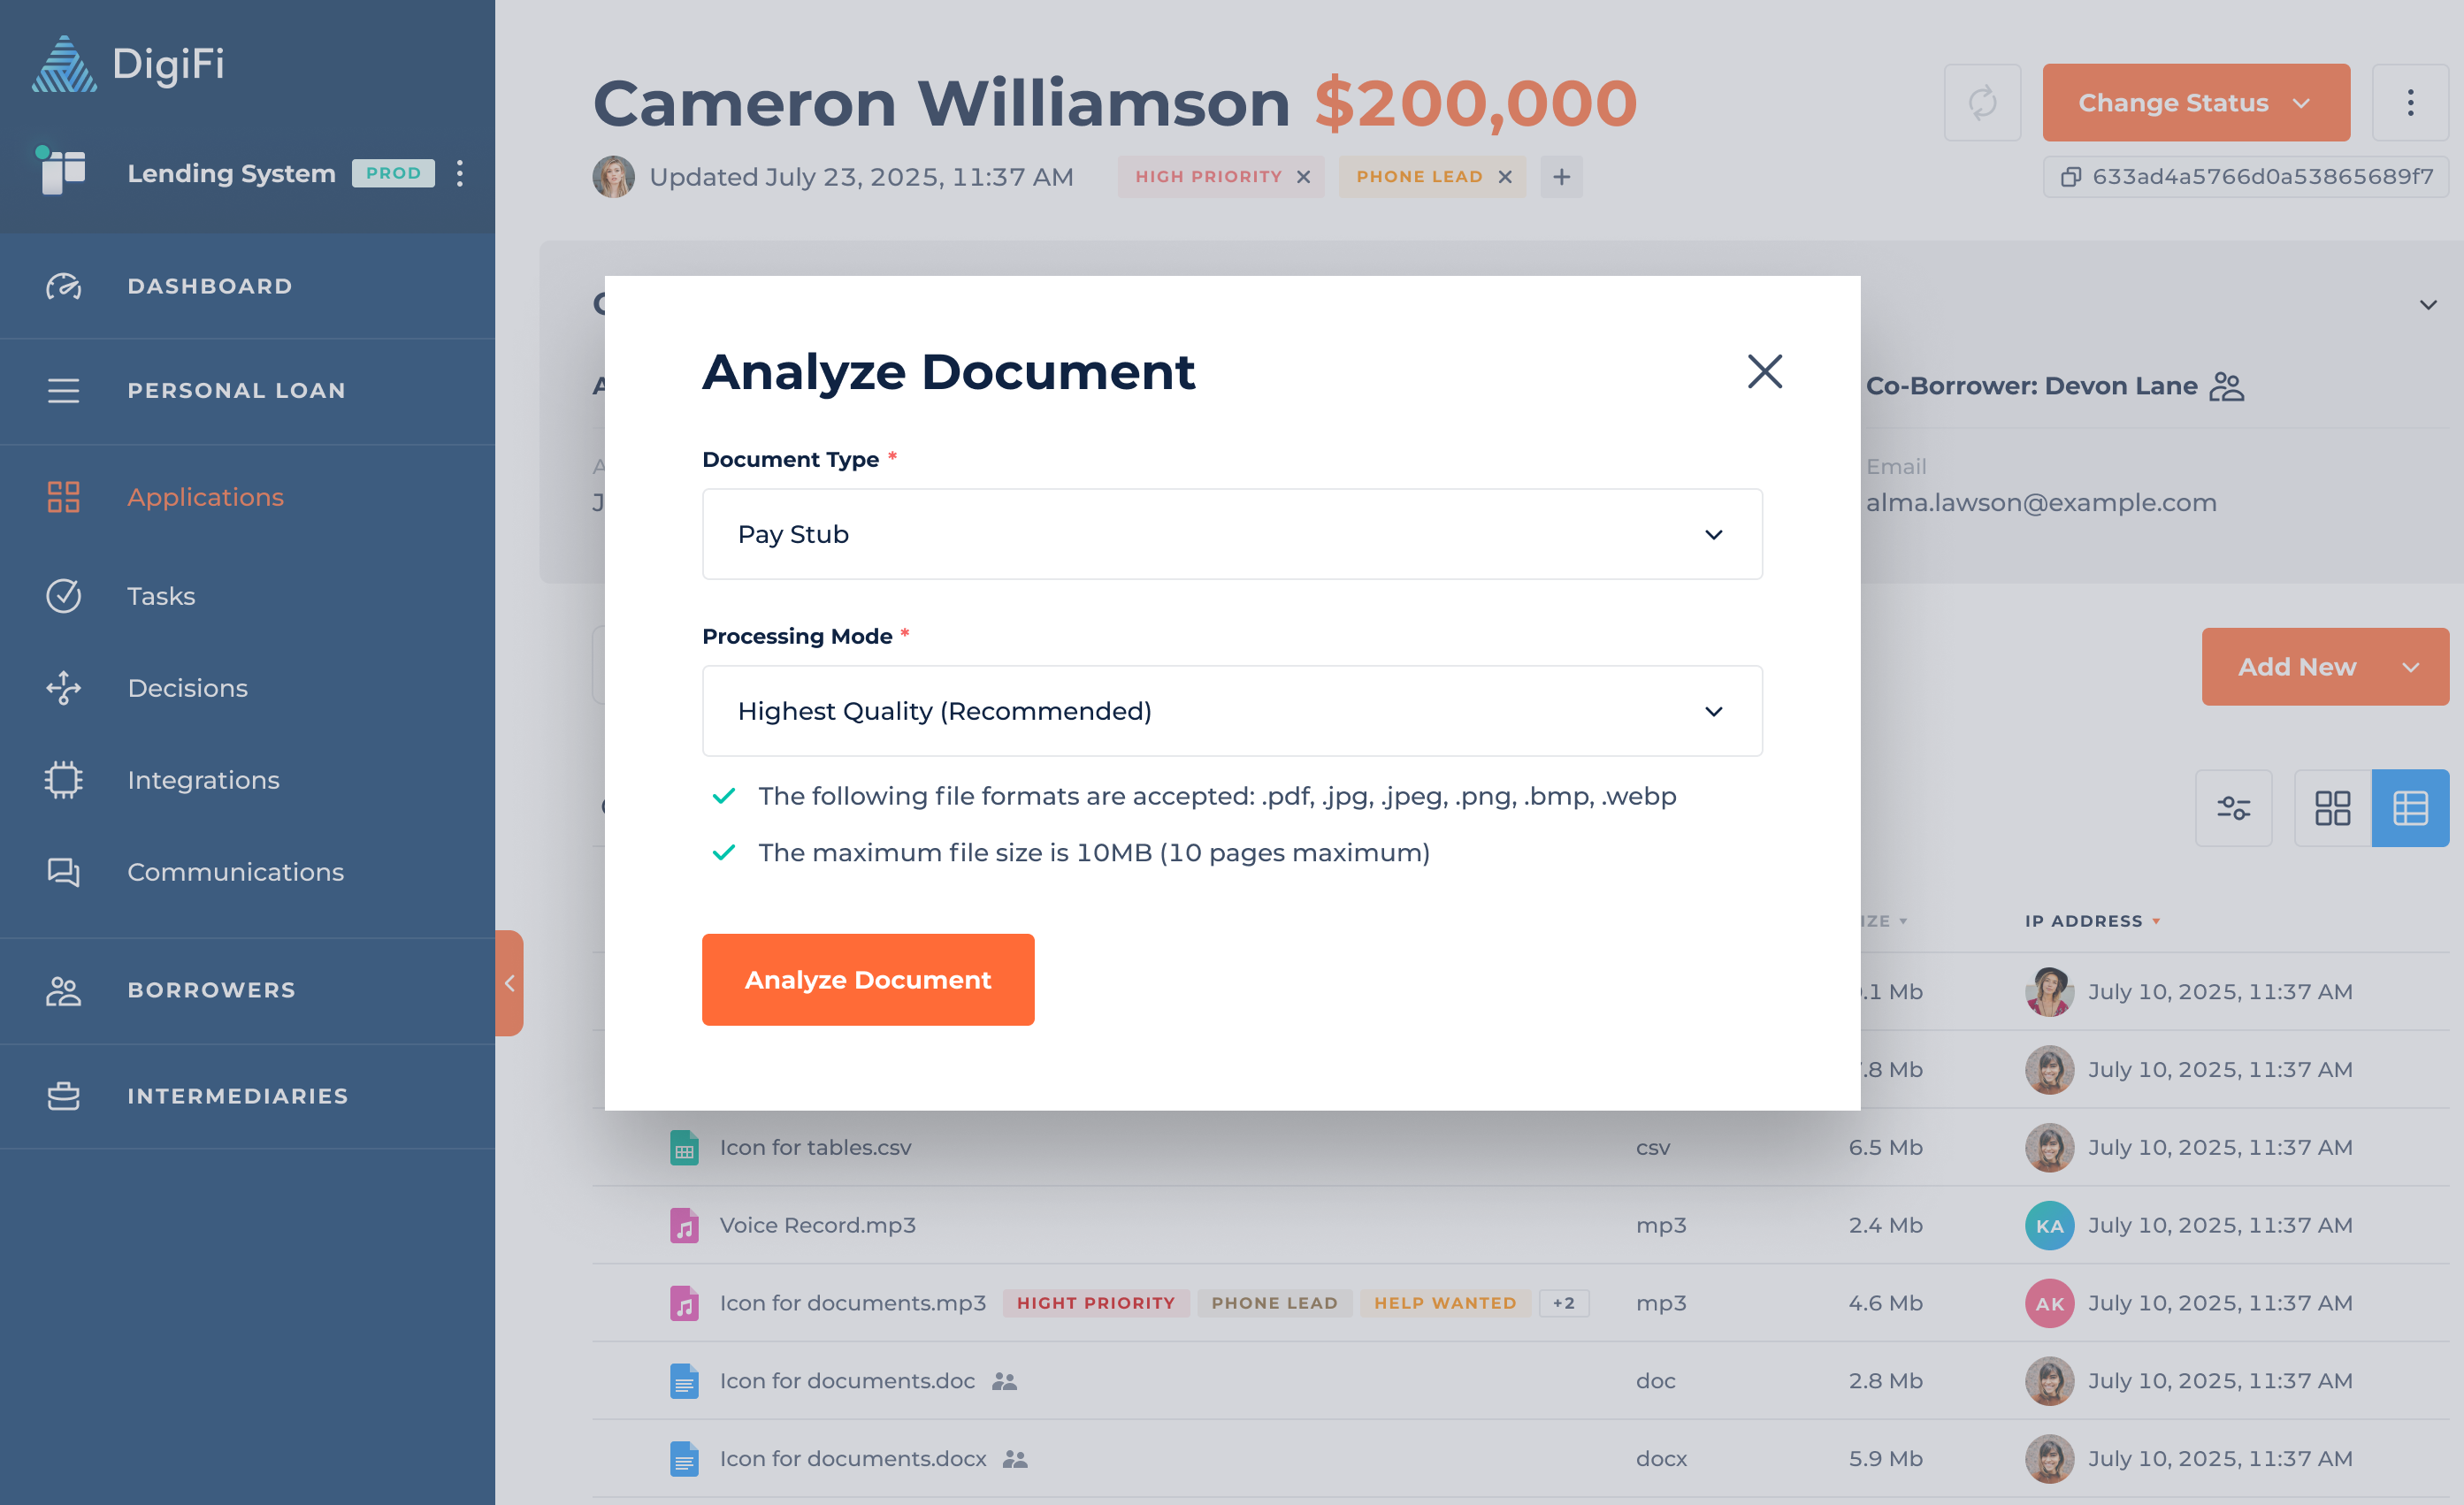
This will start a data extraction process through the Synthetiq integration, following your established configuration. Once the extraction is complete, the results will automatically populate DigiFi's application variables and be displayed within the analyzed document.
The extracted data is available every time you access the document. You can re-process the extraction at any time.
Updated 3 months ago