Workflow Statuses
How to manage your high-level lending workflow.
Overview of Workflow Statuses
The "Workflow Statuses" section of a loan product lets you configure the steps that applications go through, as well as the associated user permissions and other business rules. These workflow statuses will correspond directly to what your team members see when viewing in-process applications from the applications board view.
The "Workflow Statuses" section includes two tabs:
- The "Processing Statuses" tab includes the steps that applications will go through before becoming either "Approved" or "Rejected".
- The "Final Statuses" are the end-states of "Approved" and "Rejected". You can modify these statuses but not add additional ones.
Workflow statuses are a key part in defining your lending workflow, user permissions and automation triggers!
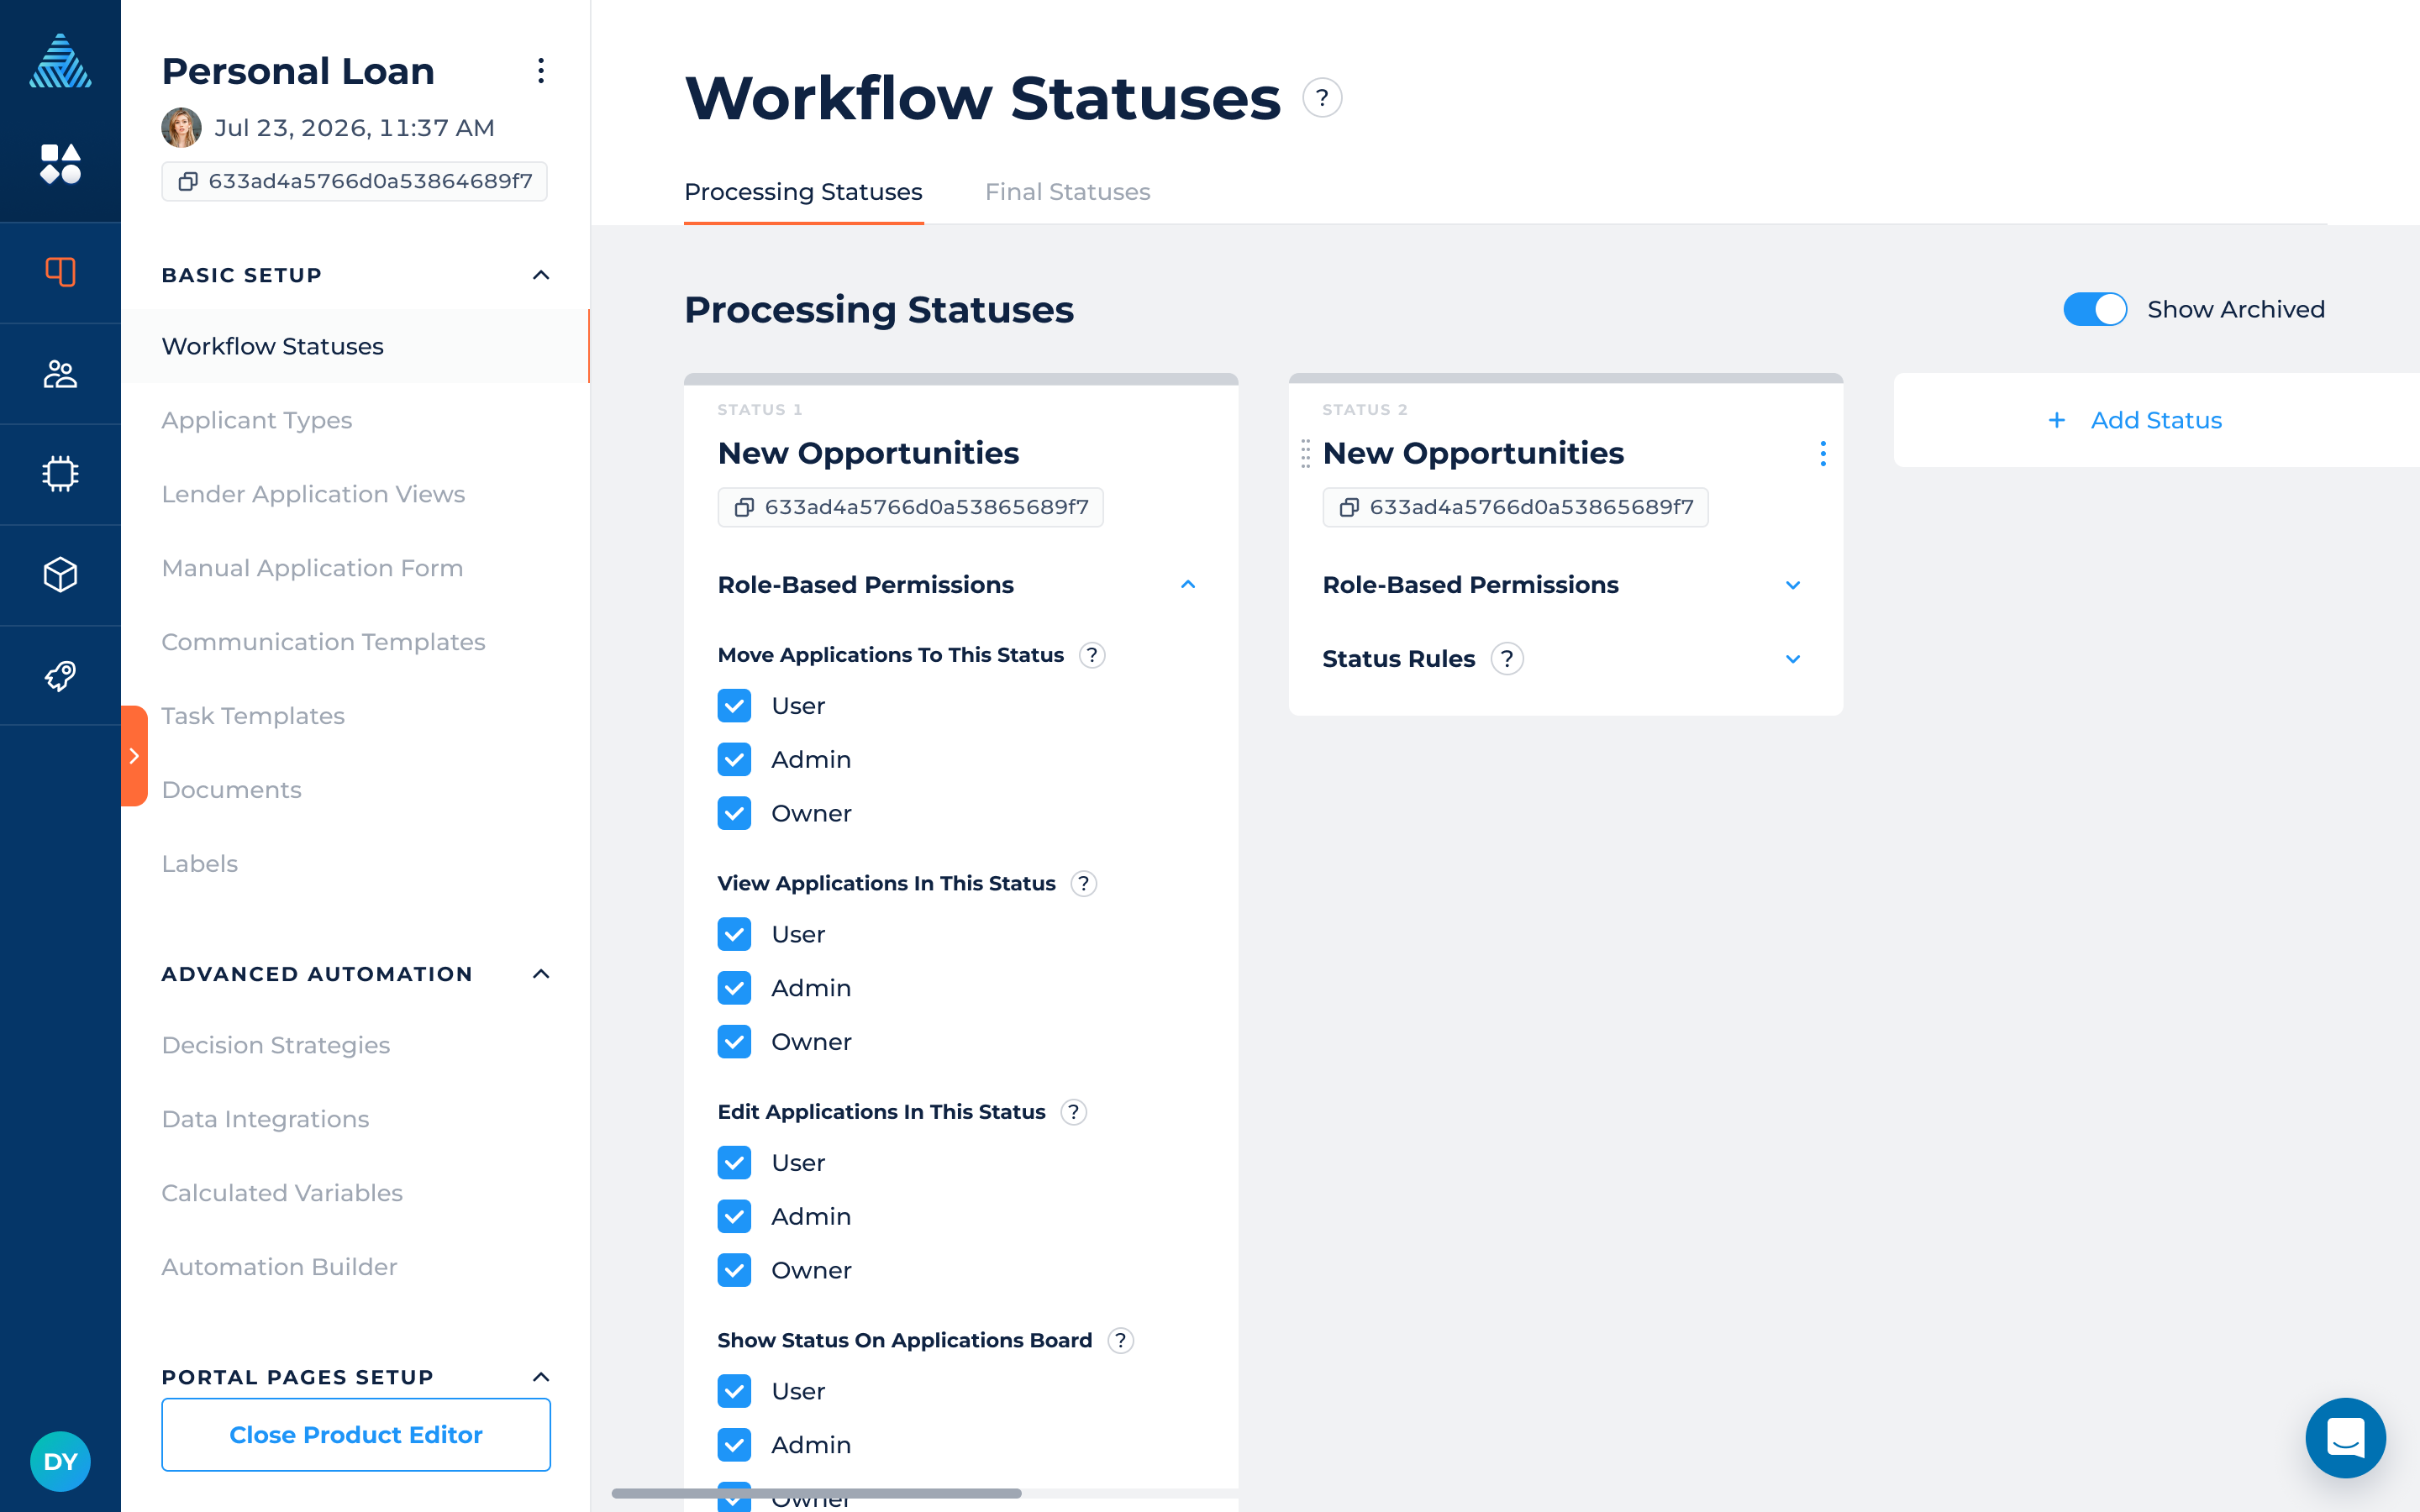
Role-Based Permissions
Control who can move applications to specific statuses, view applications of the specific statuses on the board or make edits by selected user groups within the chosen status.
With Role-Based Permissions you can decide who can:
- Move application to the status - selected user permission groups can move the application to this status. Please note that users with selected permission groups will be able to move the application to this status from any other status.
- View applications in the status - selected user permission groups can open and view applications in this status. If this is unchecked for a user permission group, the "Edit Application In This Status" permission will be disabled automatically for that group. Users without permission to view applications in this status won’t be able to access them in the application board, table view, or through a shared application link.
- Edit application in the status - selected user permission groups can edit the data, documents and status of the application in this status. In case you don’t let the user group edit the data, they will still be able to leave comments on the tasks.
- Show status on the application board - selected user permission groups can see this status on the application board. Users will be able to see the applications in this status when choosing the table view of the board and on the dashboard (in case they are assigned to the applications).
How to Add & Edit Processing Statuses
"Processing Statuses" can be added, removed, reordered or edited to define your ideal lending workflow.
How To Add A Processing Status
To add a processing status:
- Clicking the "+ Add Status" button.
- Provide a name for the status.
- Select a color for the status header from the basic colors or the color picker.
- Click on "Add Status."
How To Remove A Processing Status
To remove a processing status:
- Hover over the status.
- Click the 3-dots icon.
- Select the "Archive Status" option
How To Reorder Processing Statuses
To reorder processing statuses:
- Hover over a status.
- Click and hold your cursor down.
- Drag the status to your desired location and drop it there.
How To Edit Processing Statuses
For each processing status, you can edit the following things:
- Change the status name and color of the status header by hovering over the status, clicking the 3-dot icon, and selecting "Edit Status."
- Set the following user permissions:
- Which user permission groups can move applications to this status.
- Which user permission groups can view applications in this status.
- Which user permission groups can edit applications in this status.
- Which user permission groups can see this column on the applications board.
- Add status rules, which must pass for an application to enter this status.
User permissions and status rules can strengthen and secure your lending process!
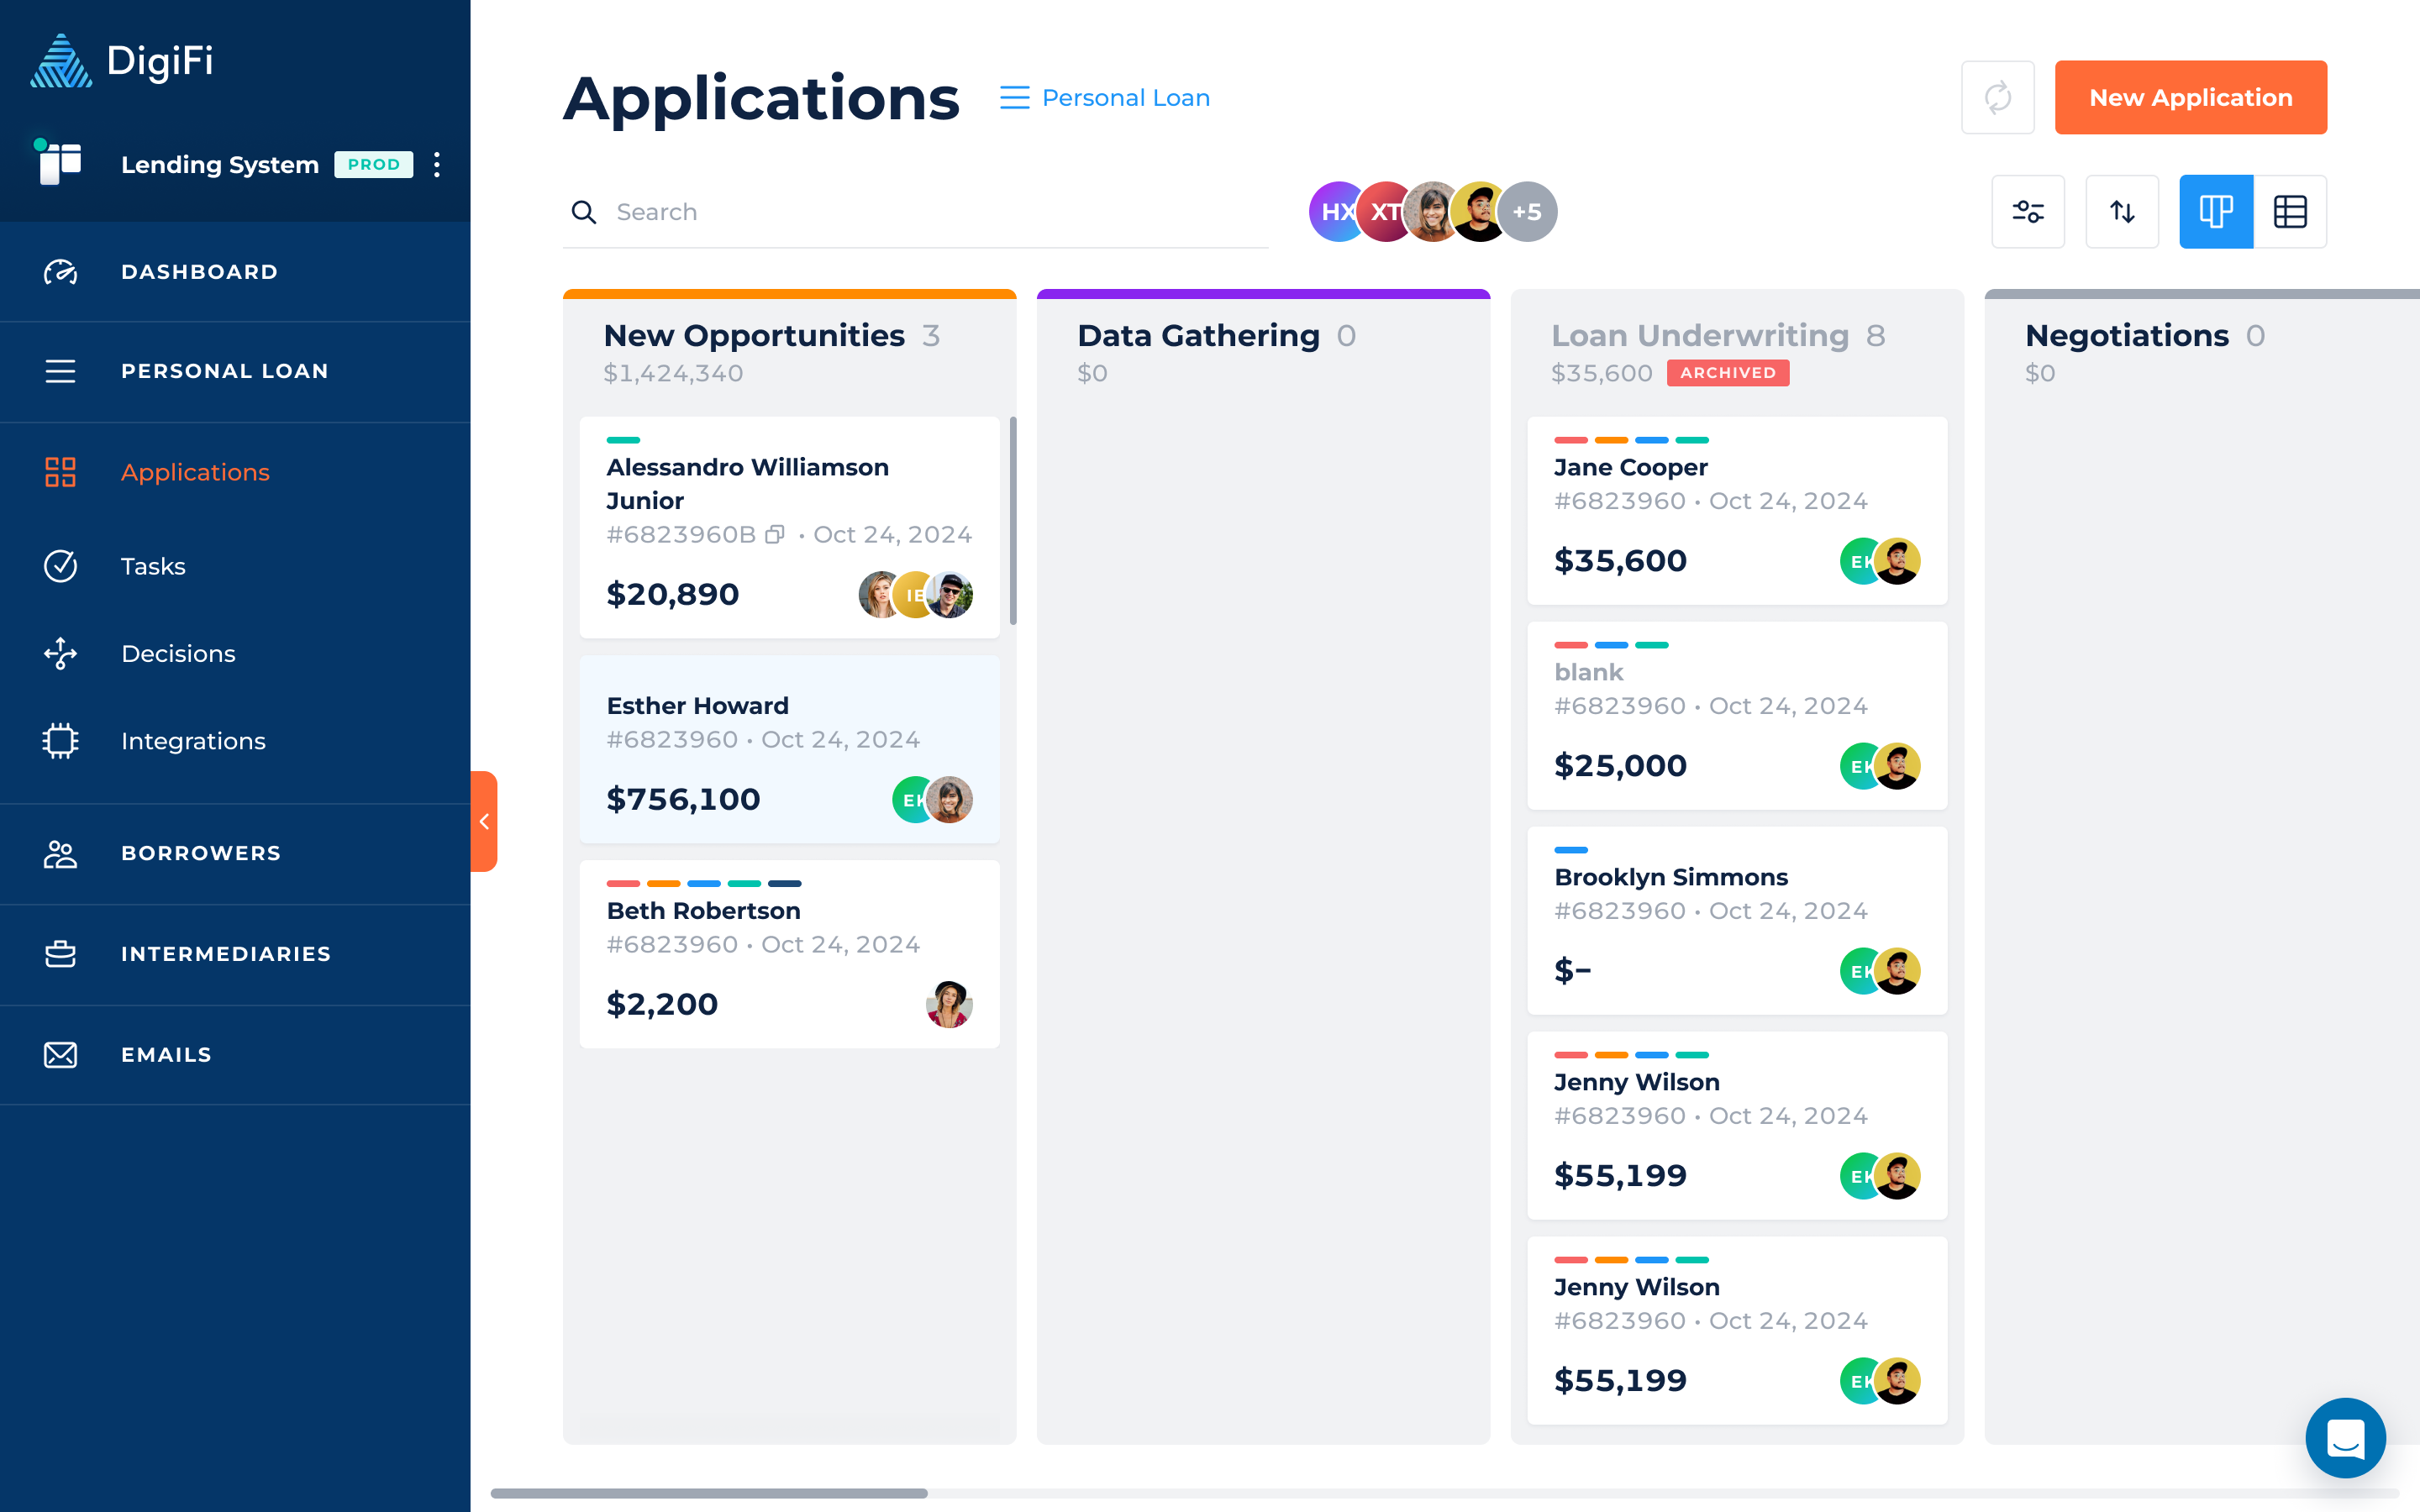
Archived Statuses
It's possible that you may need to delete a workflow status and deploy the changes to production while some applications are still assigned to that status. In this case, the DigiFi platform will archive the status and keep it visible on the applications board until all applications are removed from it.
Any remaining applications in the archived statuses will not be affected. Archived statuses are clearly labeled with a red "Archived" tag on the applications board and a warning sign in the table view. The archived status will only be hidden when all applications are transferred to a new status.
How To Edit Final Statuses
The "Approved" and "Rejected" statuses can be edited but not added, removed or reordered.
For each status, you can edit the following things:
- Change the status name and color of the status header by hovering over the status, clicking the 3-dot icon, and selecting "Edit Status."
- Set the following user permissions:
- Which user permission groups can move applications to this status.
- Which user permission groups can view applications in this status.
- Which user permission groups can edit applications in this status.
- Which user permission groups can see this column on the applications board.
- Add status rules, which must pass for an application to enter this status.
- Add a list of potential decline reasons. These options will appear to users when they move applications to the "Rejected" status.

Updated about 2 months ago