Applications: Creating New
How to create new applications in the DigiFi platform.
Overview Of Creating Applications
Creating applications through DigiFi's user interface requires completing the application form that was set up for your loan product.
Please note that applications can be created using both the DigiFi user interface and the DigiFi API. The guide below refers to the creation of applications through our user interface. Please refer to our Developer Guide for documentation related to creating applications through the API.
Step 1: Initial Selections
To begin creating a new application:
- Navigate to the "Applications" section.
- Click the button.
- A popup will appear where you can select the loan product for the application from the dropdown list, and toggle co-borrower(s) and intermediary on or off, if they are configured in the Loan Product.
- After your selections are complete, click "Continue" to open the first page of the application form.
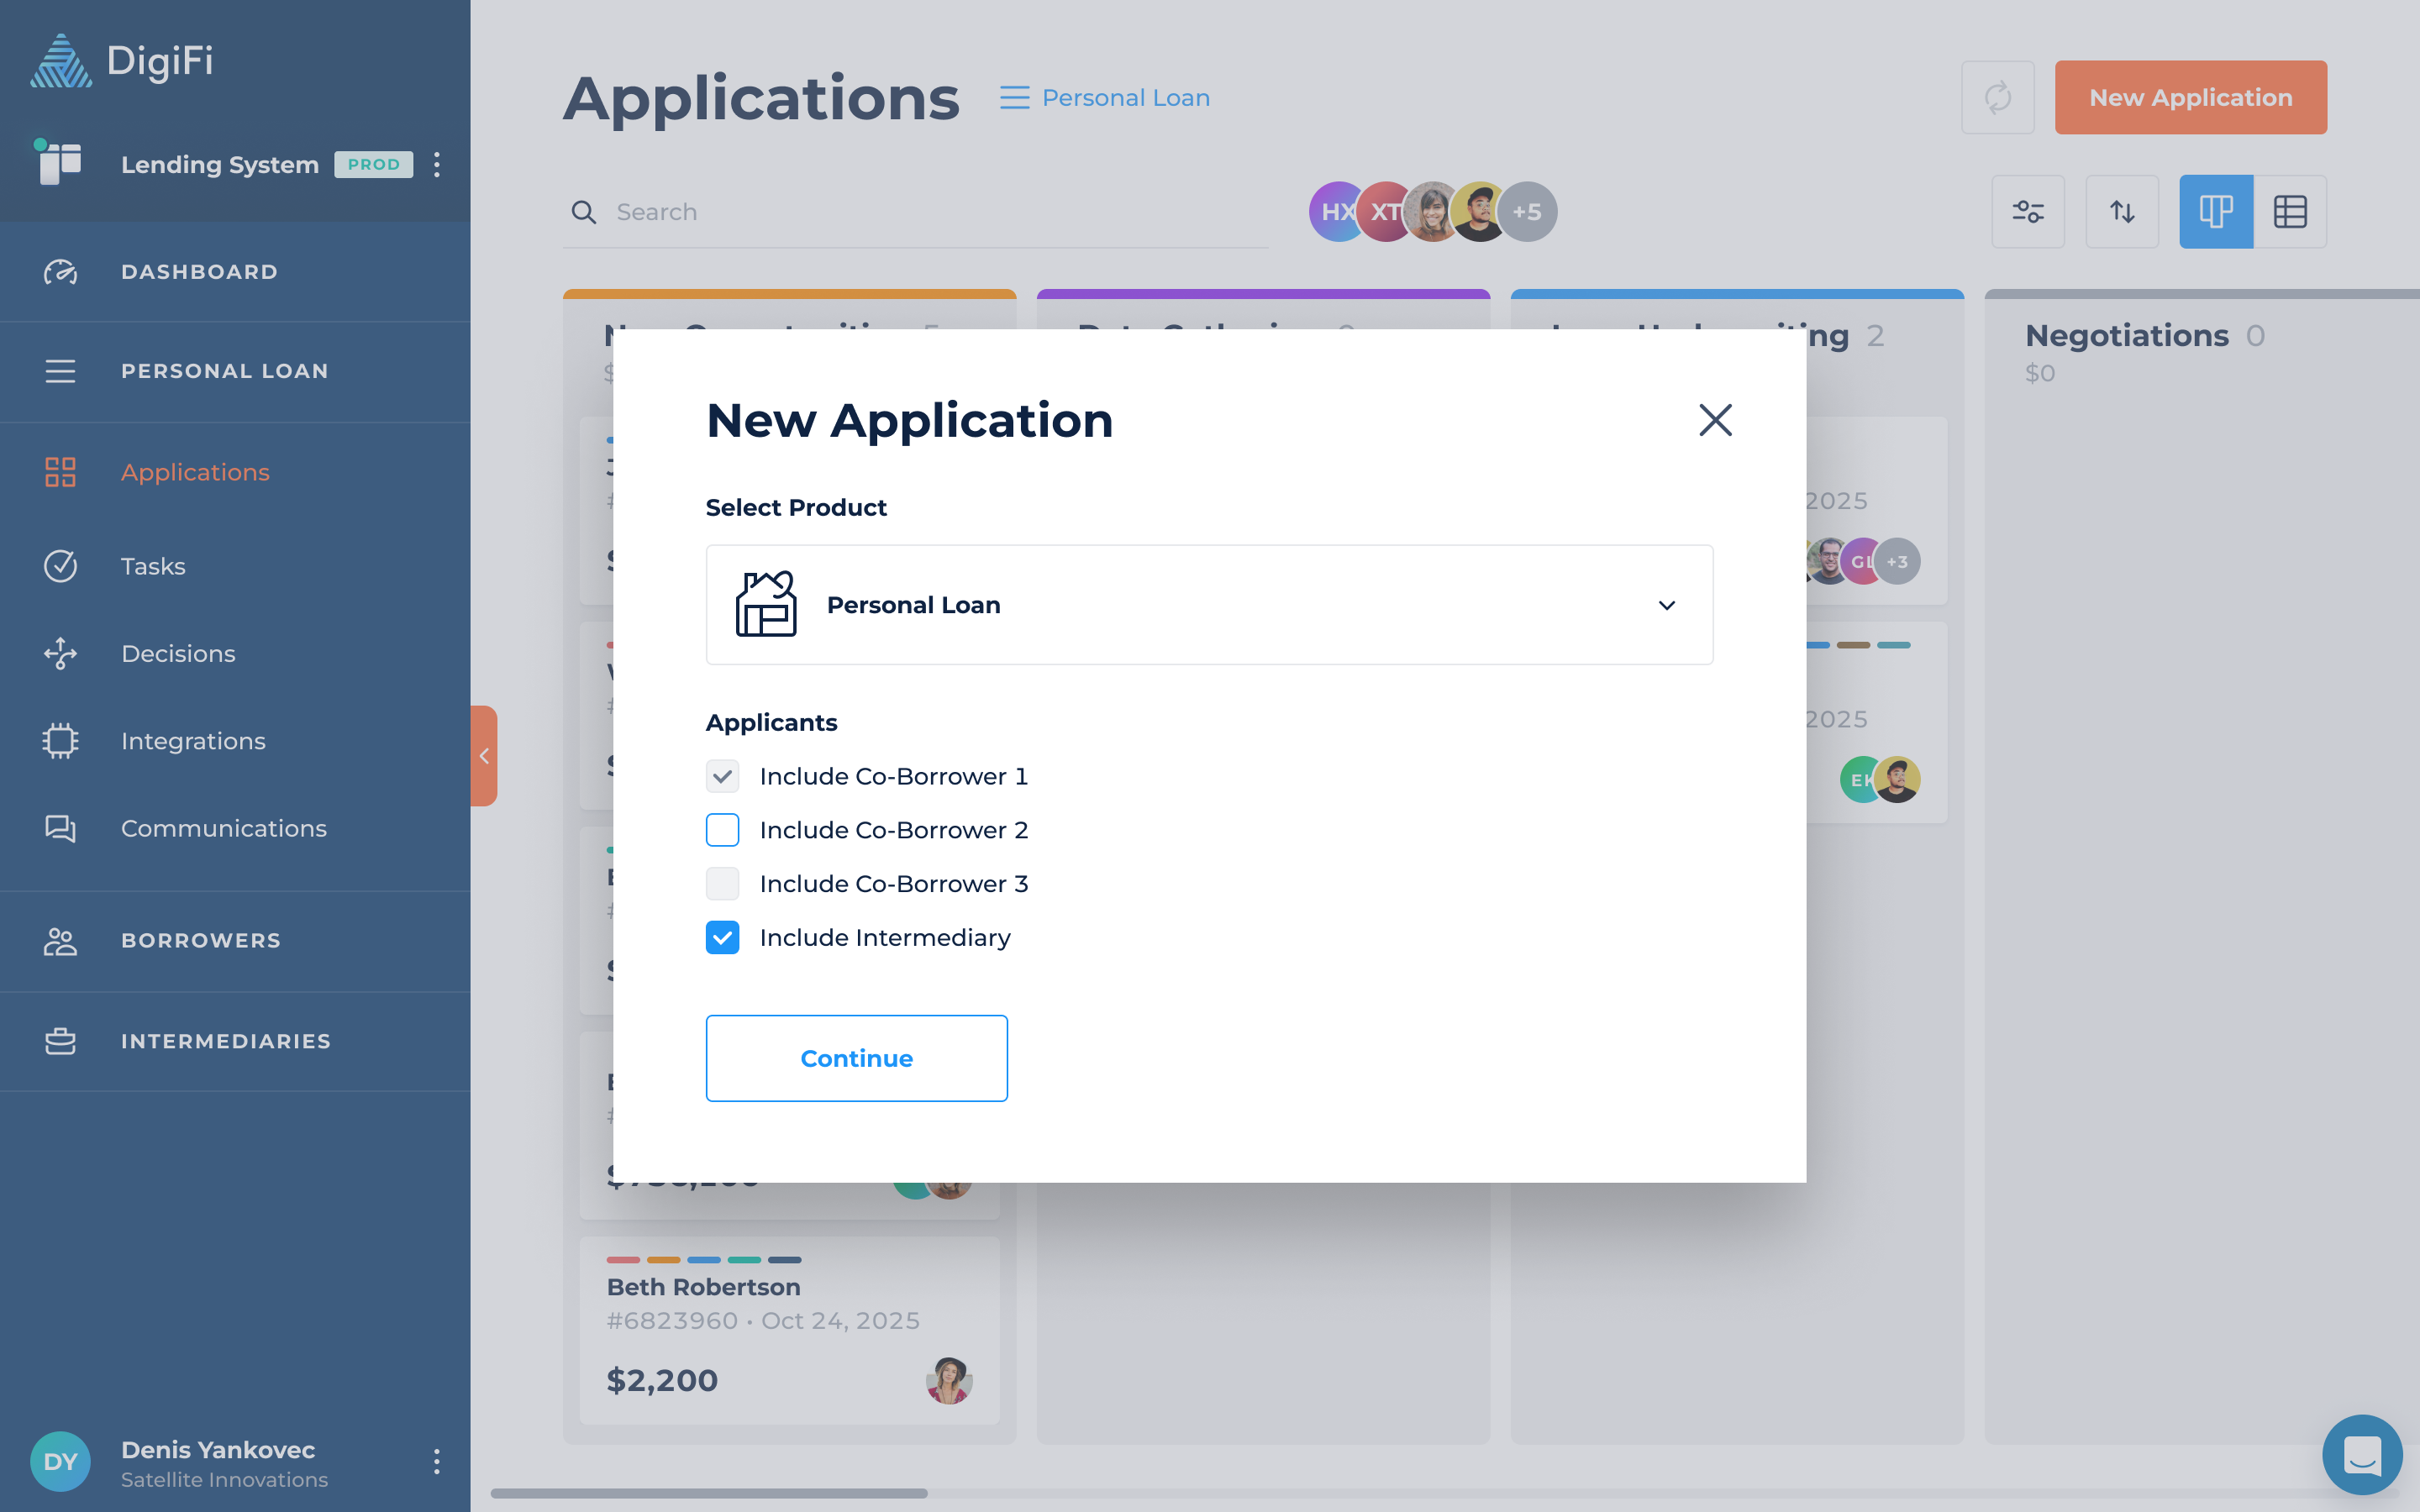
If you have a single loan product with no co-borrower or intermediary, this step will be skipped.
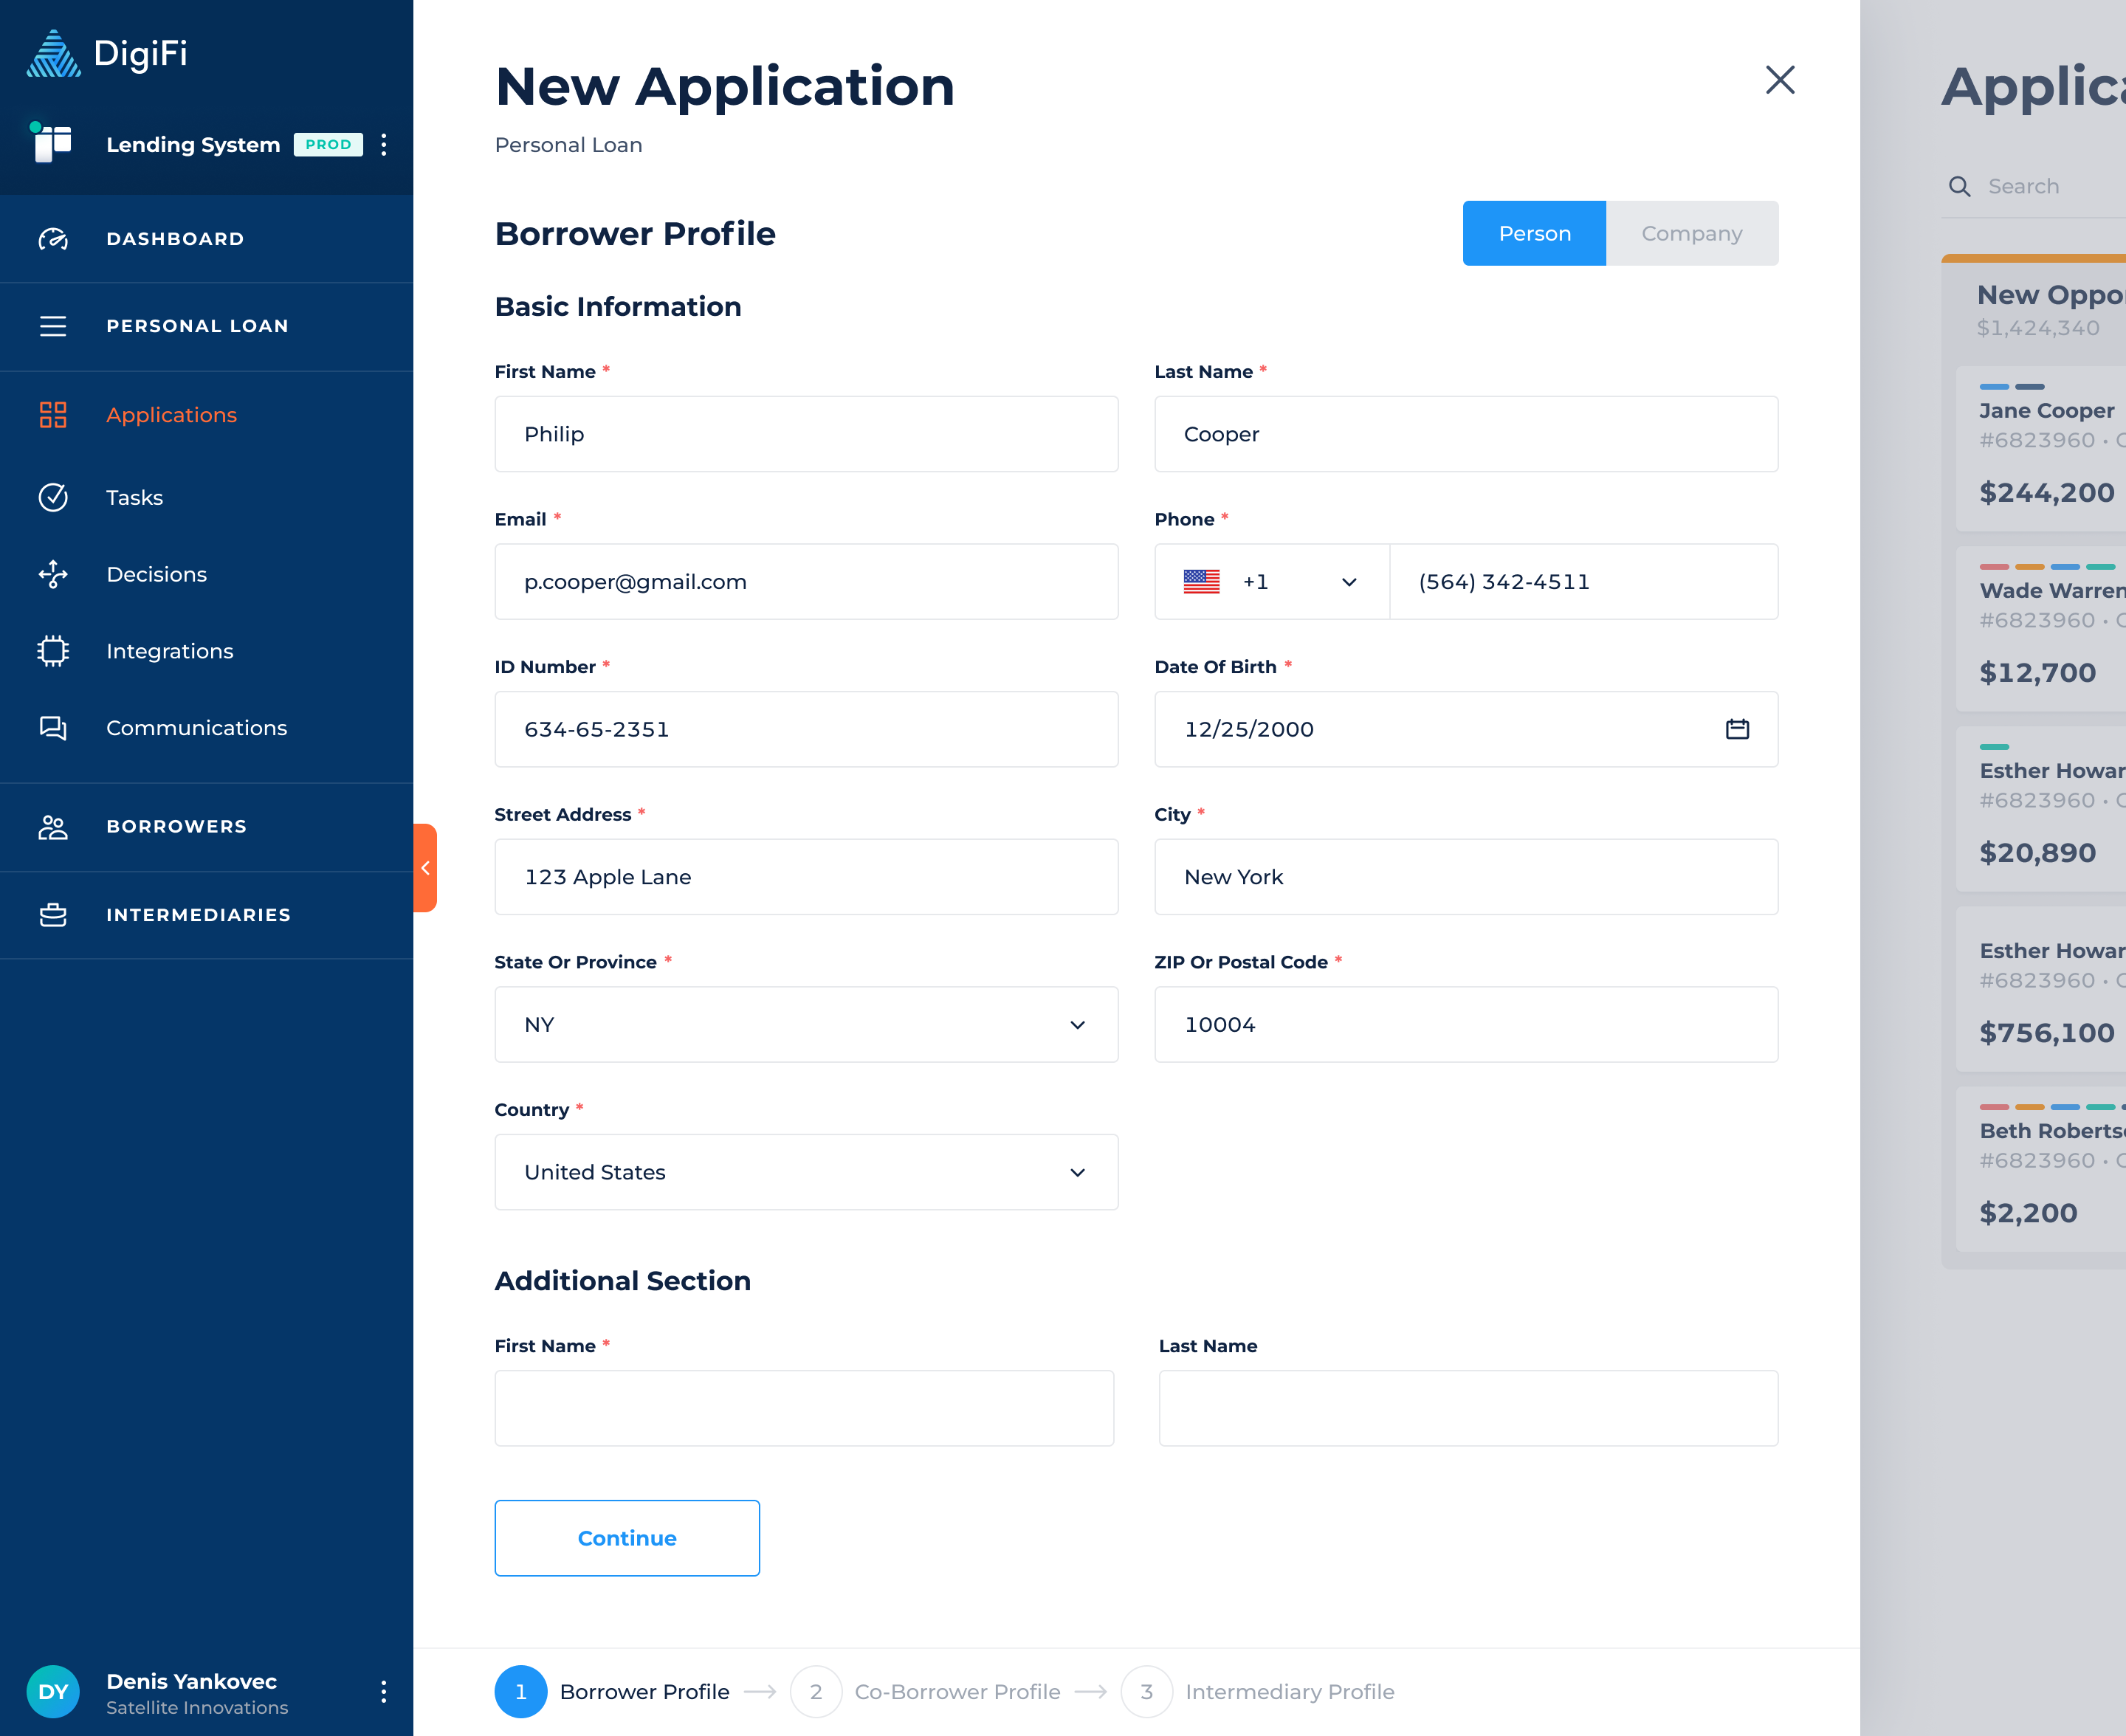
Step 2: Borrower Profile(s)
The first page of the application form is the borrower's profile (either for a person or company), where you provide information about the primary applicant. Every application in the DigiFi platform is tied to at least one borrower, and a single borrower can be tied to many applications. As part of the new application process you will have to either select an existing borrower or create a new one.
You'll have the option to toggle between borrower types of "Person" and "Company" if your loan product included both options!
If the applicant has not previously applied they will be treated as a new borrower. You'll need to provide all of the required information (indicated by a red asterisk) to continue creating the application.
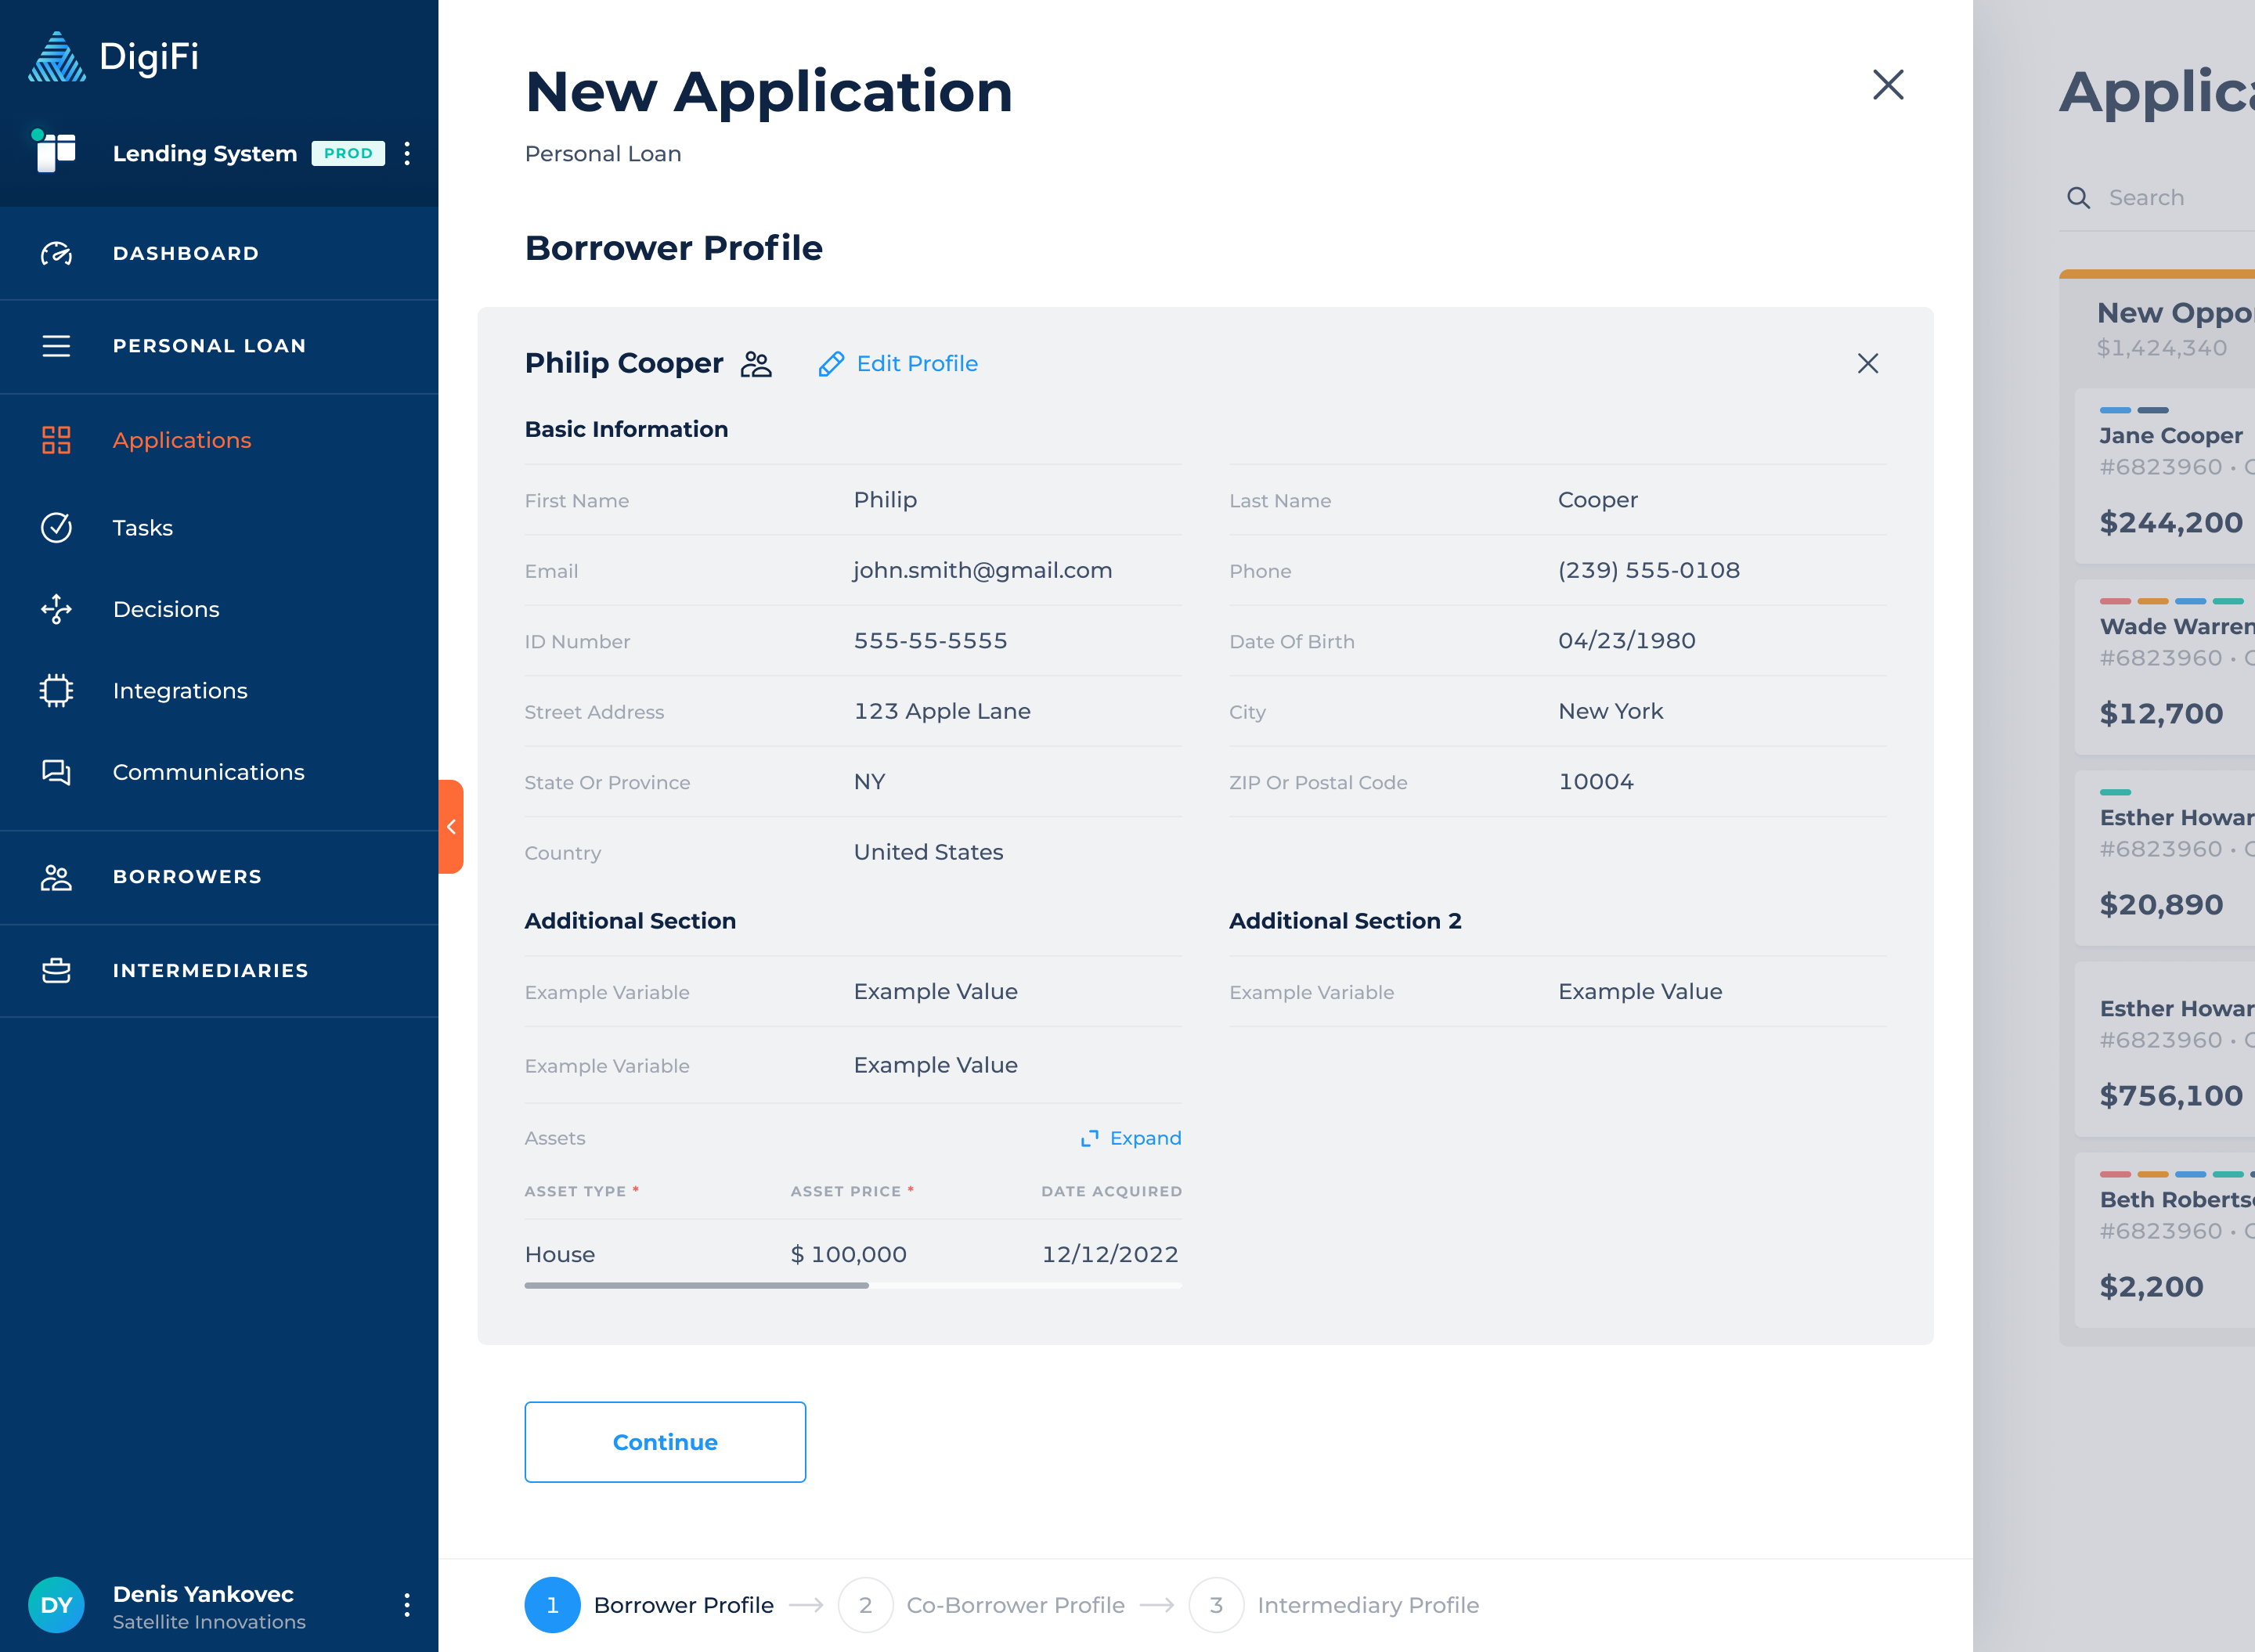
If the applicant has previously applied, they will be treated like an existing borrower. You'll be able to find them by typing their basic information (e.g. name, email, date of birth, phone number, identification number) and selecting the correct person or company. You then have the option to edit their information by clicking the "Edit Profile" button.
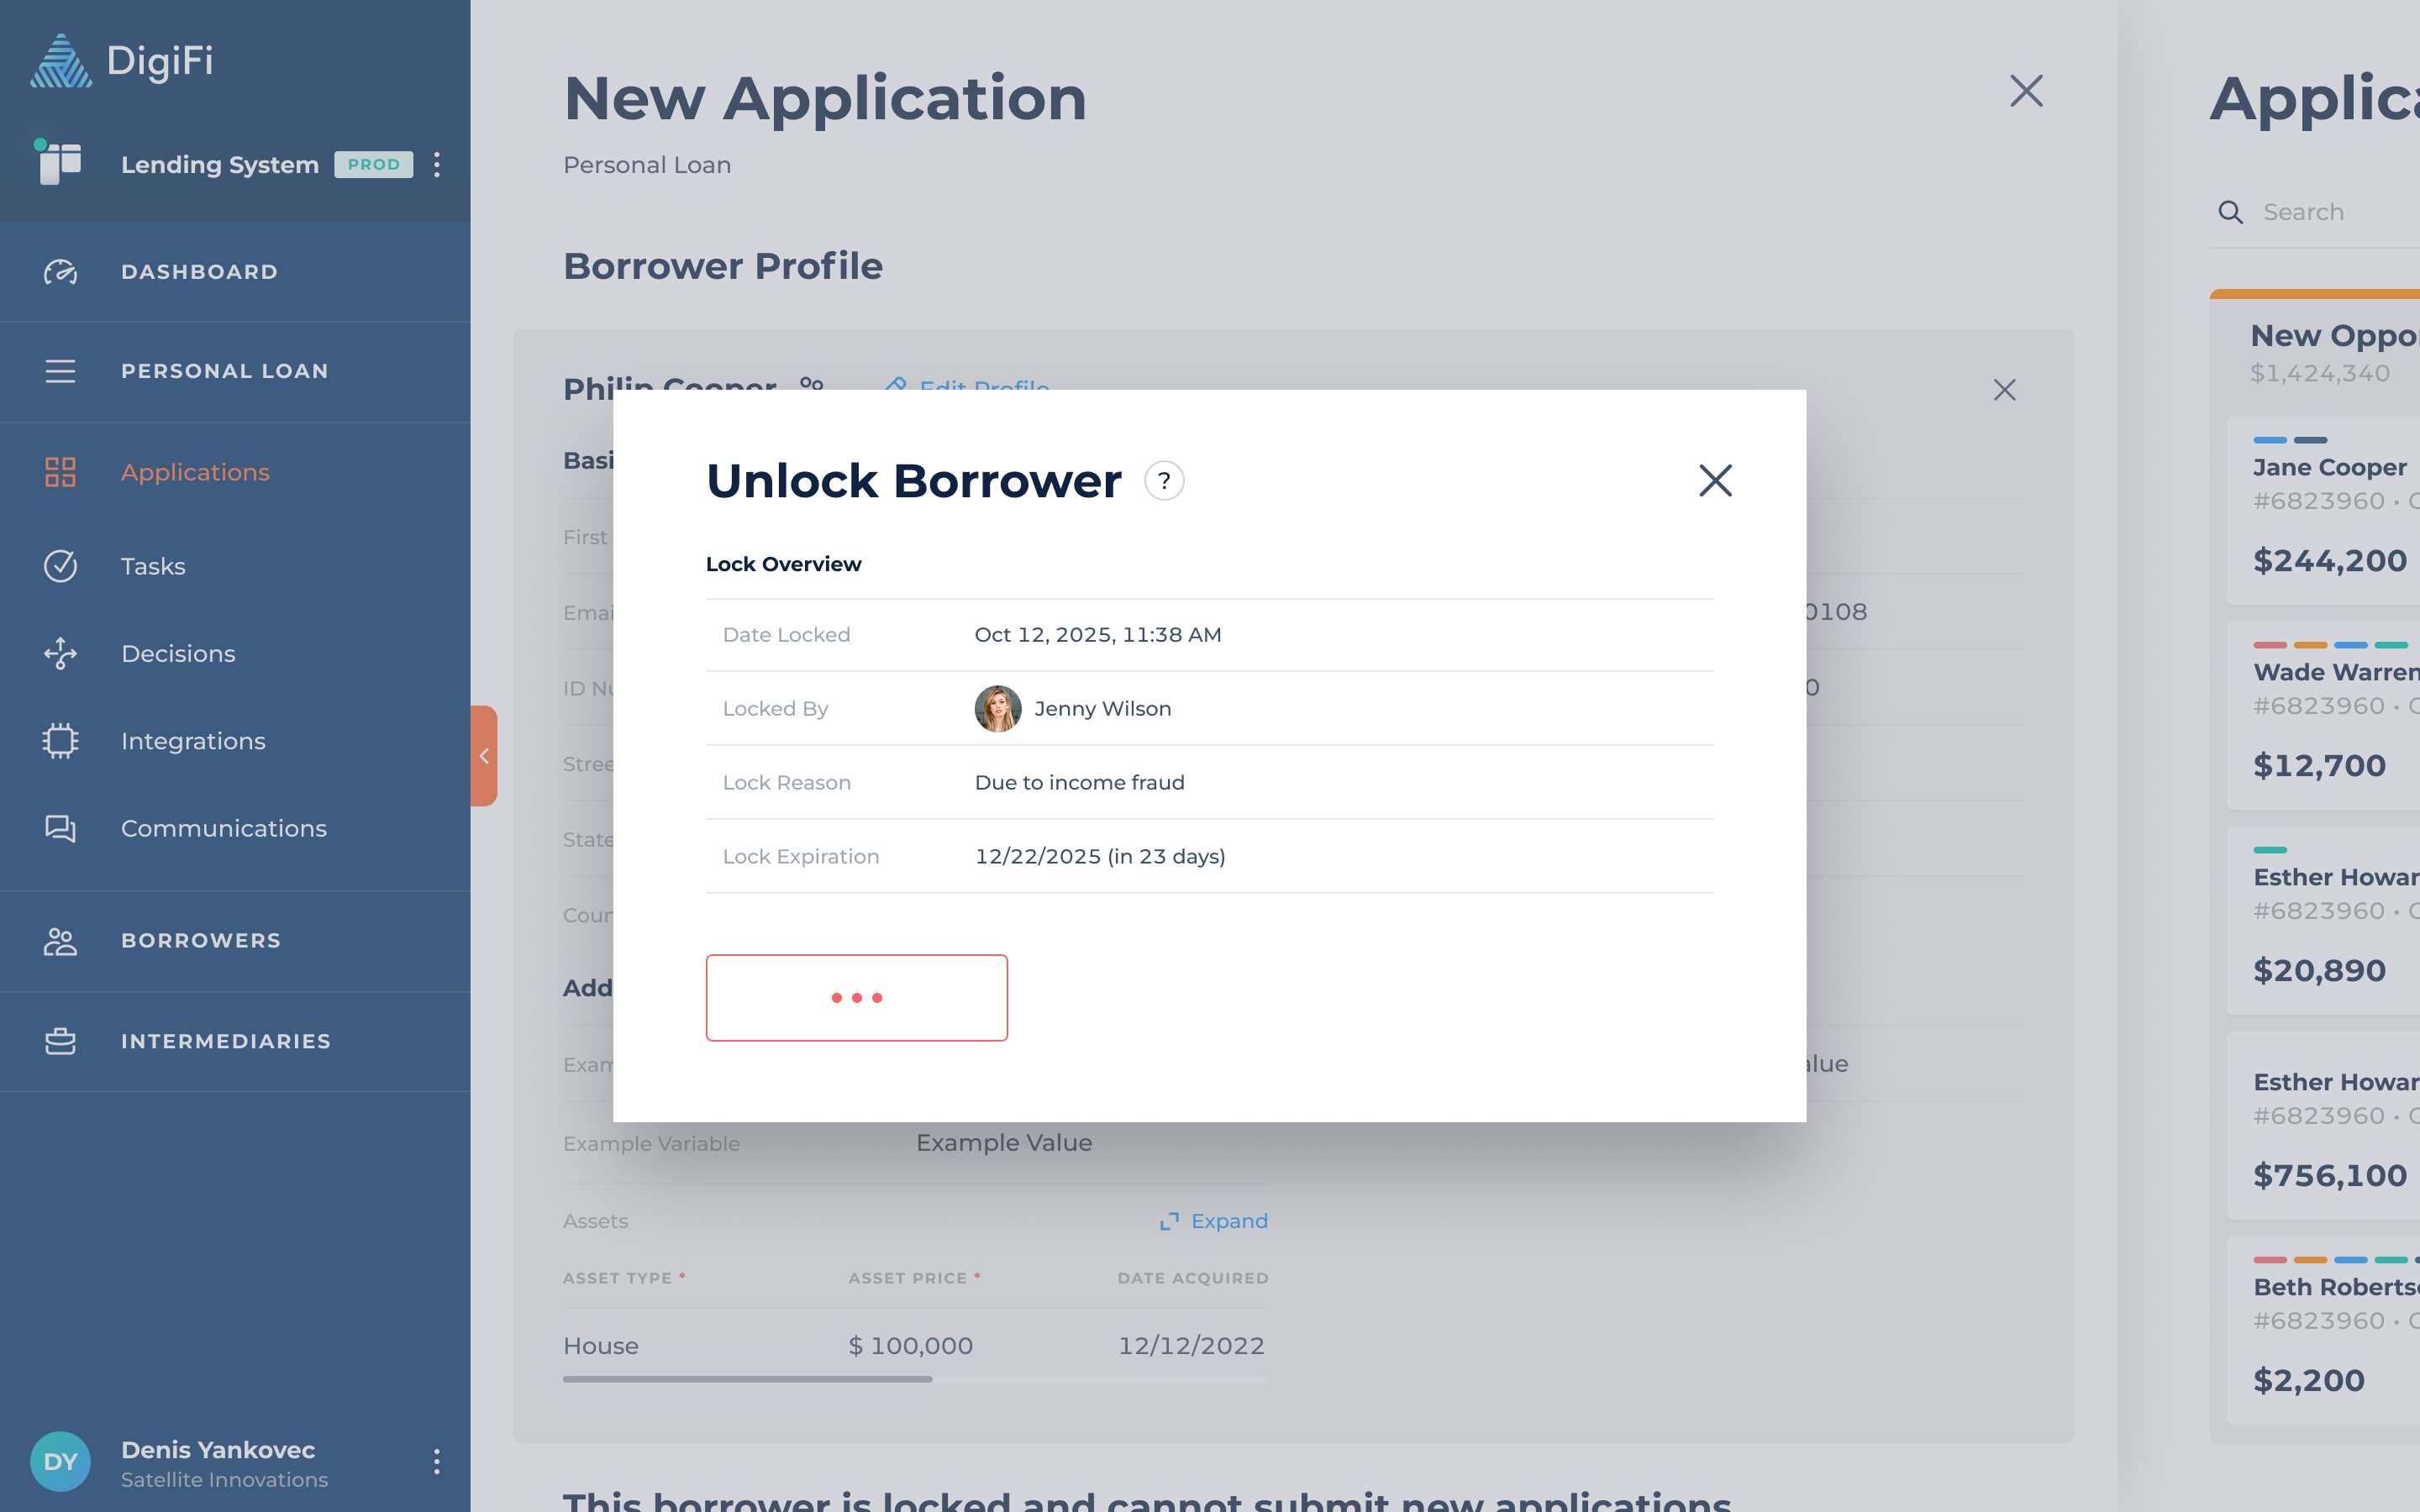
Existing borrowers may be "Locked" and unable to apply, in which case a message will appear letting you know. This typically occurs when they have applied recently, but could also be because one of your team members decided to block them from new applications (e.g. suspected fraud or identity theft). If the borrower is Locked, you'll have the option to view the reasons they were locked and, if appropriate, unlock them.
Once you have completed the borrower profile page, click the "Continue" button.
If you included a co-borrower, you'll also have pages to provide their information in the same way
Step 3: Intermediary Profile
The "Intermediary Profile" page of the Application Form will only appear if you chose to include an intermediary in the application (see Step 1). If so, this is where you'll provide information about the intermediary.
If the intermediary has not previously referred a loan, they will be treated as a new intermediary. You'll need to provide all of the required information (indicated by a red asterisk) to continue creating the application.
If the intermediary already exists in the system, they will be treated like an existing intermediary. You'll be able to find them by typing their basic identification information (e.g. name, email, phone number, identification number) and selecting the correct intermediary. You can then edit their information by clicking the "Edit Profile" button.
Once you have completed the intermediary profile, click the "Continue" button.

Step 4: Application Details
The "Application Details" page of the Application Form will appear only if you choose to include it in the application as part of the loan configuration.
This page includes additional all application form information that is not a part of a borrower or intermediary profile. You'll need to provide all of the required information (indicated by a red asterisk) to continue creating the application.
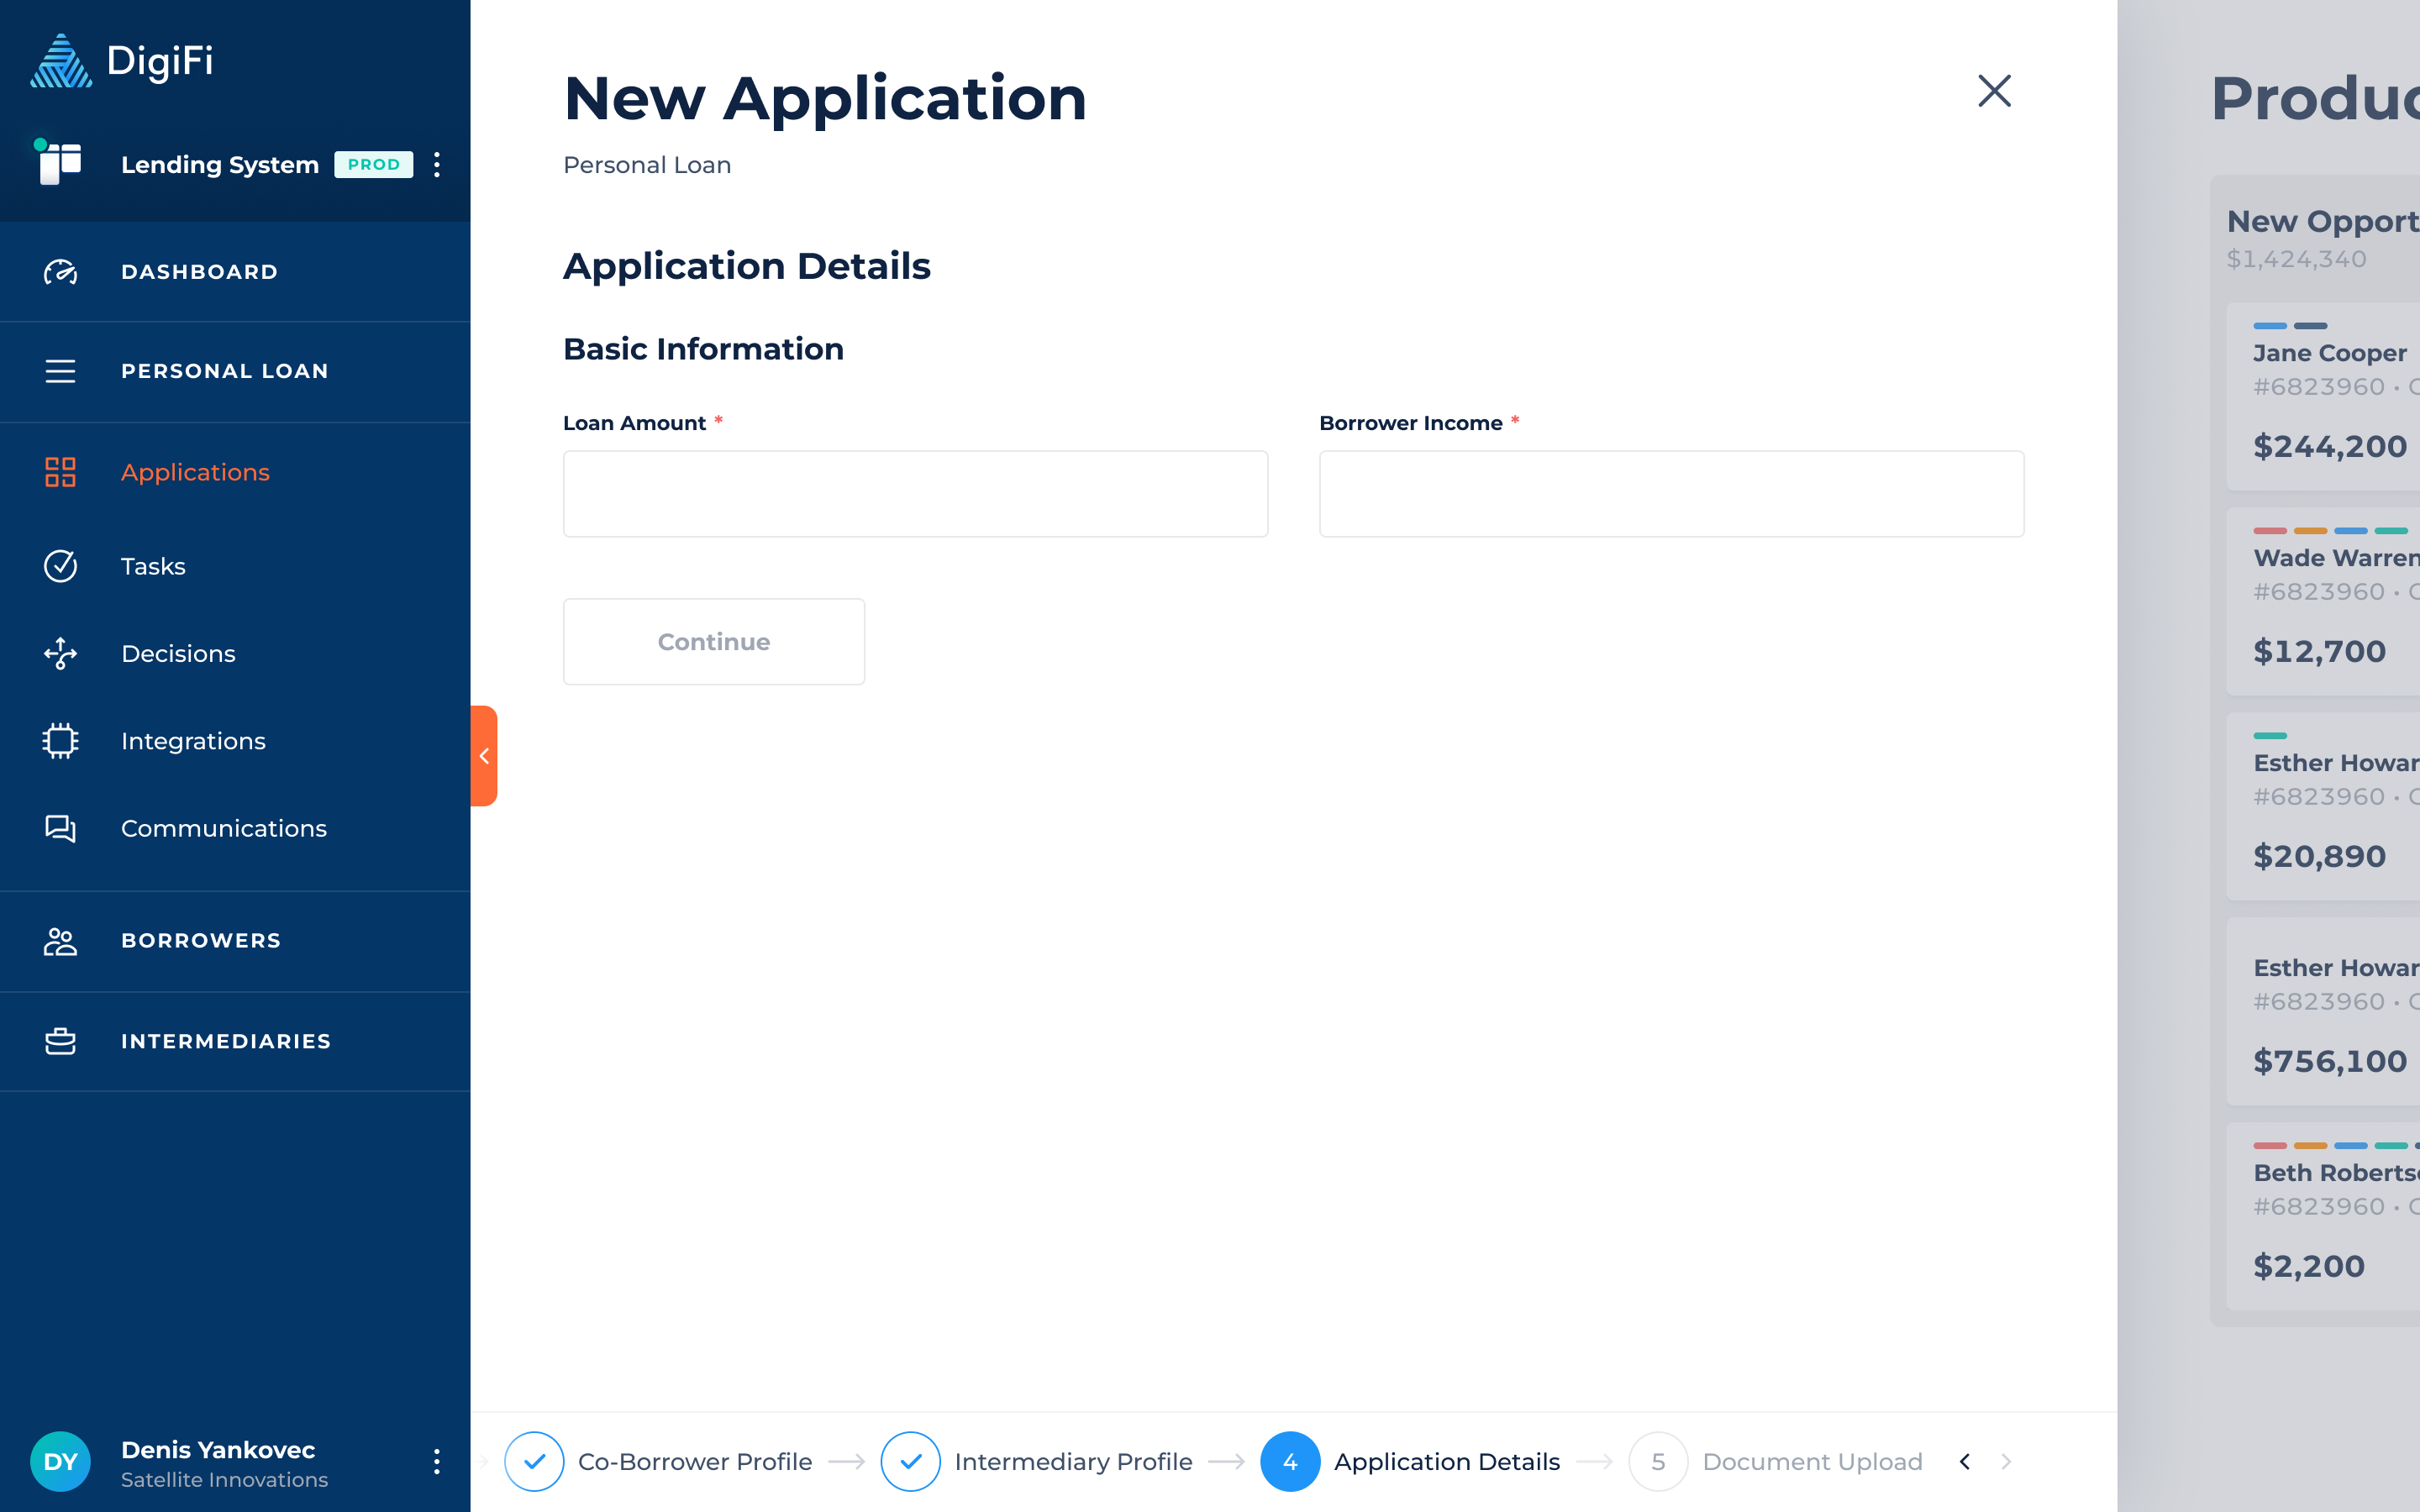
Once you have completed the profile, click either the "Create Application" (to finish creating the application) or "Continue" button (if Step 5 is required for your loan product).
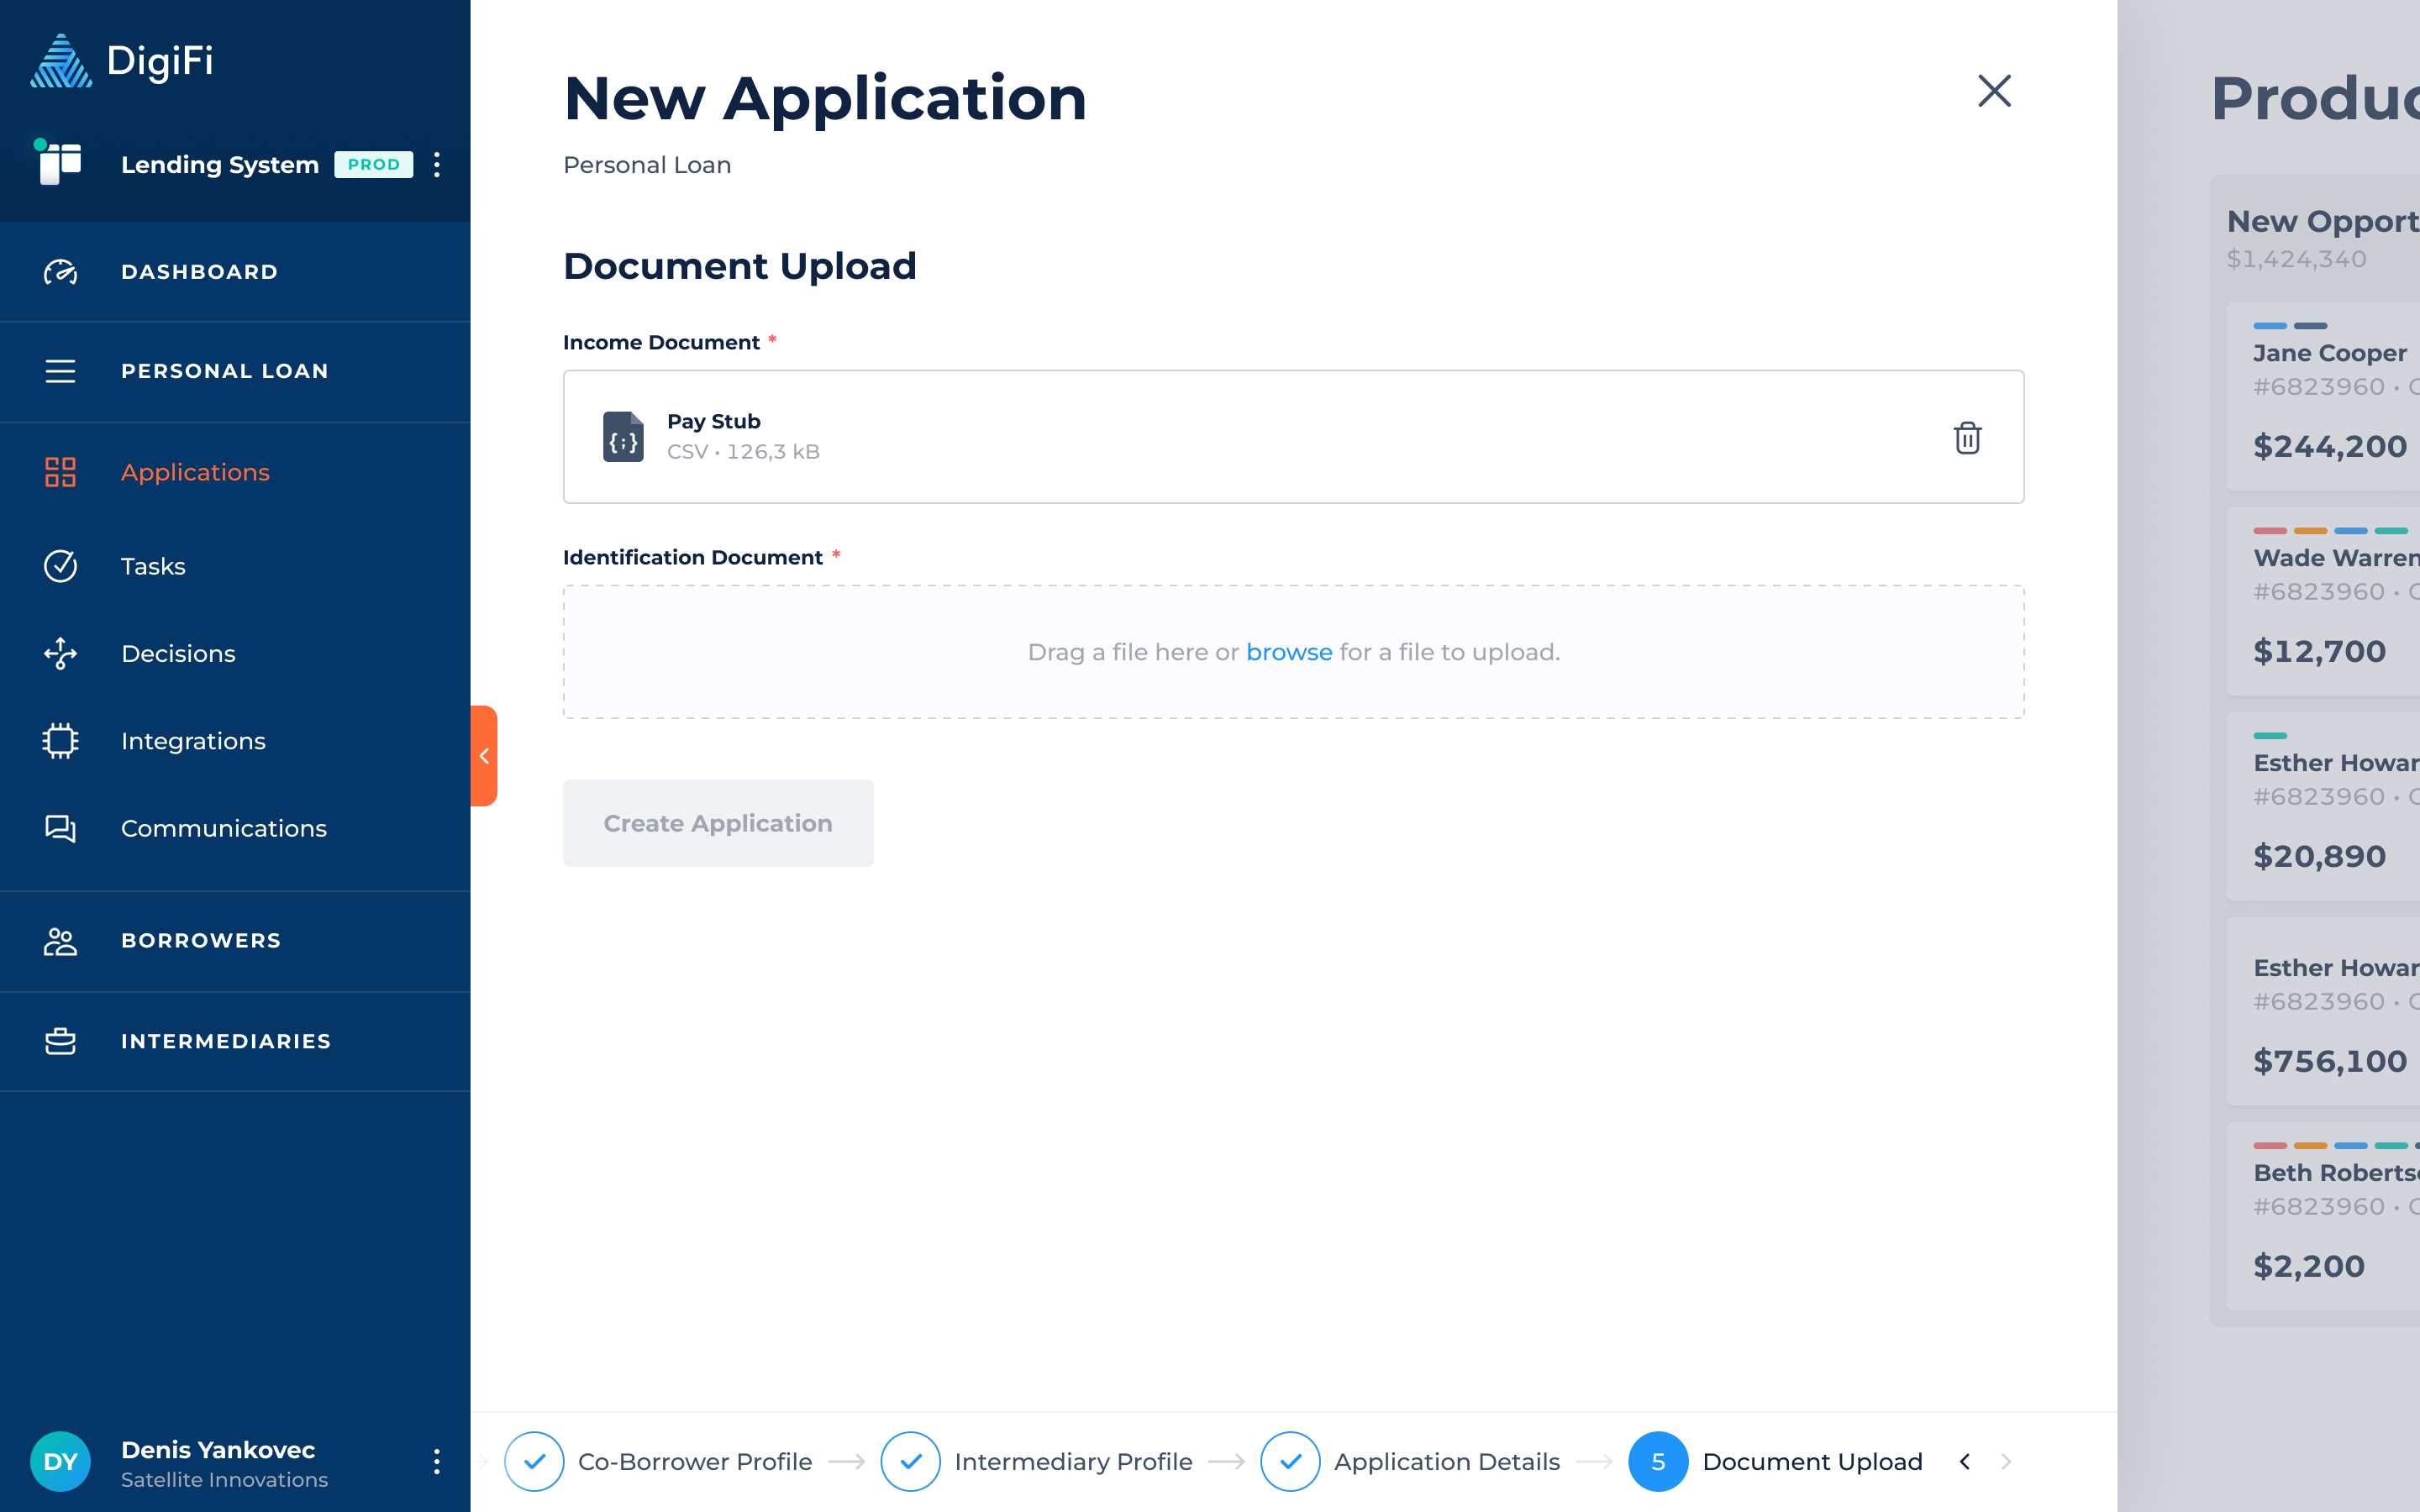
Step 5: Document Upload
The "Document Upload" page of the Application Form will appear only if you choose to include it in the application as part of the loan configuration.
This page of the application form lets you upload application-related documents. You'll need to upload the required documents (indicated by a red asterisk) to create the application.
Once the documents are uploaded, click the "Create Application" button to finish creating the Application. The documents that you uploaded here will appear on the "Documents" tab of the application once it is created.