Data Integrations
How to connect to third-party data sources in the DigiFi platform.
Overview of Data Integrations
DigiFi's platform includes the ability to set up and manage data integrations that can request and receive information from external sources. Once set up, data integrations can be used within applications to automatically retrieve information and have the outputs assigned to variables (i.e. data fields).

Common examples of data integrations include connecting to credit bureaus, collateral valuation data, fraud scores and internal company systems.
The DigiFi platform can be connected to almost any external data source!
Adding a Data Integration
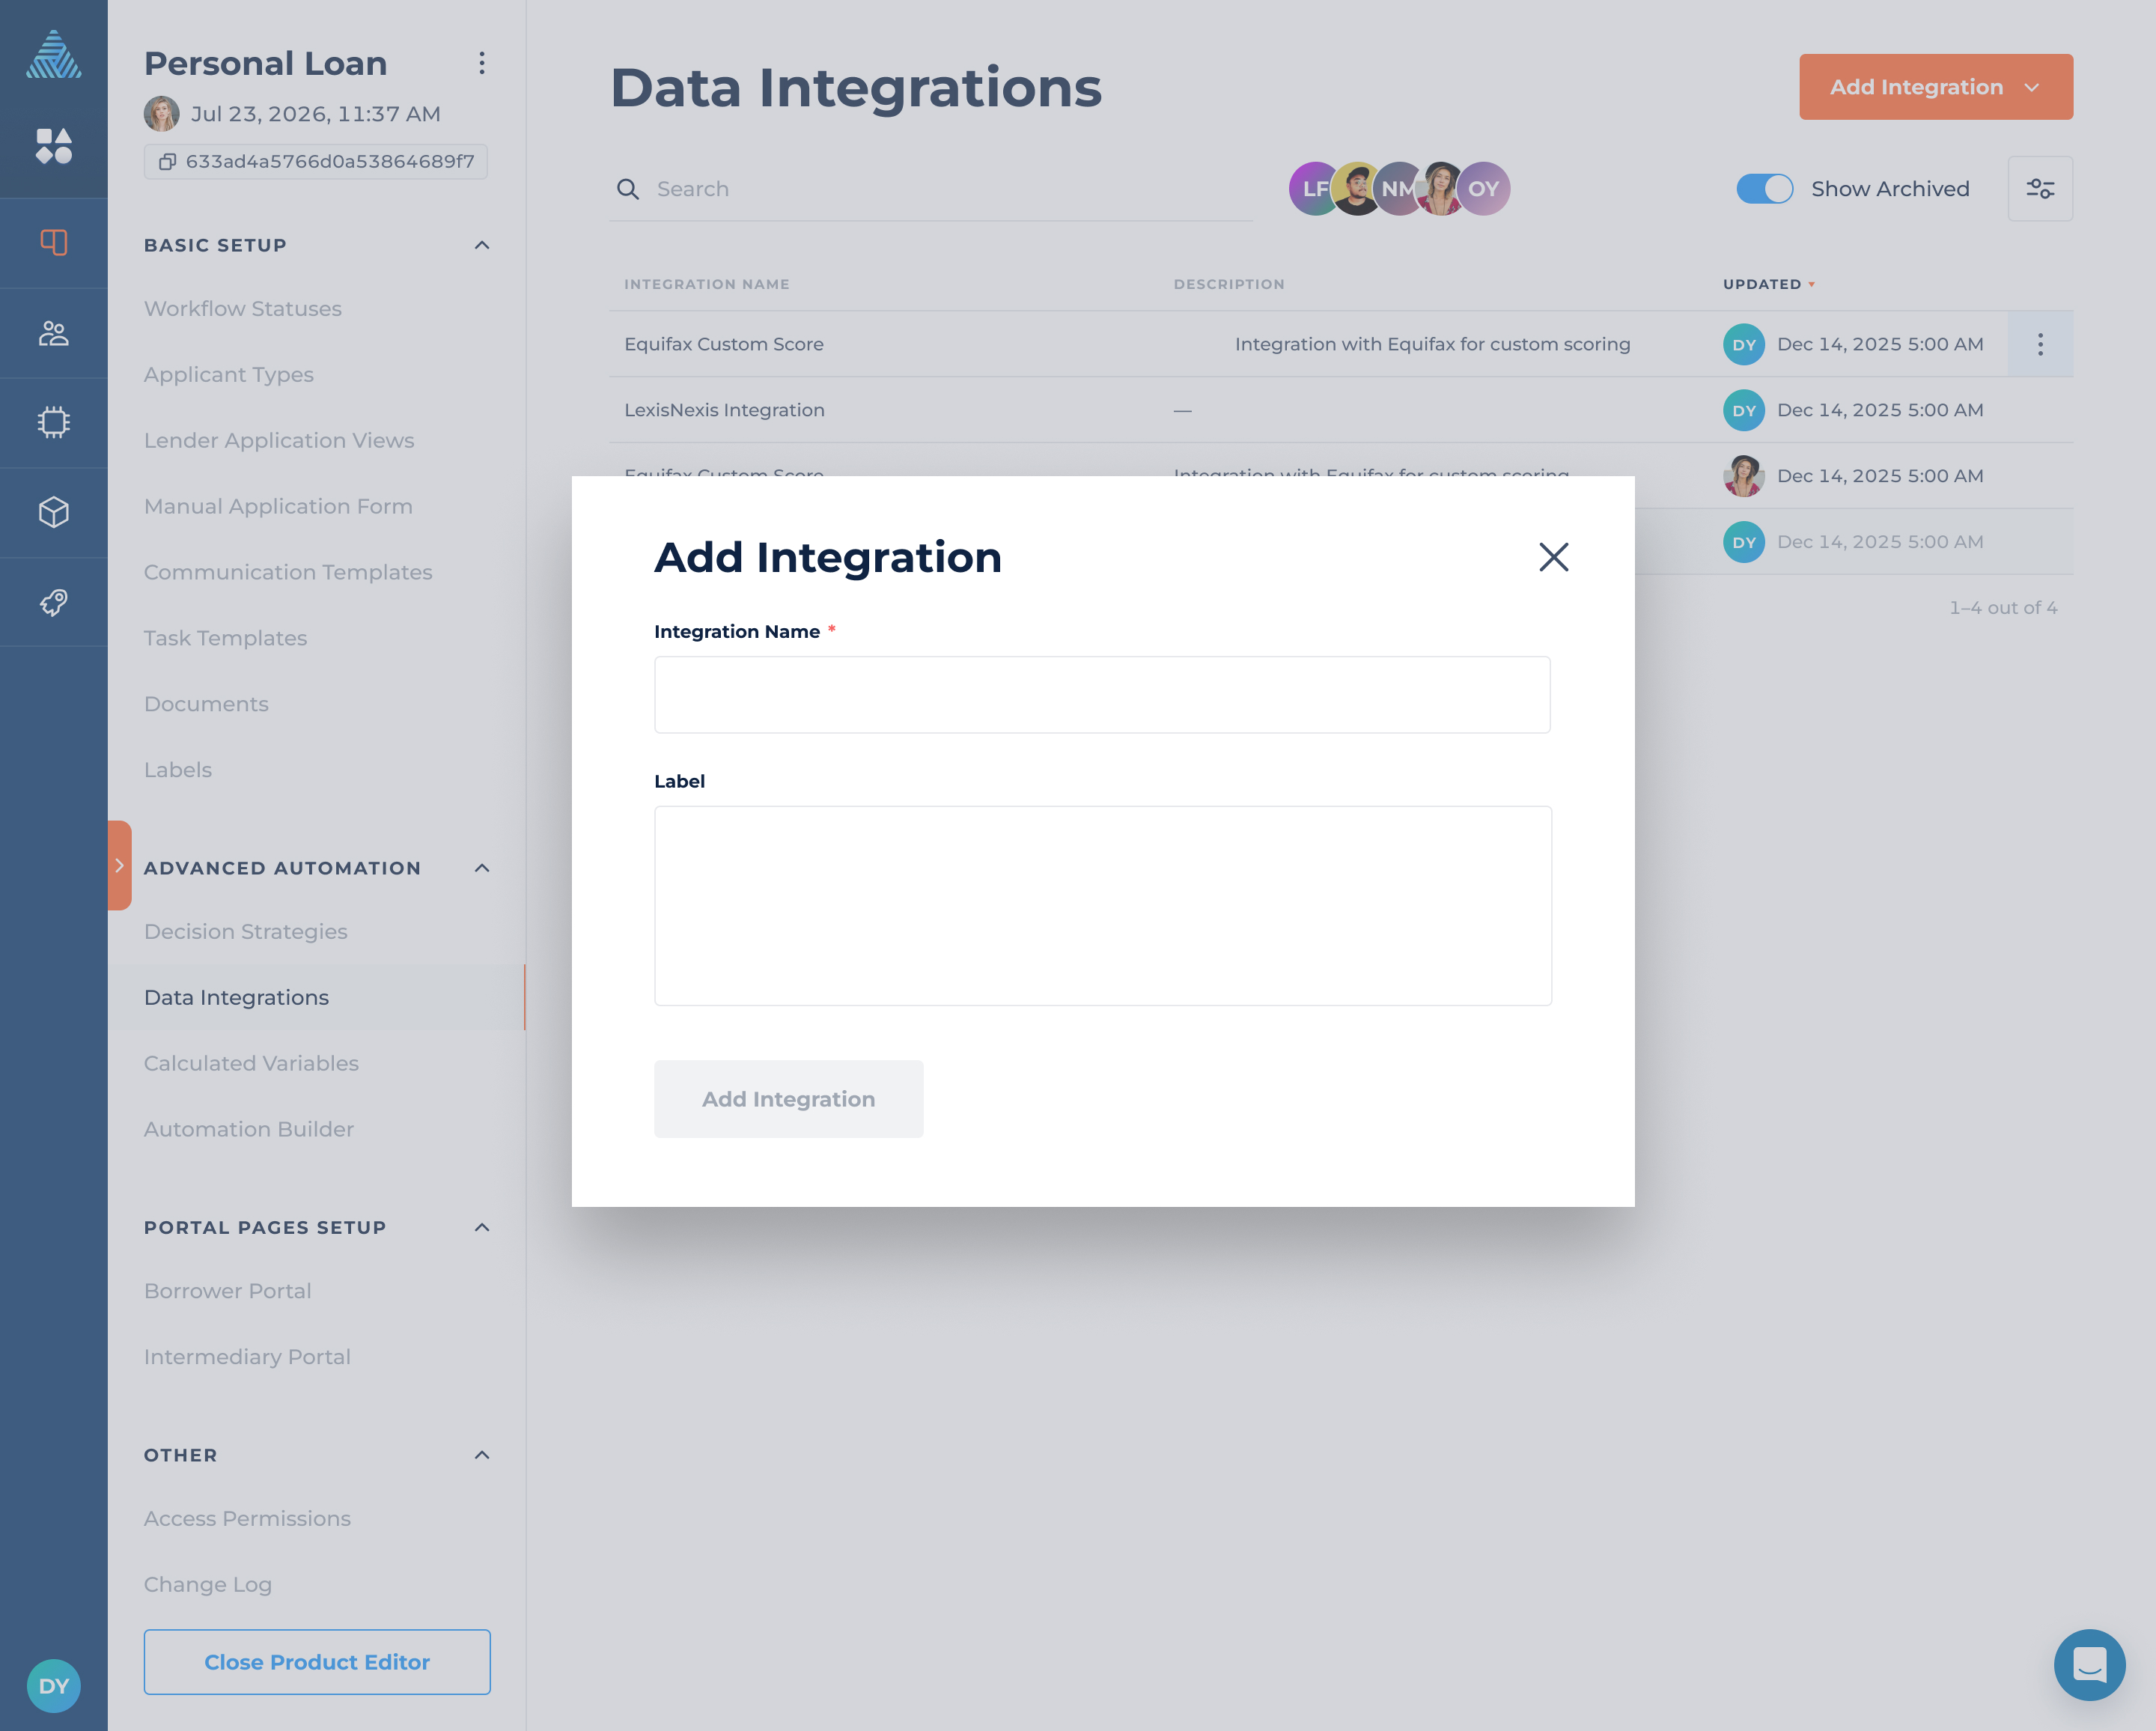
To add a new data integration:
- Navigate to Lending Setup > Loan Product > Advanced Automation > Data Integrations.
- Click the "Add Integration" button.
- Provide an Integration Name (required) and Description (optional).
Standard Integration Configuration
Once your integration is created, you'll be automatically redirected to the detailed integration configuration pages. This is separated into "Standard Configuration", "Advanced Configuration" and "Other". The "Standard Configuration" section includes 4 sub-pages:
- Request Options
- Request Headers
- Request Body
- Response Data
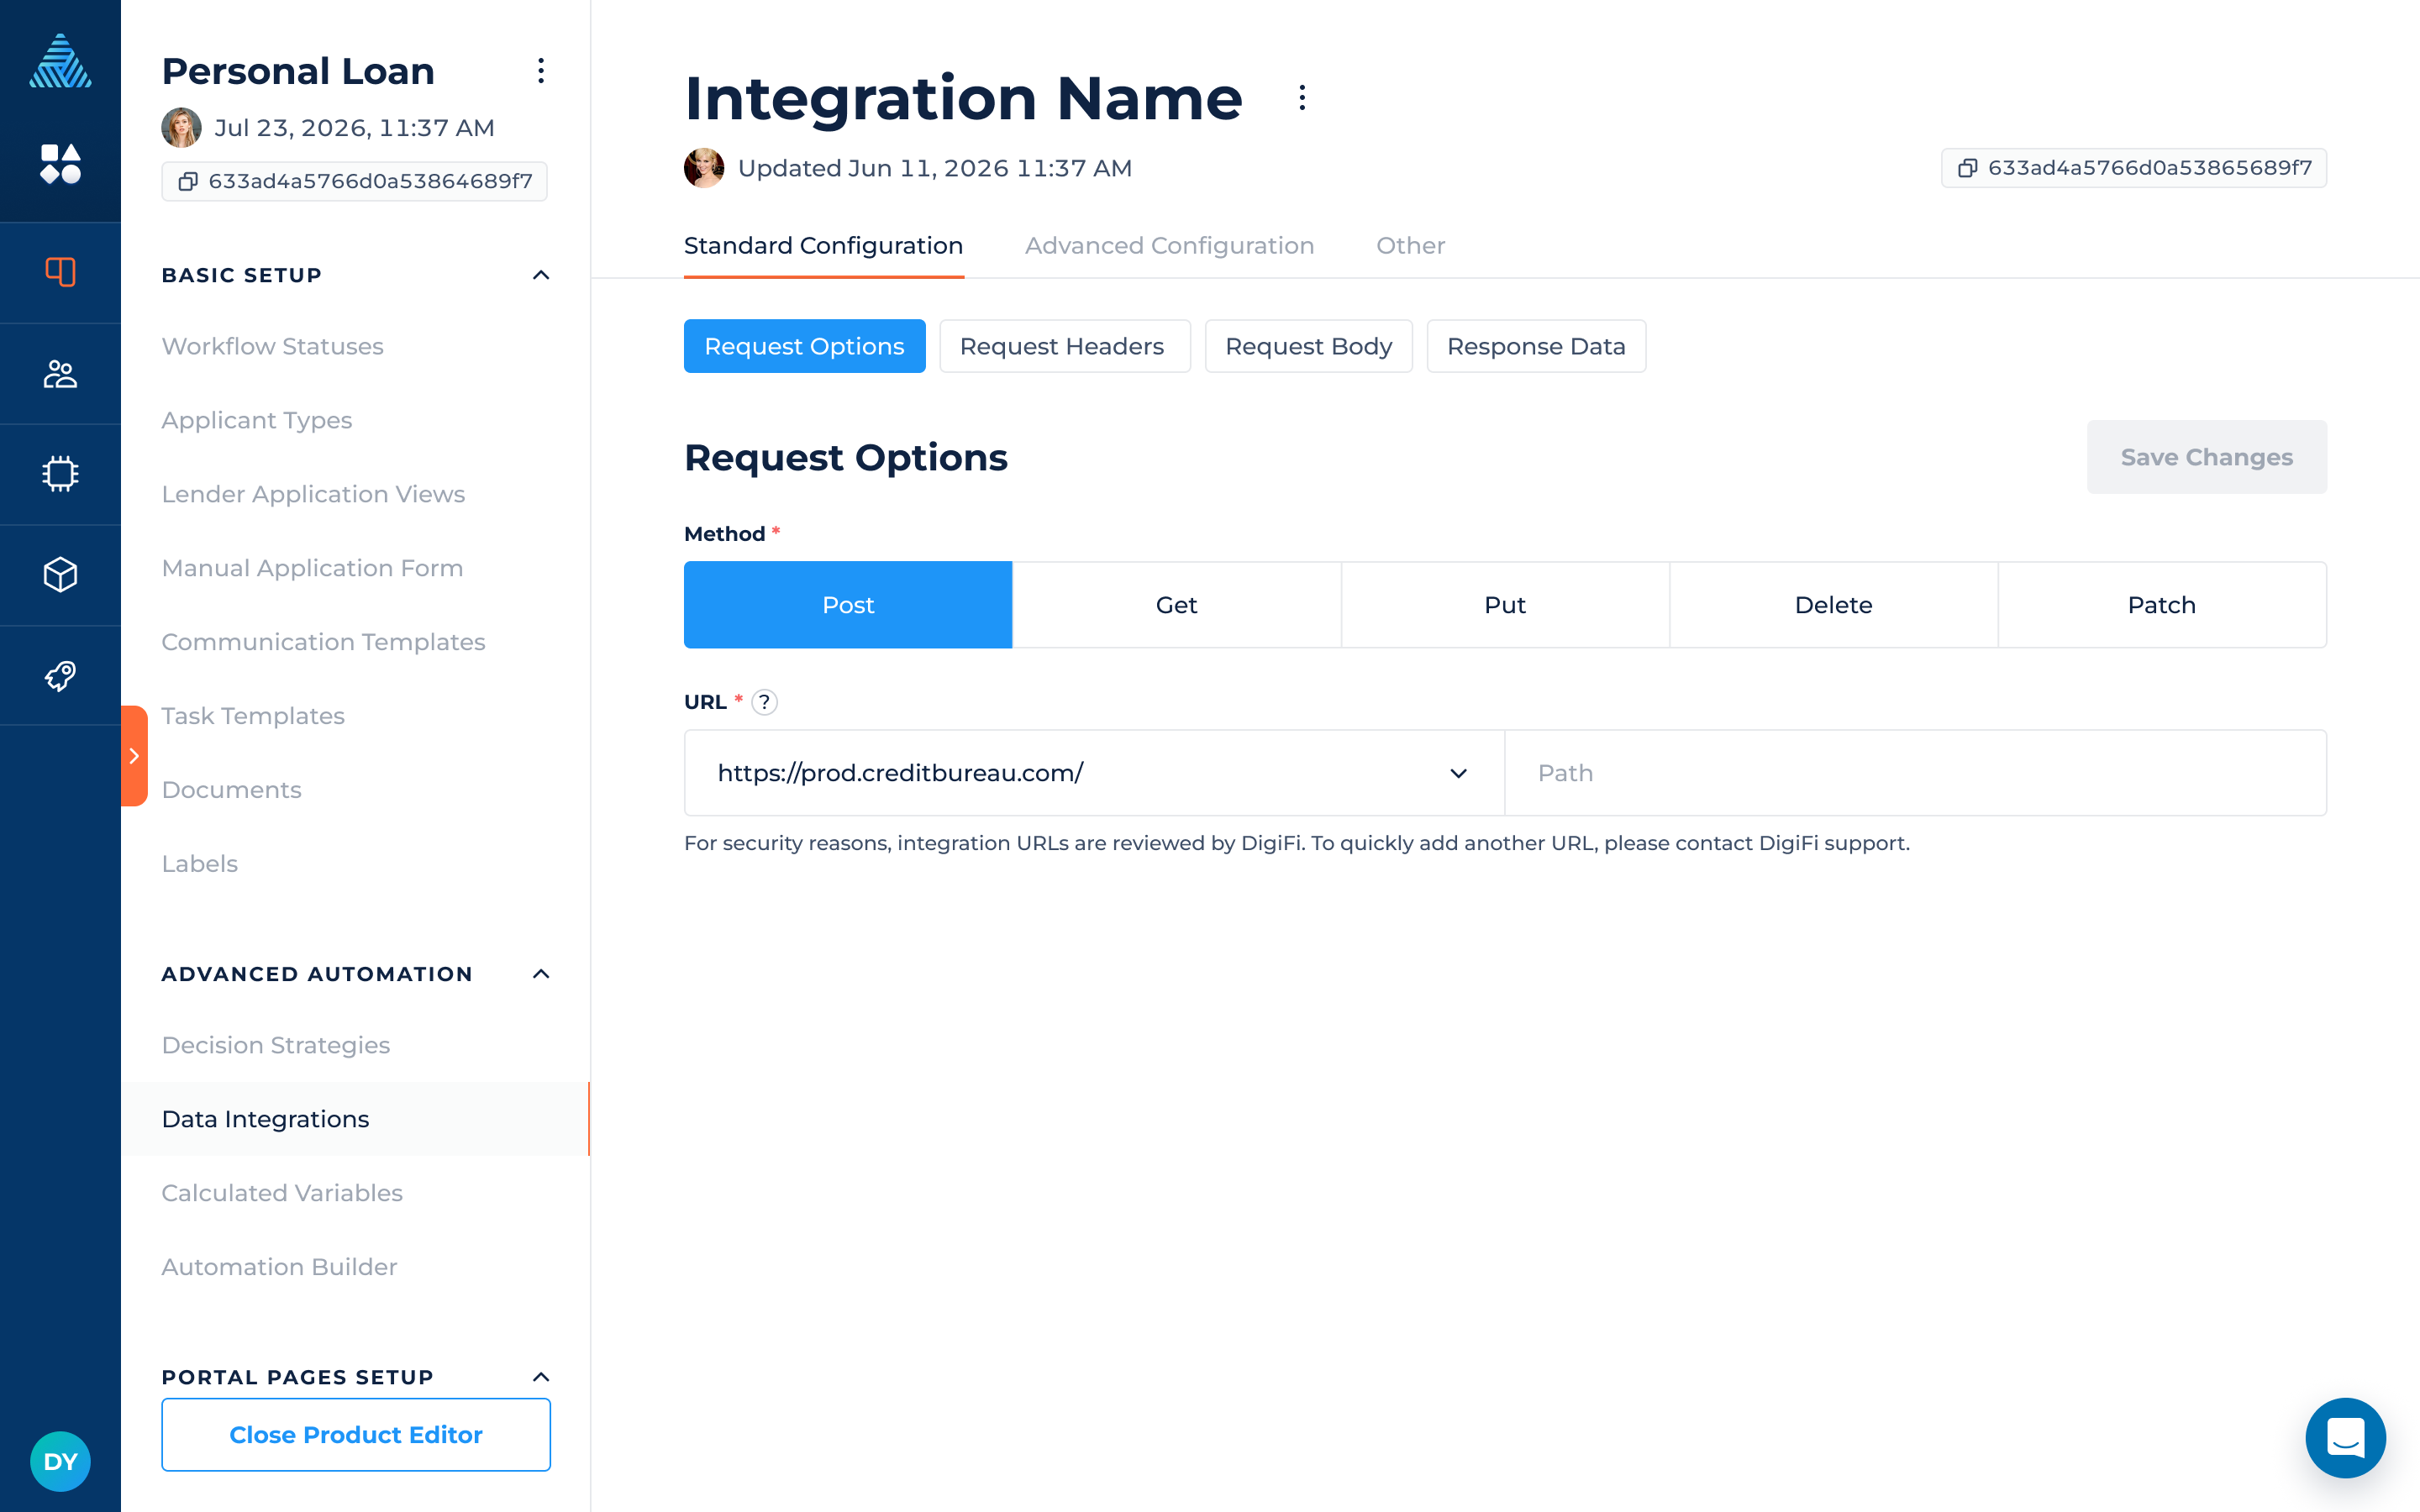
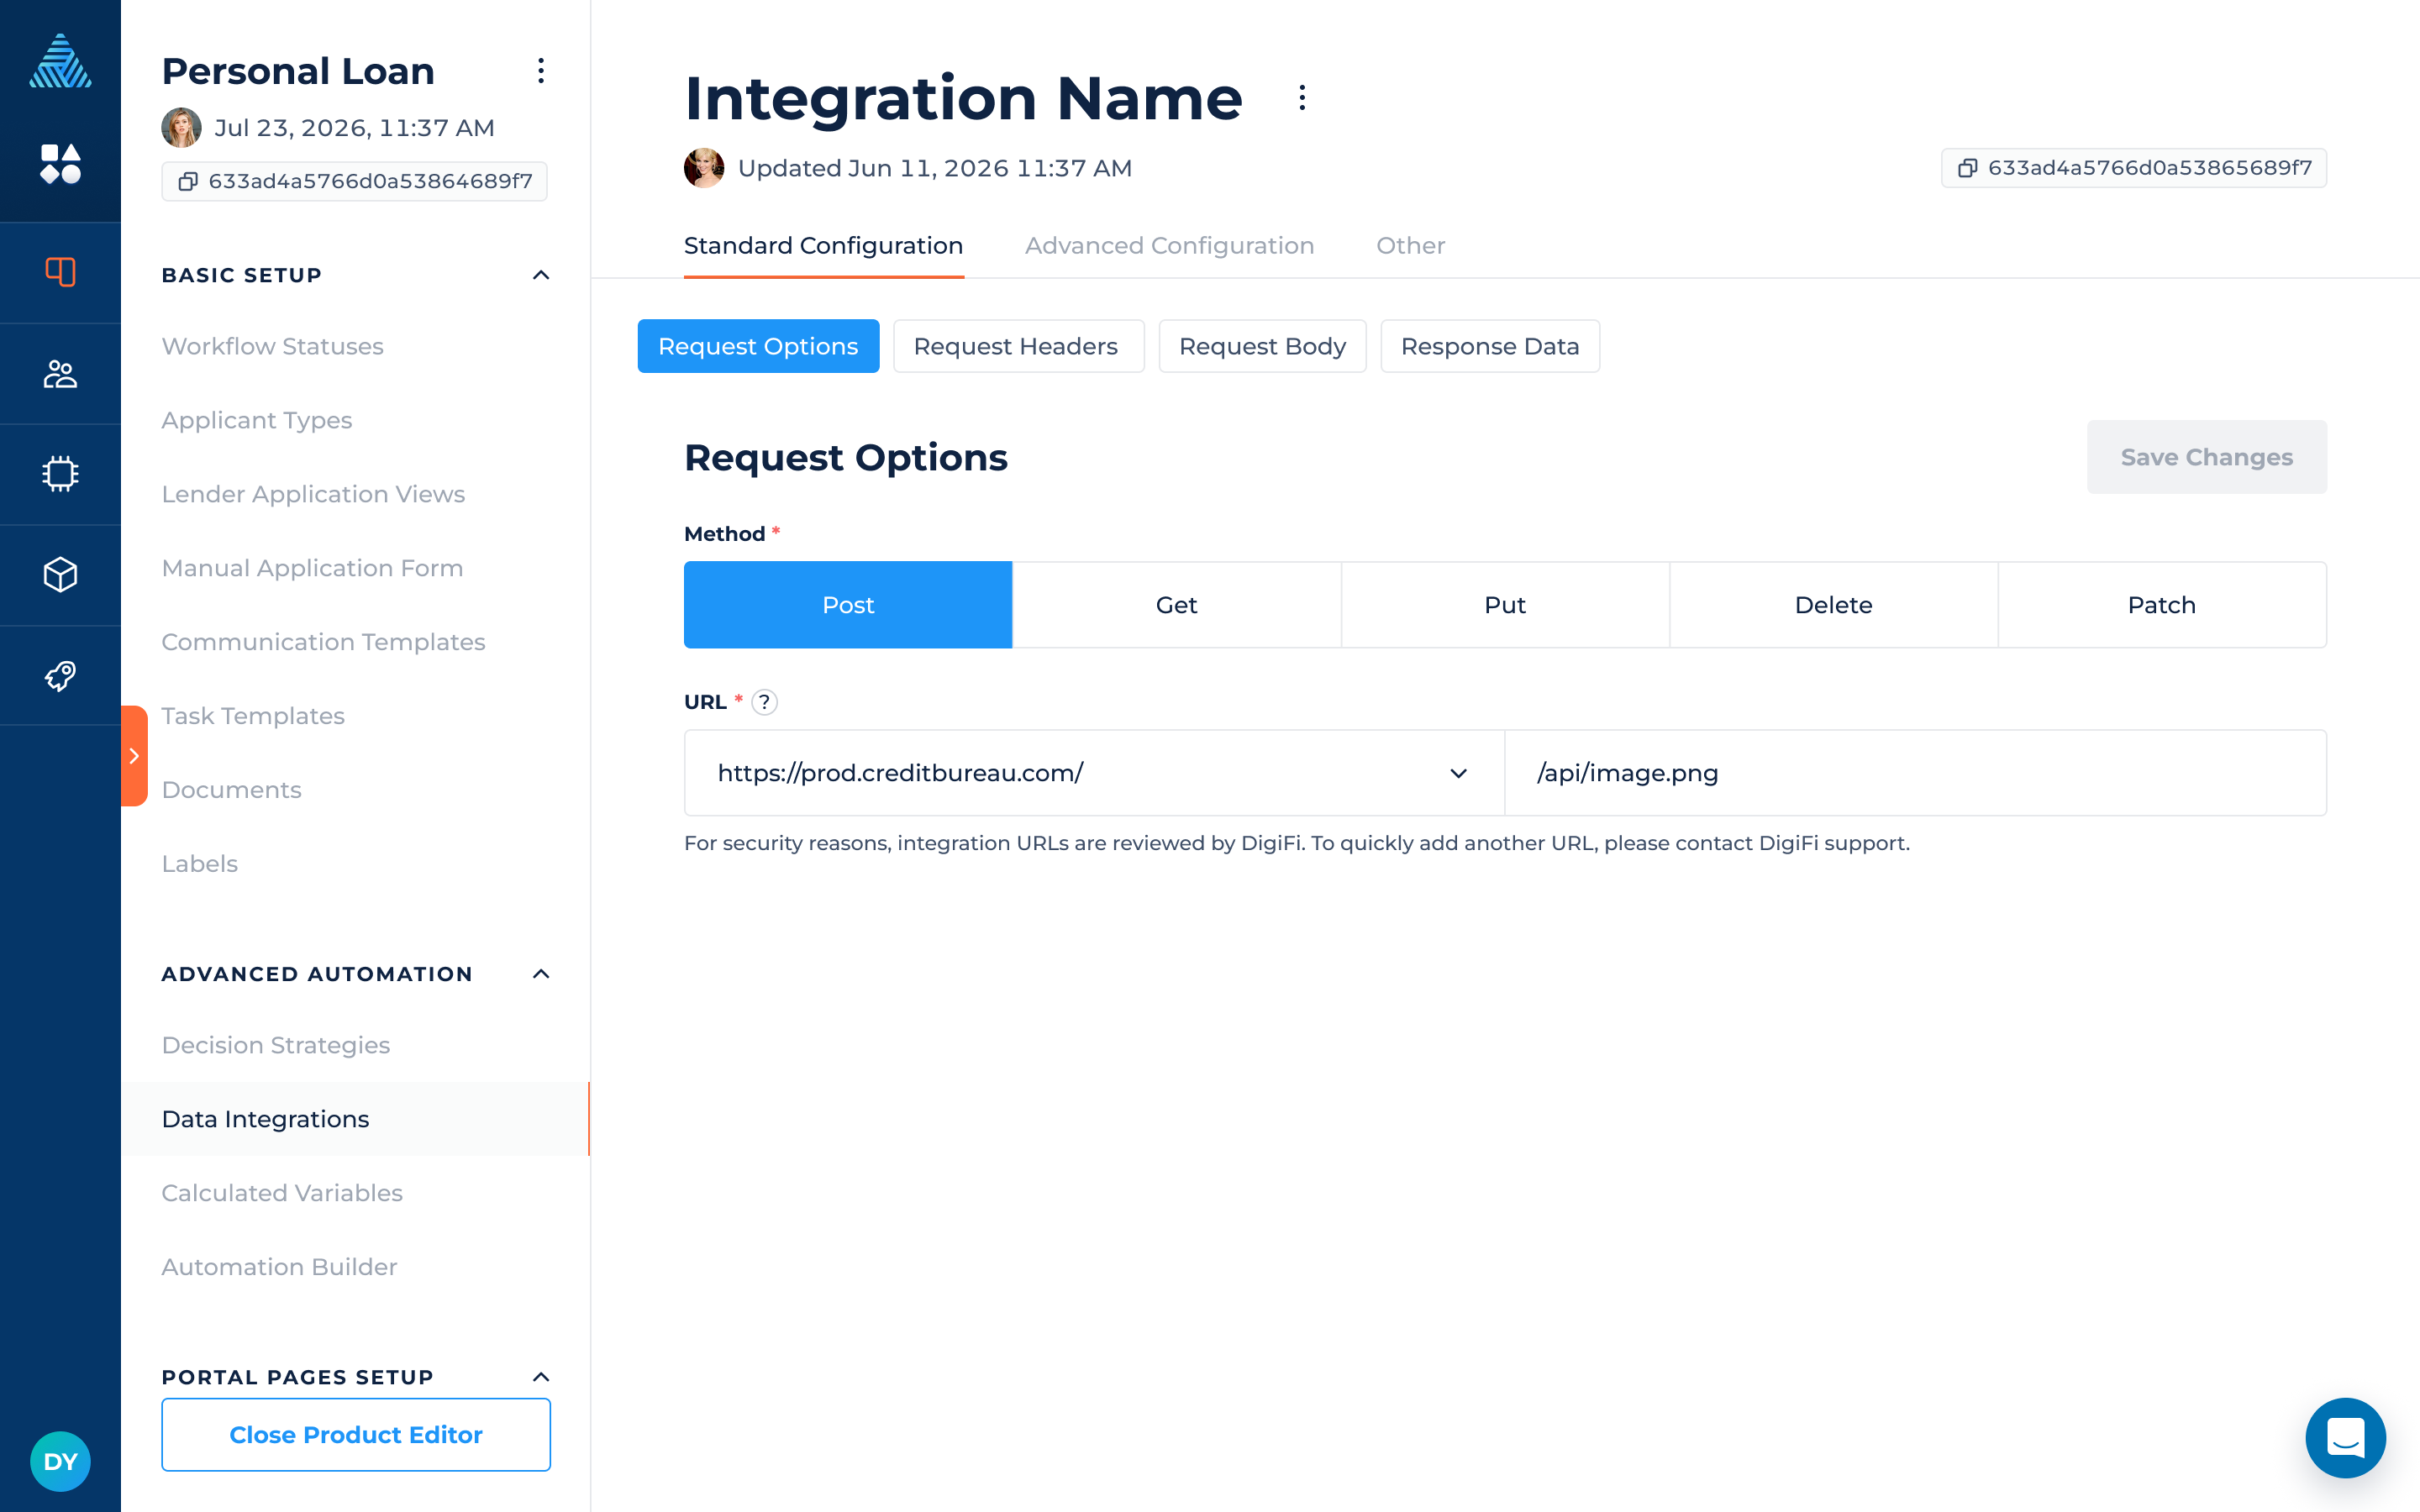
Request Options
To begin configuring a data integration, the following information must be provided:
- URL, which consists of two parts (provider + other URL parameters). For the hostname, you can select from the list of standard options. If you need an additional option, please contact DigiFi for assistance.
- Method, which is either POST, GET, PUT, DELETE or PATCH.
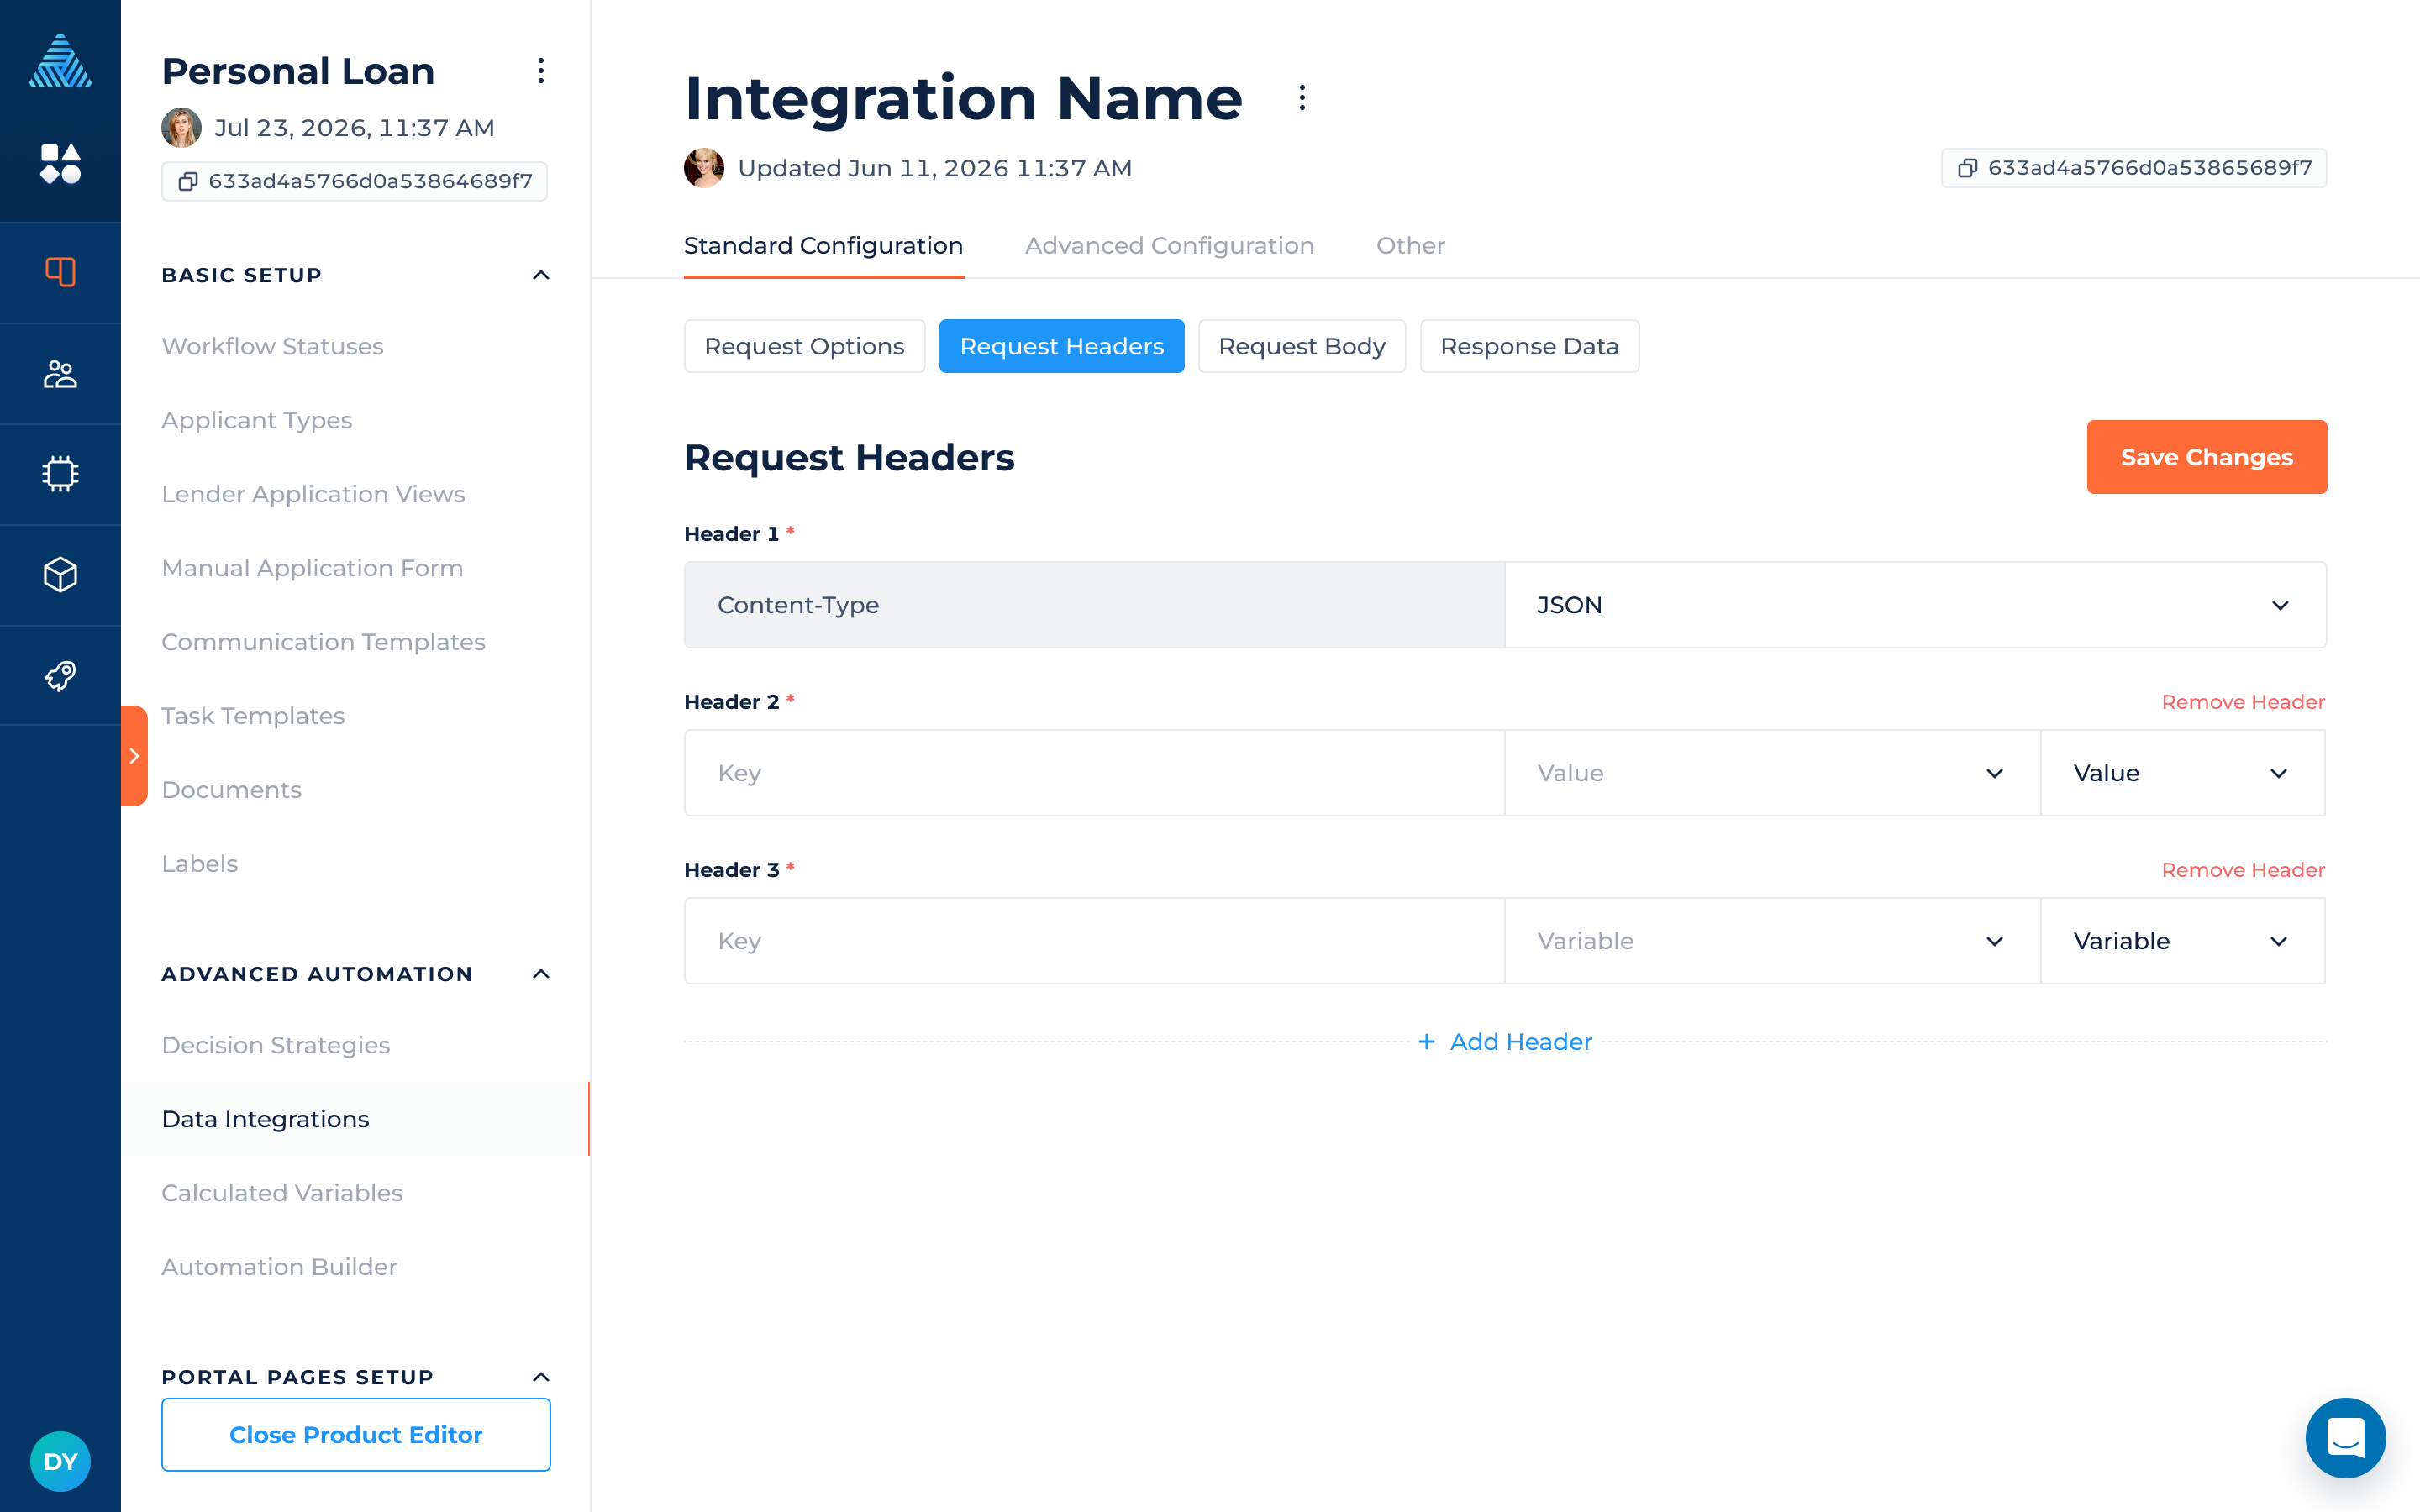
Request Headers
Almost every request requires headers to be sent. These can be standard headers (such as "Content-Type") or custom headers which are used to send credentials or specific header parameters.
Every data integration requires a "Content-Type" to be specified. This is mandatory because it defines how request data will be formatted. "Content-Type" can be one of the following options:
- JSON
- XML
- Form-data
- SOAP+XML
- Multipart/Form-Data
Every custom header can use a static value or use a variable's value (see screenshot below).
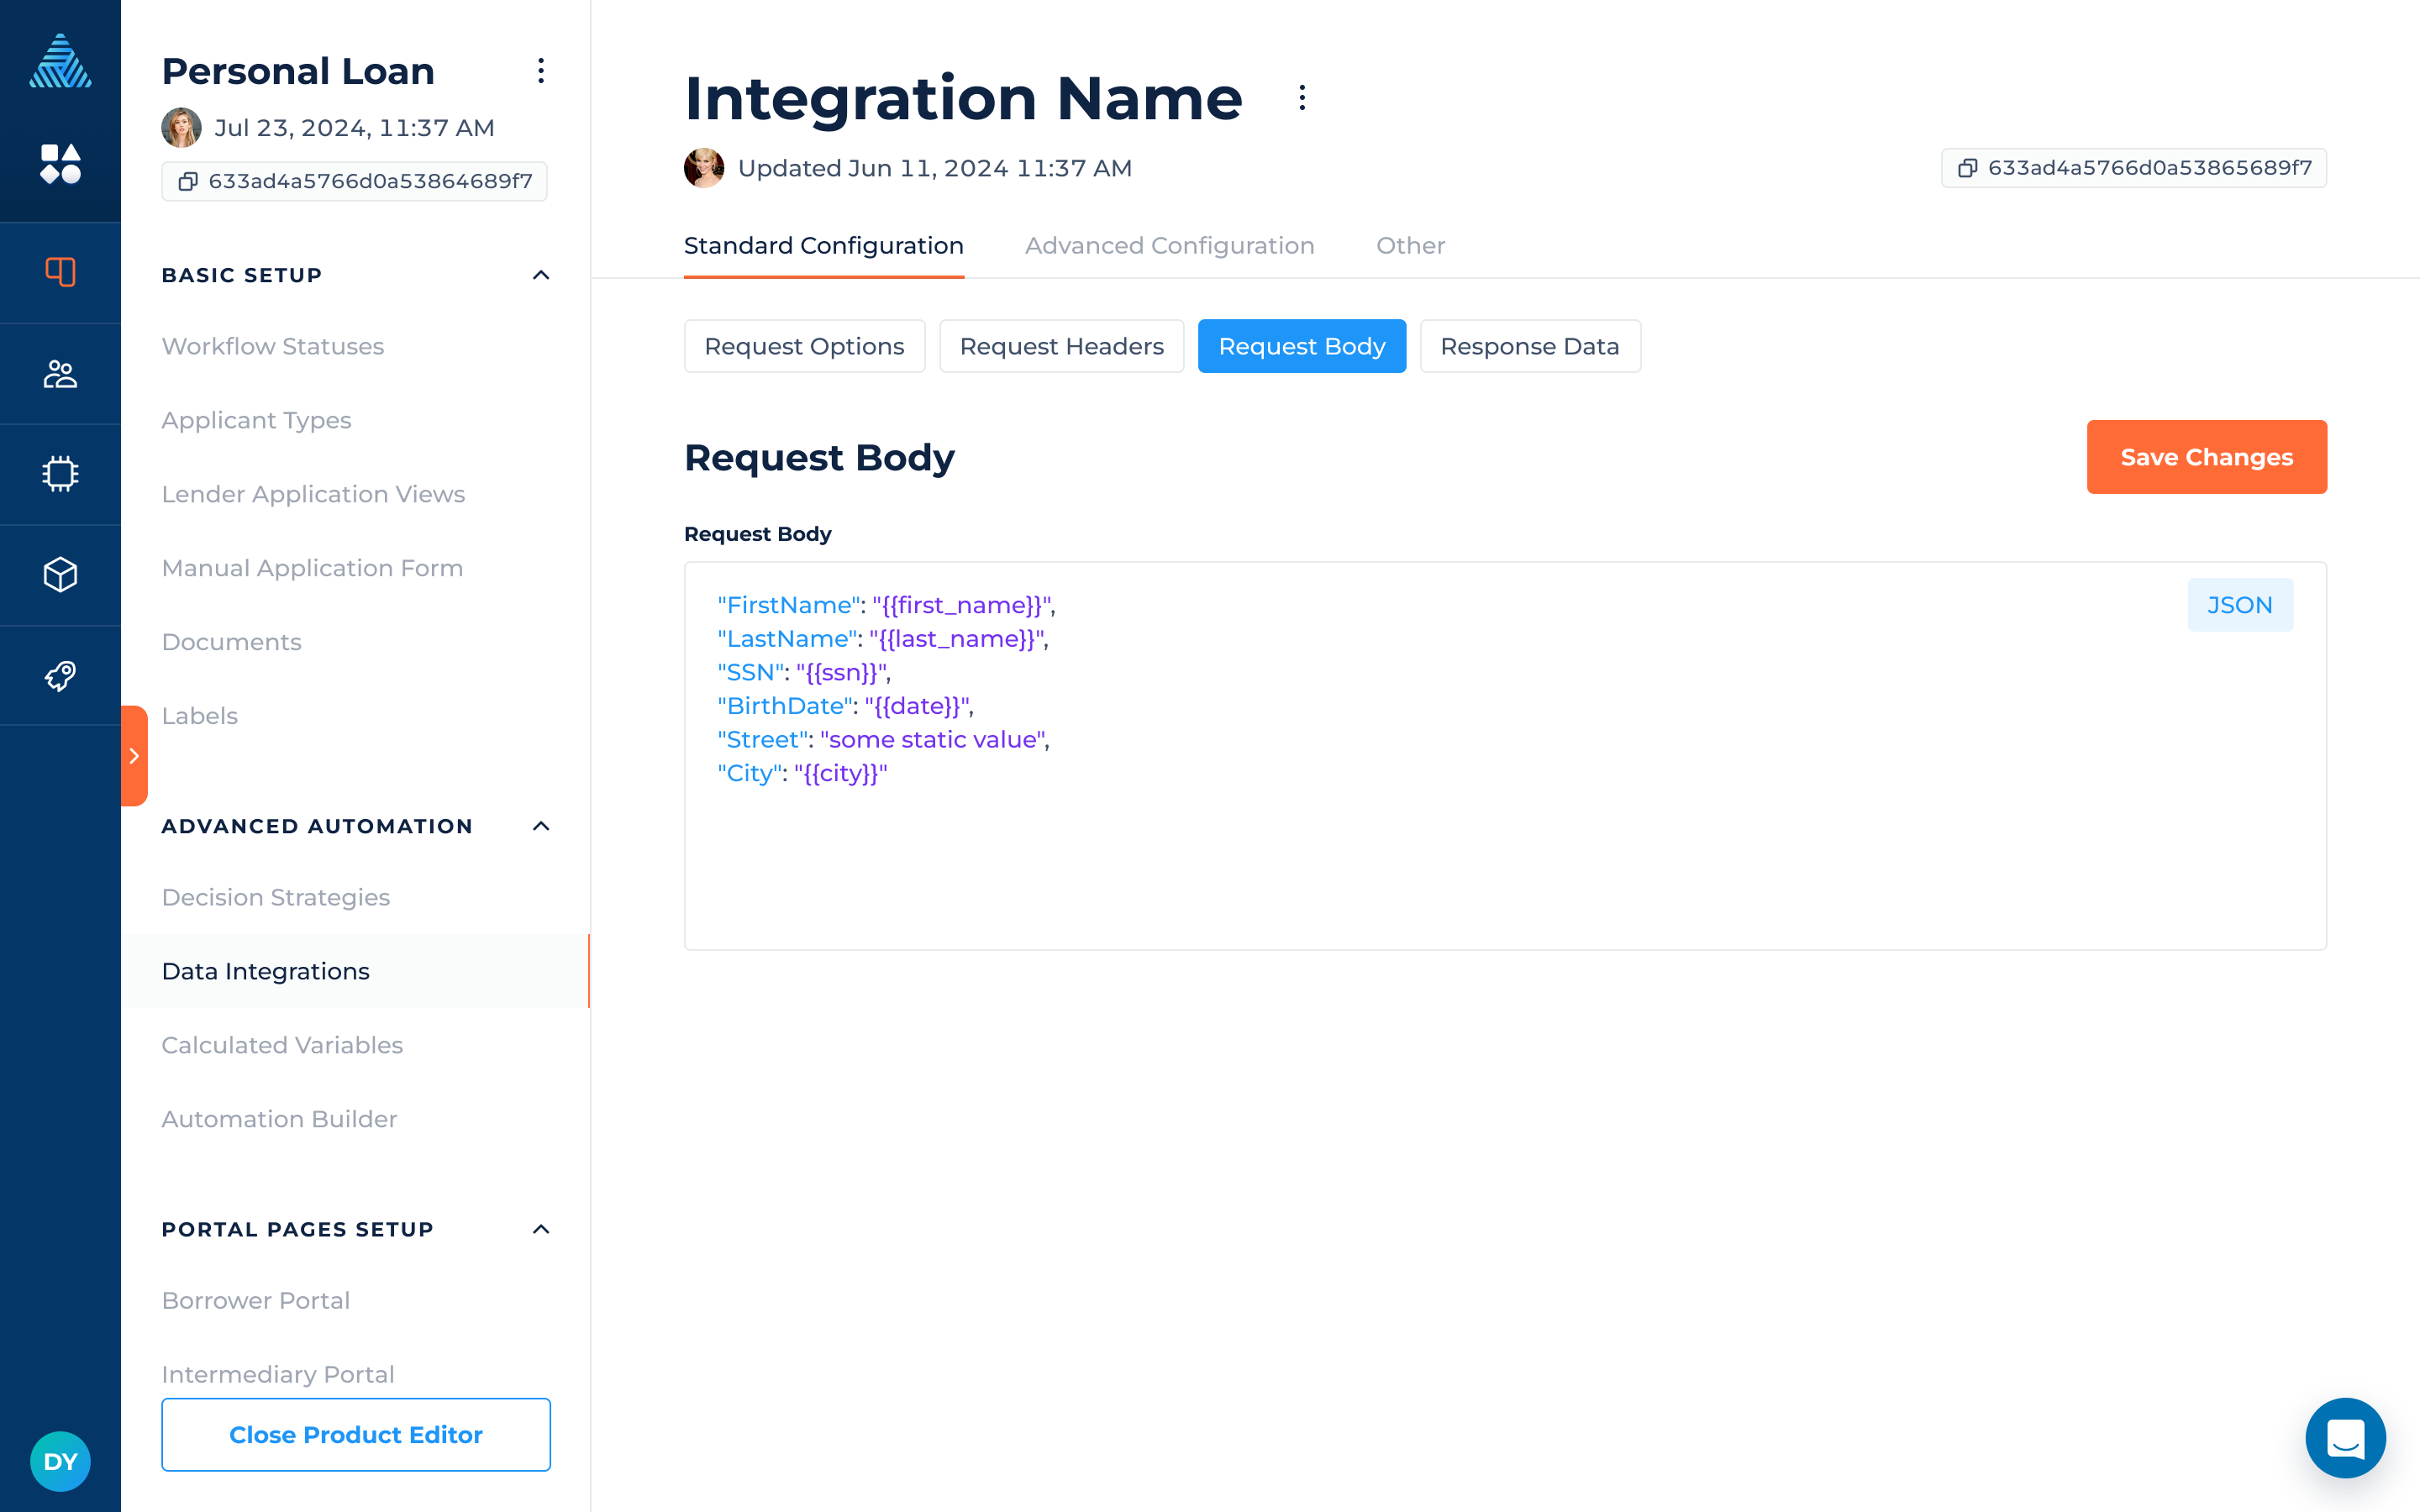
Request Body
The request body is built using either JSON or XML. You can reference variables inside a request body by wrapping their system name like {{variable_system_name}}.
For example, if your configuration looks like this:
{
  "borrower_type": "person",
  "borrower_email": "{{borrower_email}}"
}
When the request is sent, {{borrower_email}} will be replaced by the borrower's actual email like this:
{
  "borrower_type": "person",
  "borrower_email": "[email protected]"
}
For example:
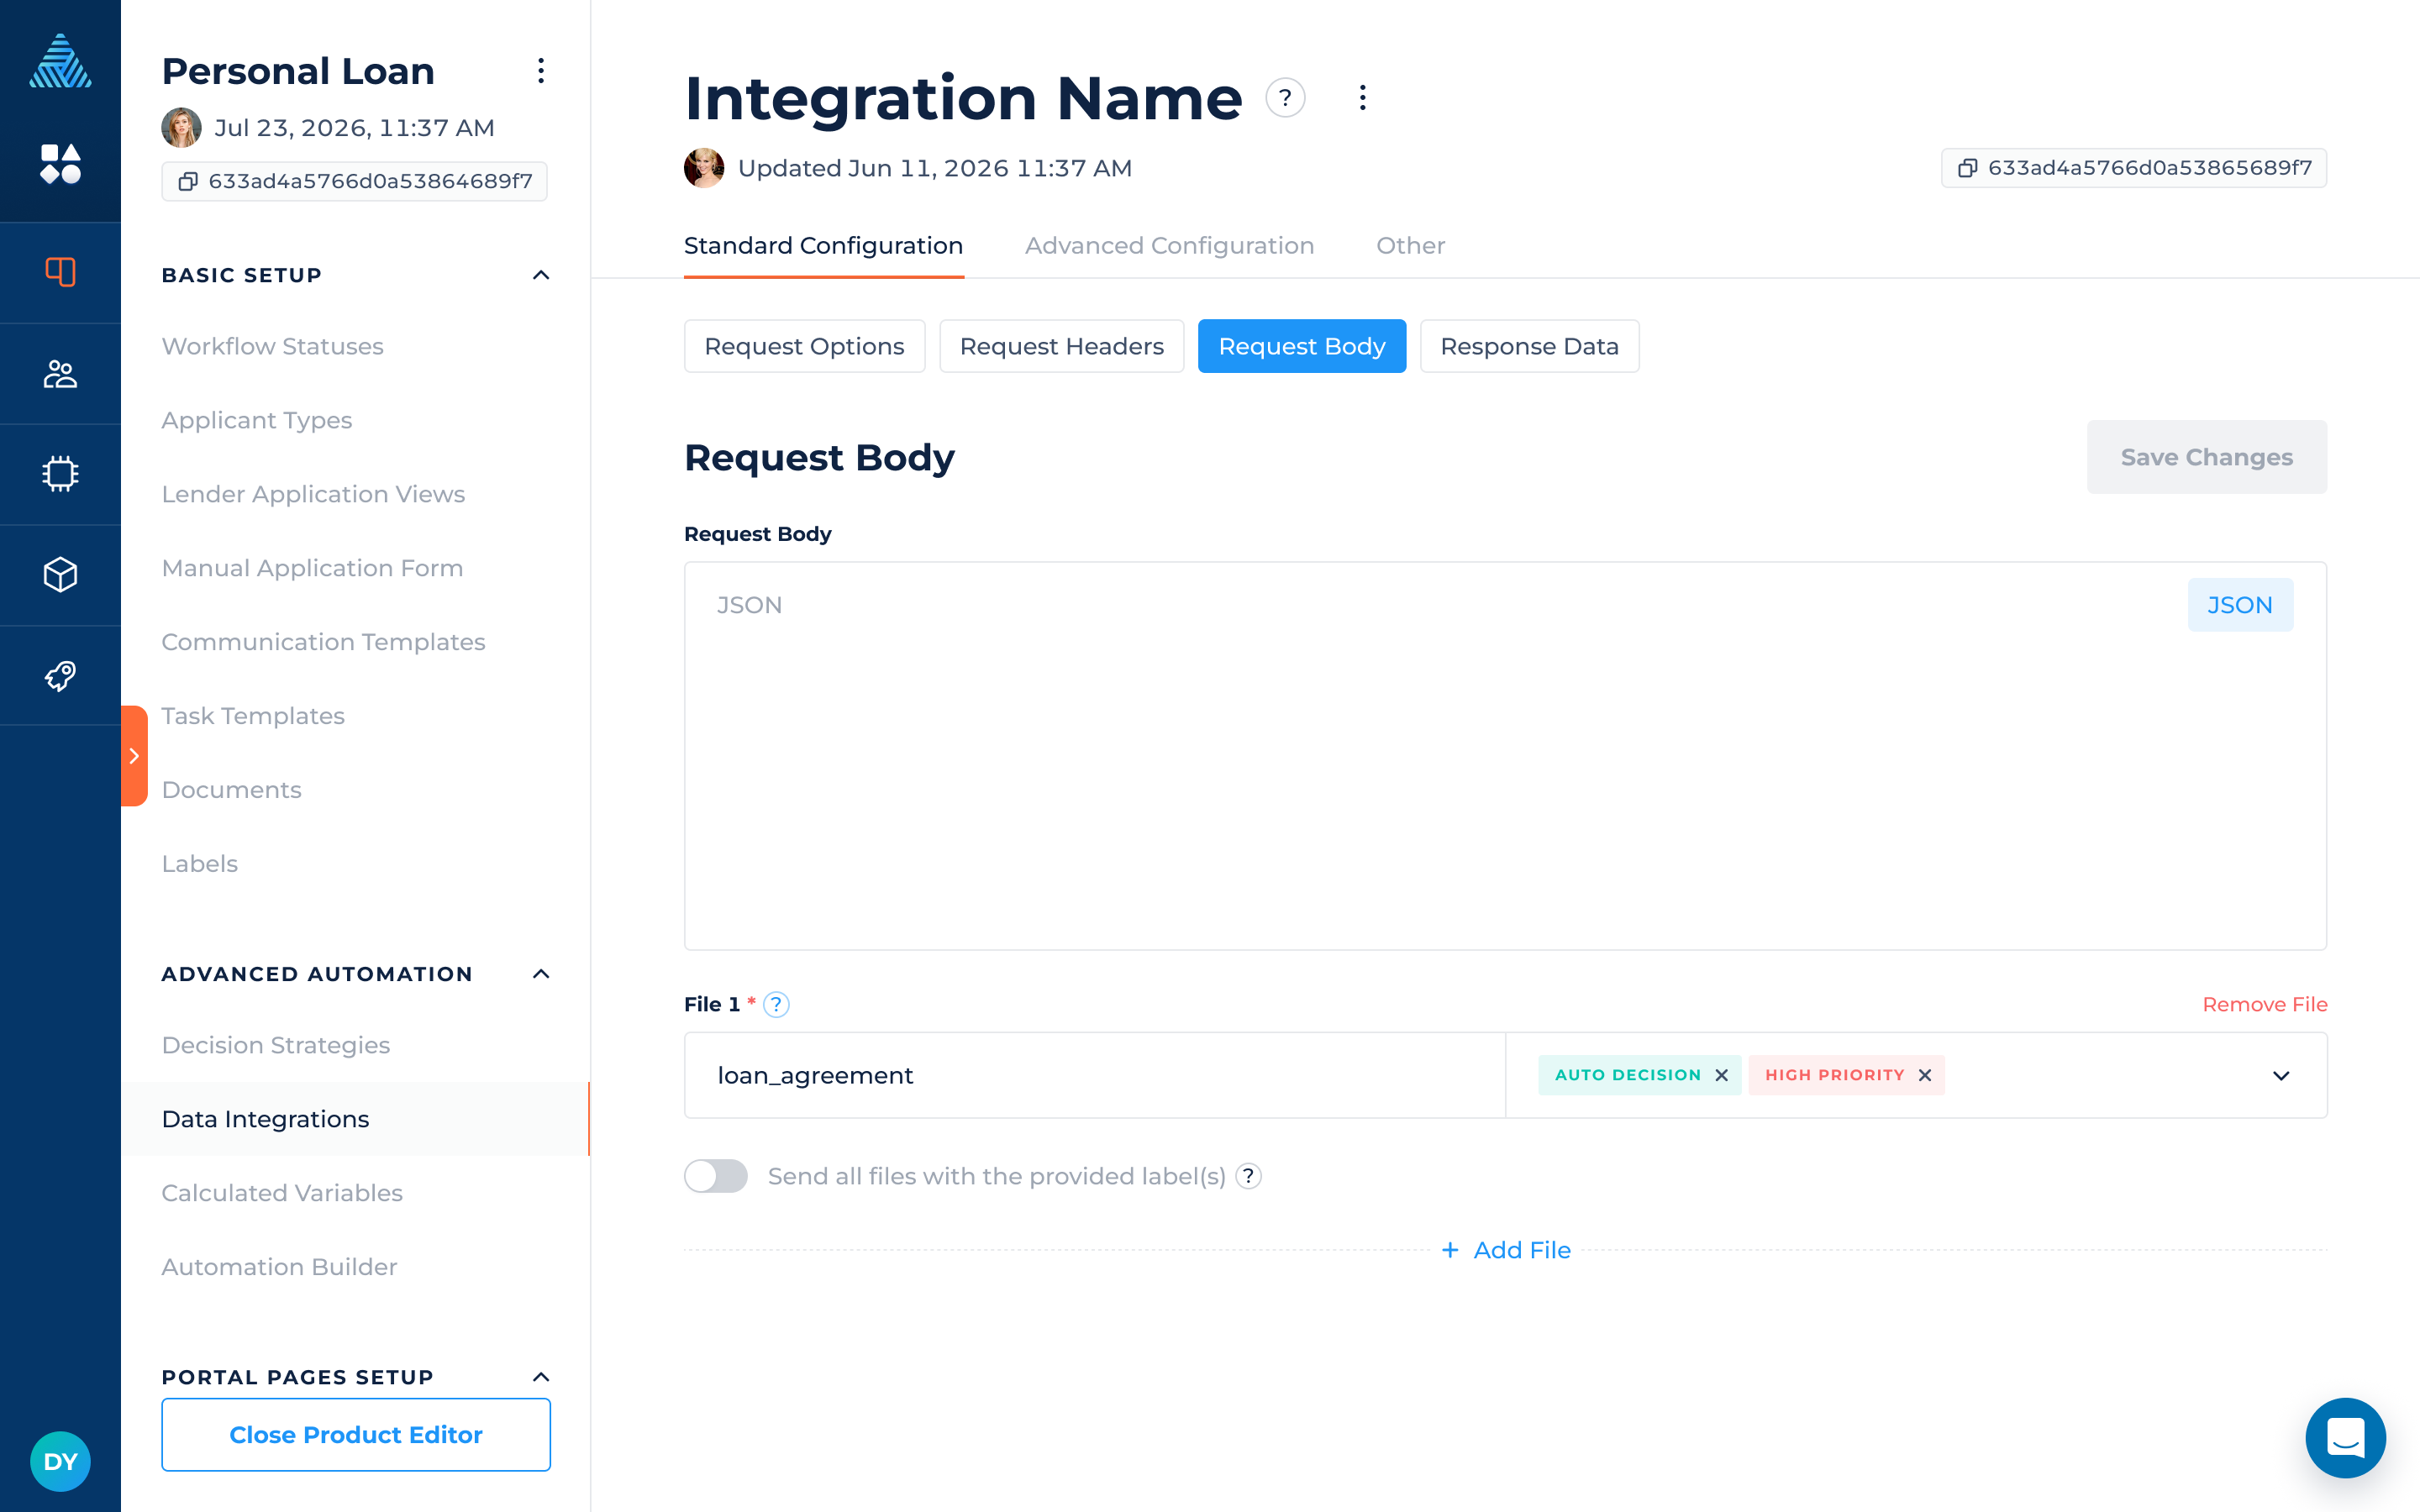
Request Body: Transferring Files
By selecting Multipart/Form-Data as the Content-Type, you will be able to send files as part of your request. This can be achieved by using document labels, which help the integration identify the specific documents that need to be transferred. For example, you can automatically generate a document, assign a label to it and then pass it through an integration. The transferred files will be reflected in the integration results.
By default, only the latest files with the selected label(s) will be transferred through the integration. If you need to transfer all files with those label(s), enable the "Send all files with the provided labels" toggle.
The following integration document types can be transferred: .zip, .ico, .pdf, .jpg, .jpeg, .png, .svg, .gif, .doc, .docx, .heic, .xls, .xlsx, .ppt, .pptx, .csv, .txt, .json, .xml and .mp3. We accept the documents with max size of 25 MB. A maximum of 5 files can be transferred in a single integration.
Retrieving Files
DigiFi can receive files (including PDFs, CSVs, and images) from external systems via data integrations. These files, received as part of the integration response, are subsequently stored in both the integration results and application documents. For example, if your vendor provides credit reports in a more user-friendly format, such as a PDF, you can configure a data integration to retrieve these reports.
Response Data
When an API response is received, DigiFi converts it into JSON (regardless of the response format). This response can be traversed through the traversal path.
For each field you would like to extract from the response, you'll need to select a DigiFi variable (which the value will assign to) and provide a traversal path (which is where the value can be found in the response).
Traversal path is used to get response data items. For example if response data looks like:
{
  "variables": {
    "borrower_company_name": "Wholesale",
    "borrower_phones": ["+372348545", "+3443534636"]
  }
}
The traversal path may look like: variables.borrower_company_name.
Response Data: Working With Table Variables
By selecting the table variable for “Extracted Field“ to match the result from the response file, the system shows additional fields for columns mapping.
To configure the traversal path for each column, provide the traversal path to the main object. Add the property path to map the values.
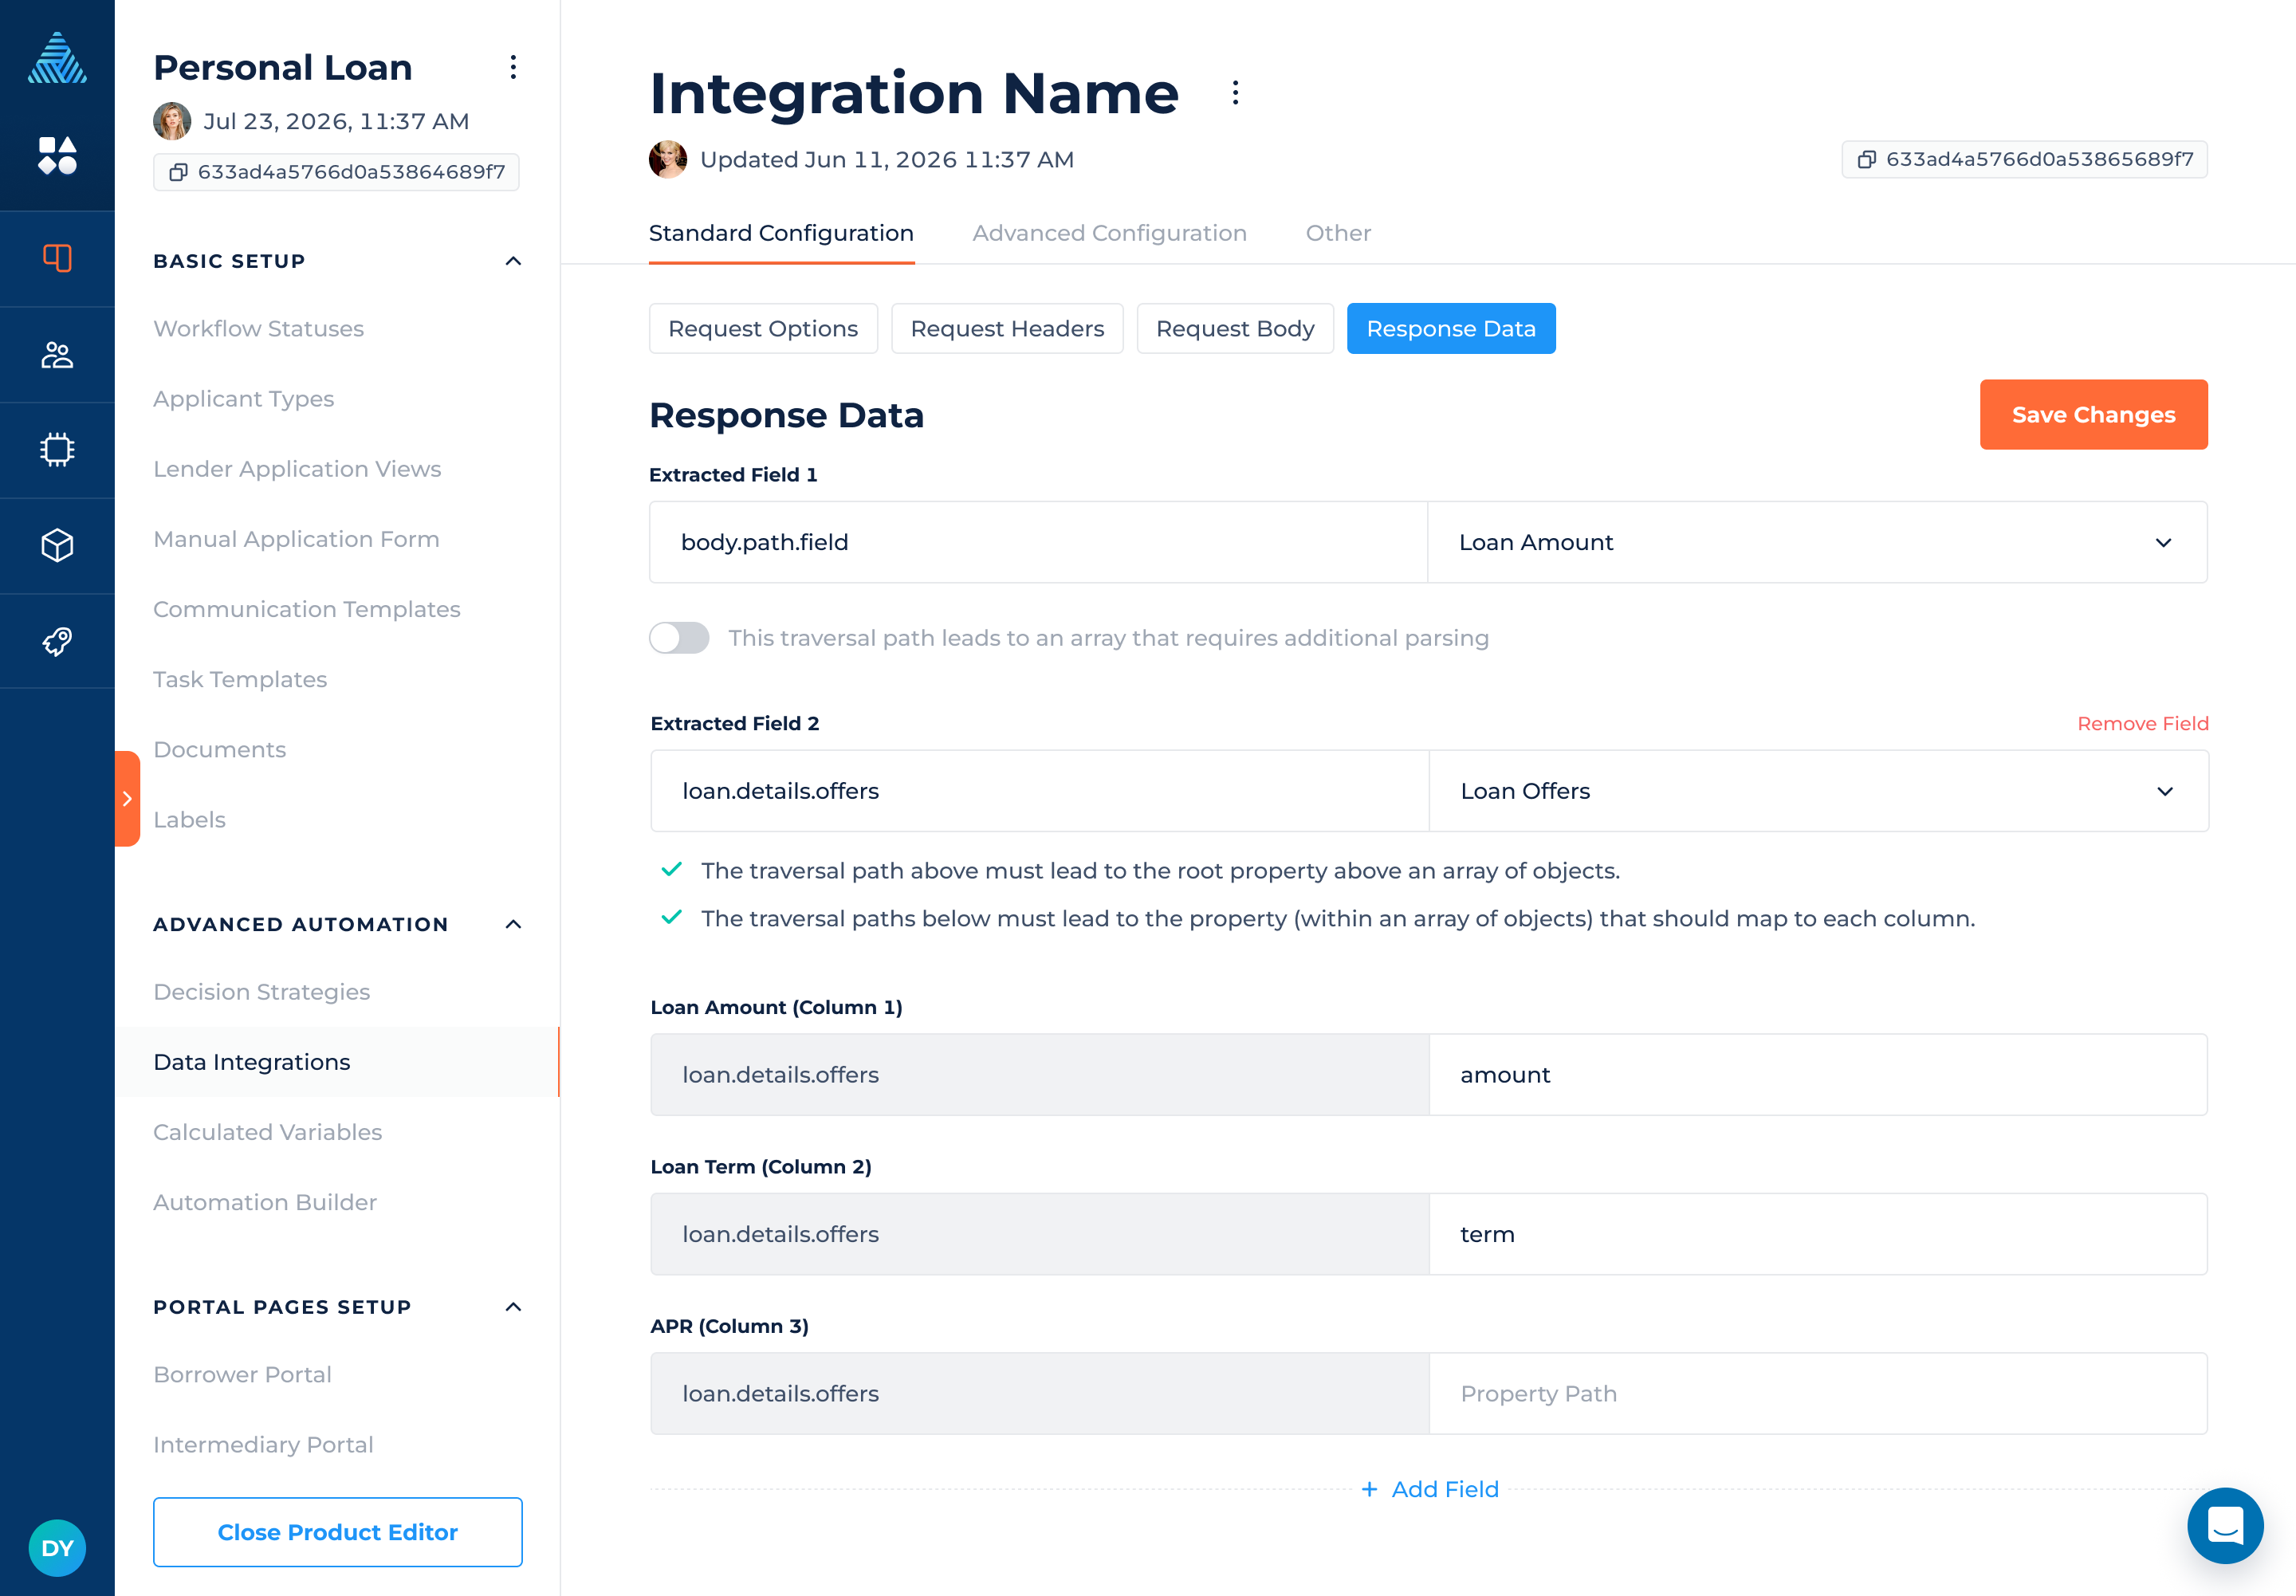
Column requirement (*) depends on the variable-column setting. If the column in the table is optional, the path filling can be omitted.
When running the integration, the response file will be parsed into the table according to the configured settings.
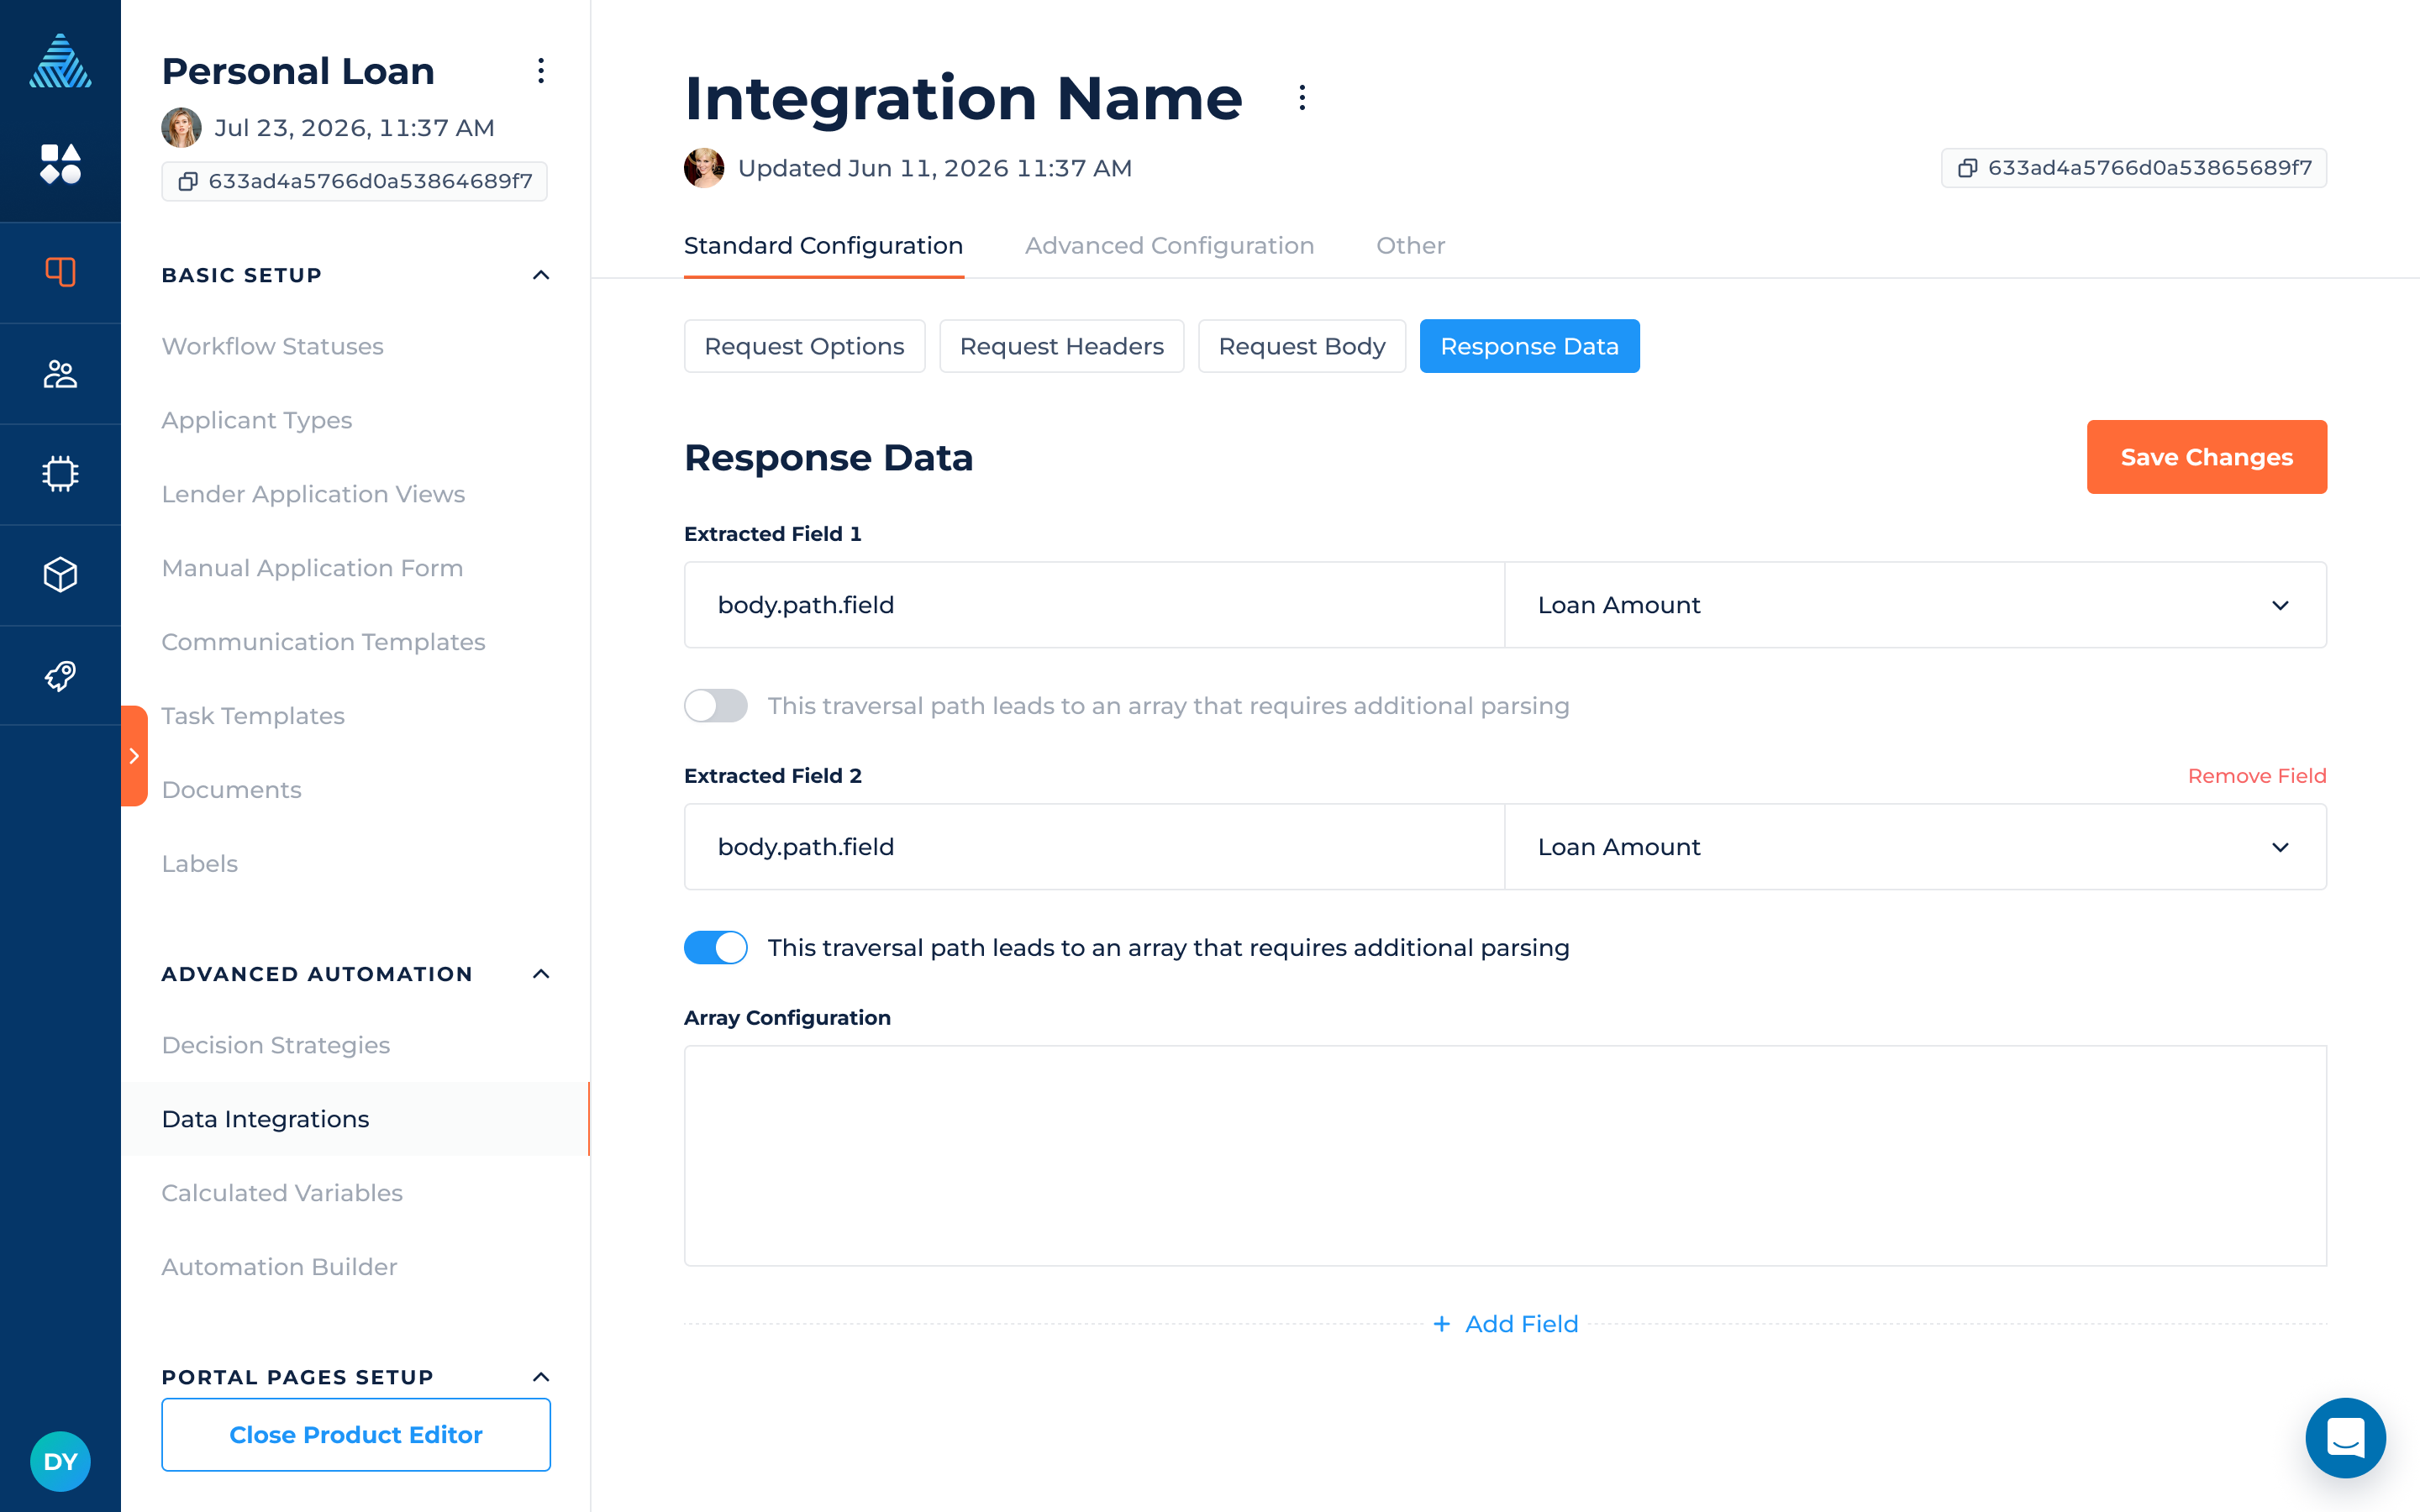
Response Data: Array Parsing Configuration
In case of arrays in the response data additional configuration can be used for a field:
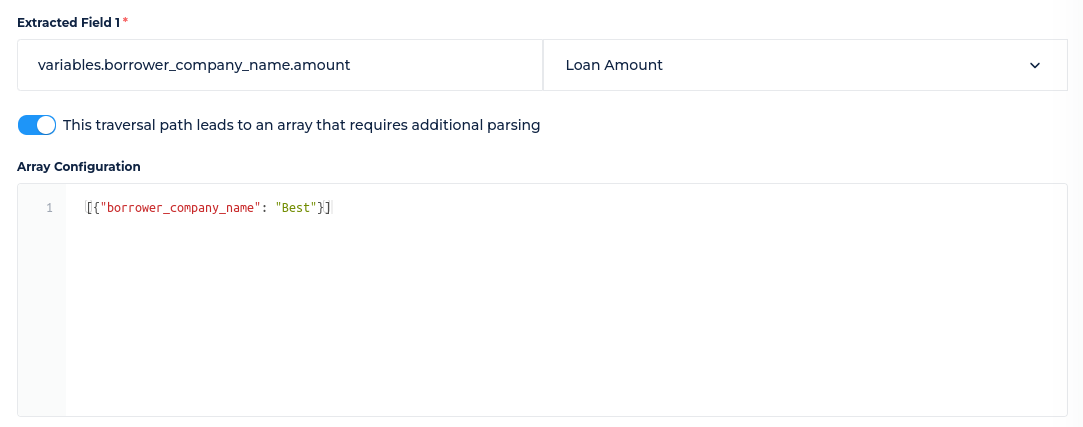
This configuration will assign 100 to Loan Amount in case if the following JSON will be received in response:
{
"variables": [{"borrower_company_name": "Best", "amount": 100}]
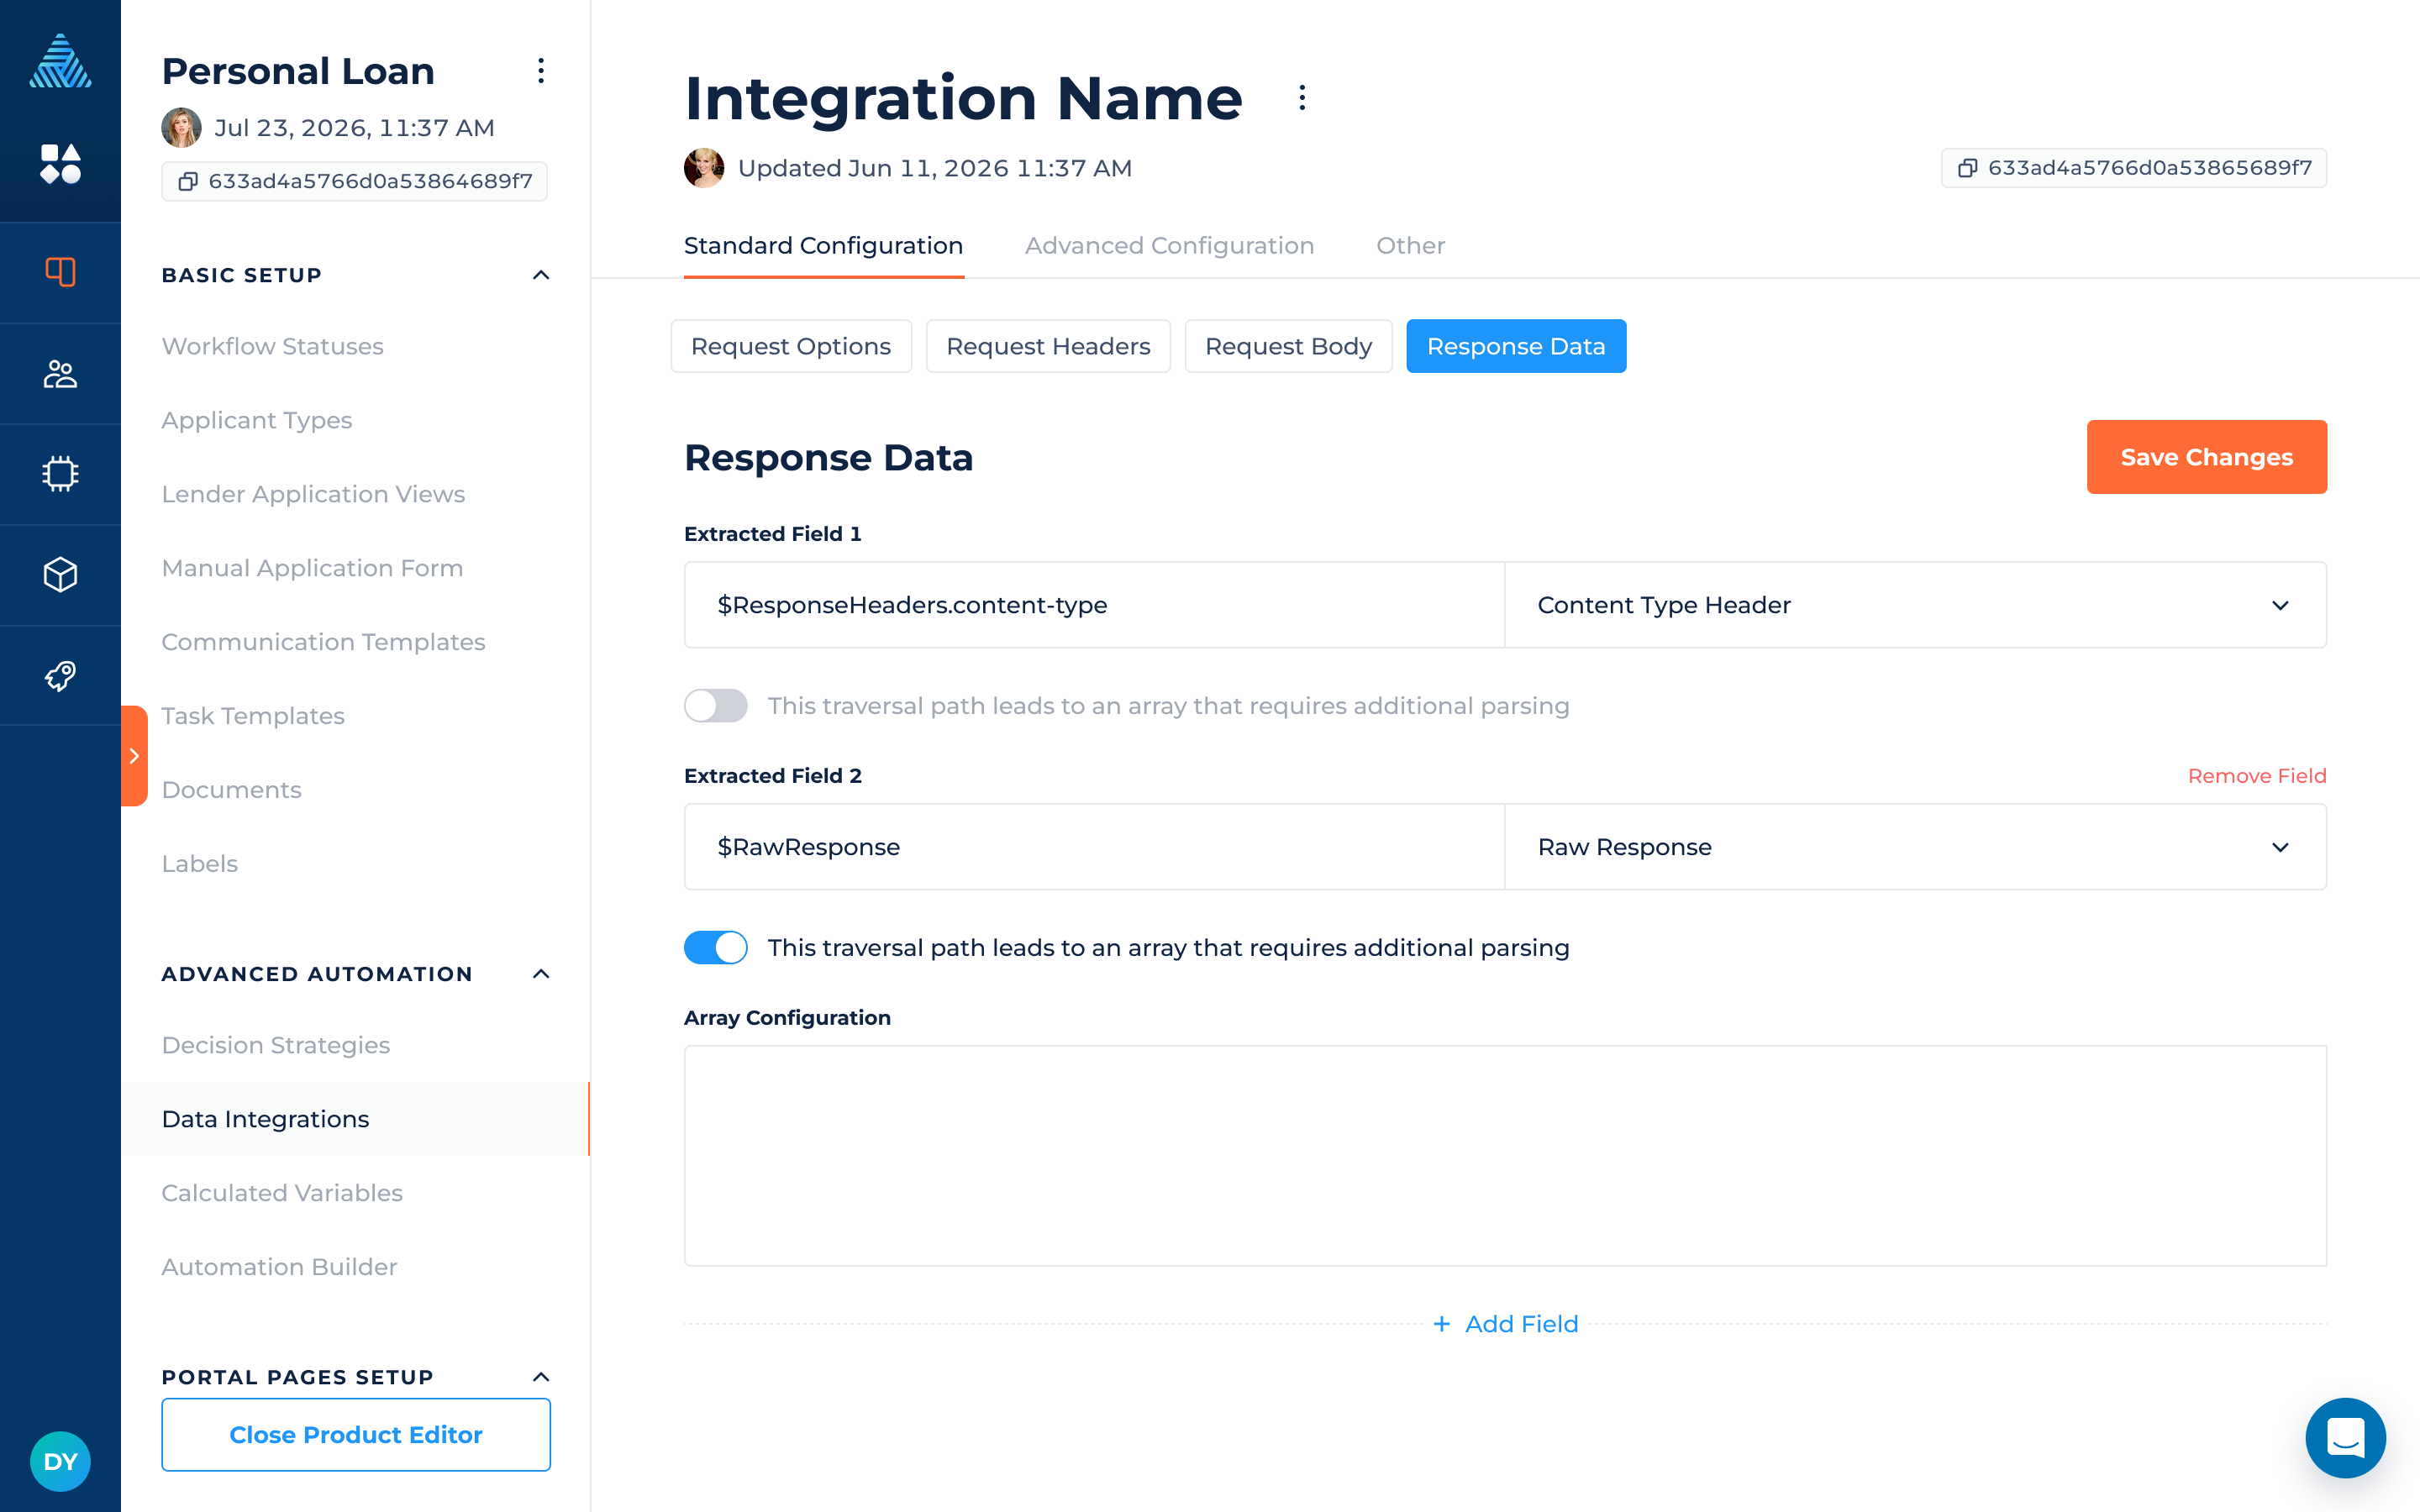
}Response Data: Response Headers and Raw Response Mapping
In addition to the fields included in the response file, you can extract response headers and save the raw response to a text variable.
To extract response headers, use the following format: $ResponseHeaders.[header name]. For example: $ResponseHeaders.content-type
To save the full raw response, use $RawResponse in the extraction field and map it to a text variable.
Advanced Configuration
The "Advanced Configuration" section includes 4 sub-pages:
- oAuth2 Authentication
- Certificate Authentication
- Automatic Retries
- JavaScript Functions
- Additional Configuration
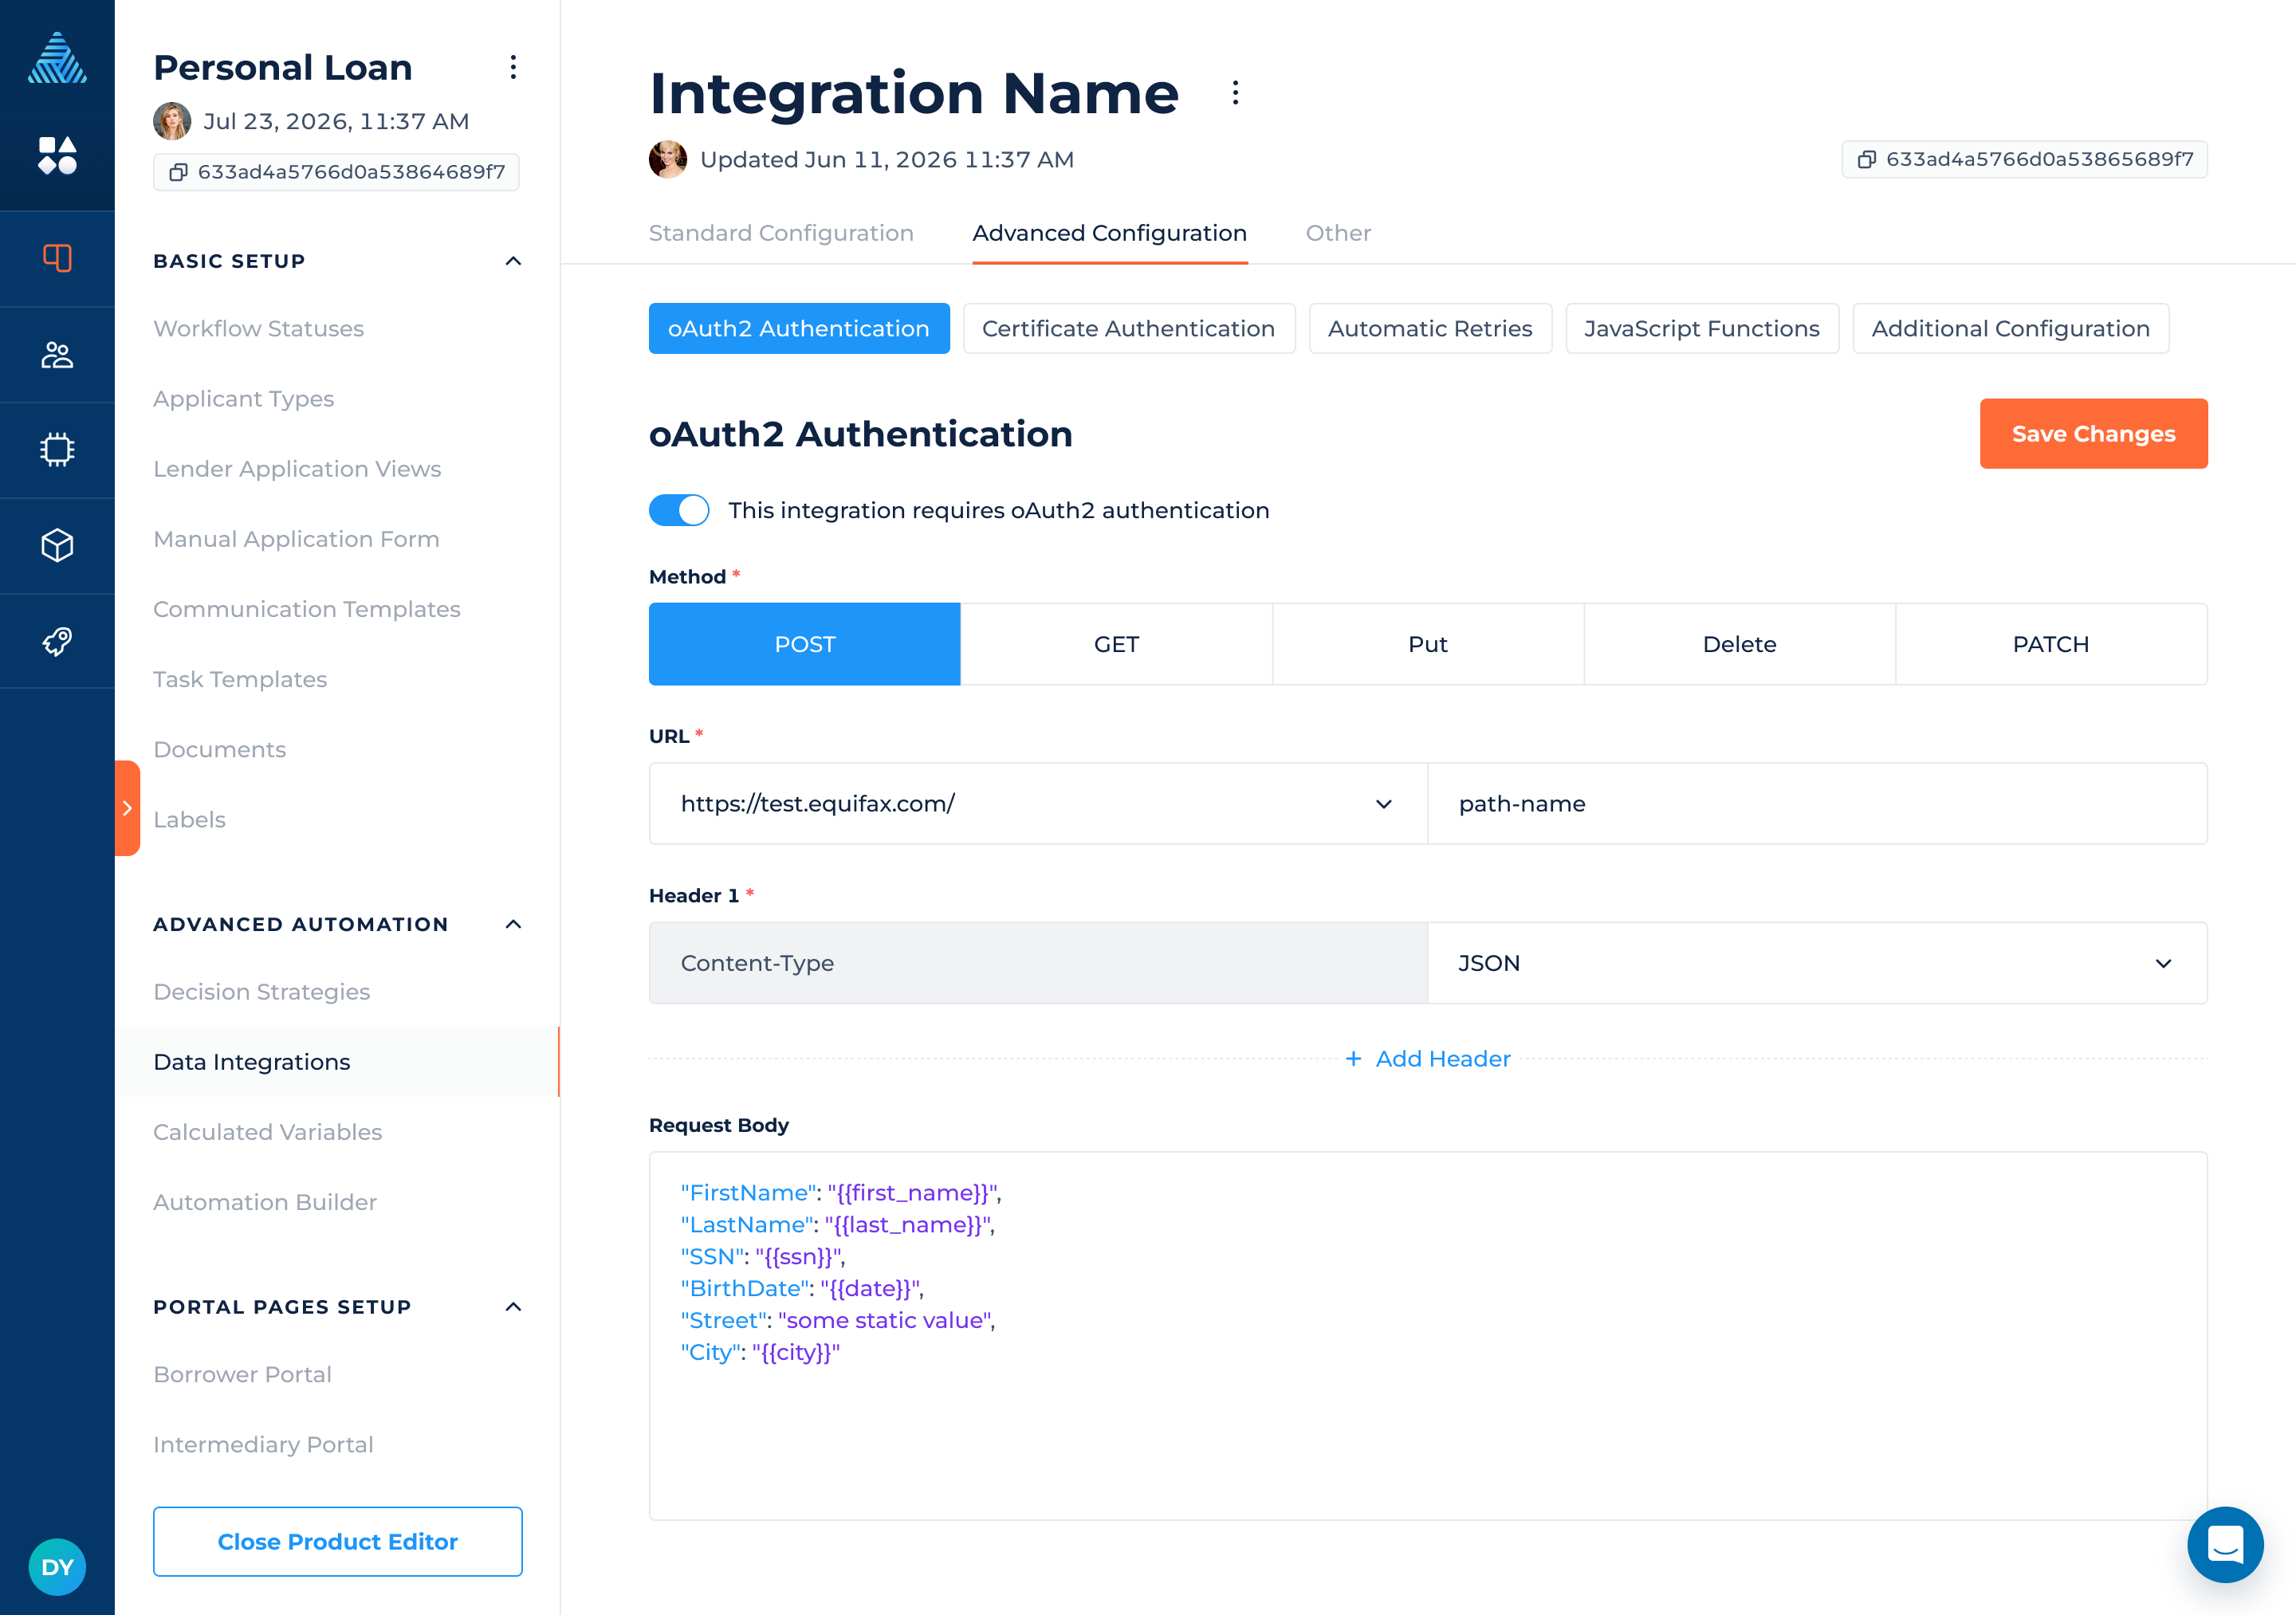
oAuth2 Authentication
If your integration requires oAuth2 authorization it is possible to configure the authorization request through DigiFi. The configuration form includes similar configurations from the "Standard Configuration" steps. Please follow the "Standard Configuration" steps to set up the sections of oAuth2 Authentication.
Once oAuth2 is configured, no other actions are required, DigiFi caches the key and sends it with the main request automatically.
Security Certificate
If your integration requires a security certificate for authentication, it needs to be uploaded in the Security Certificate section.
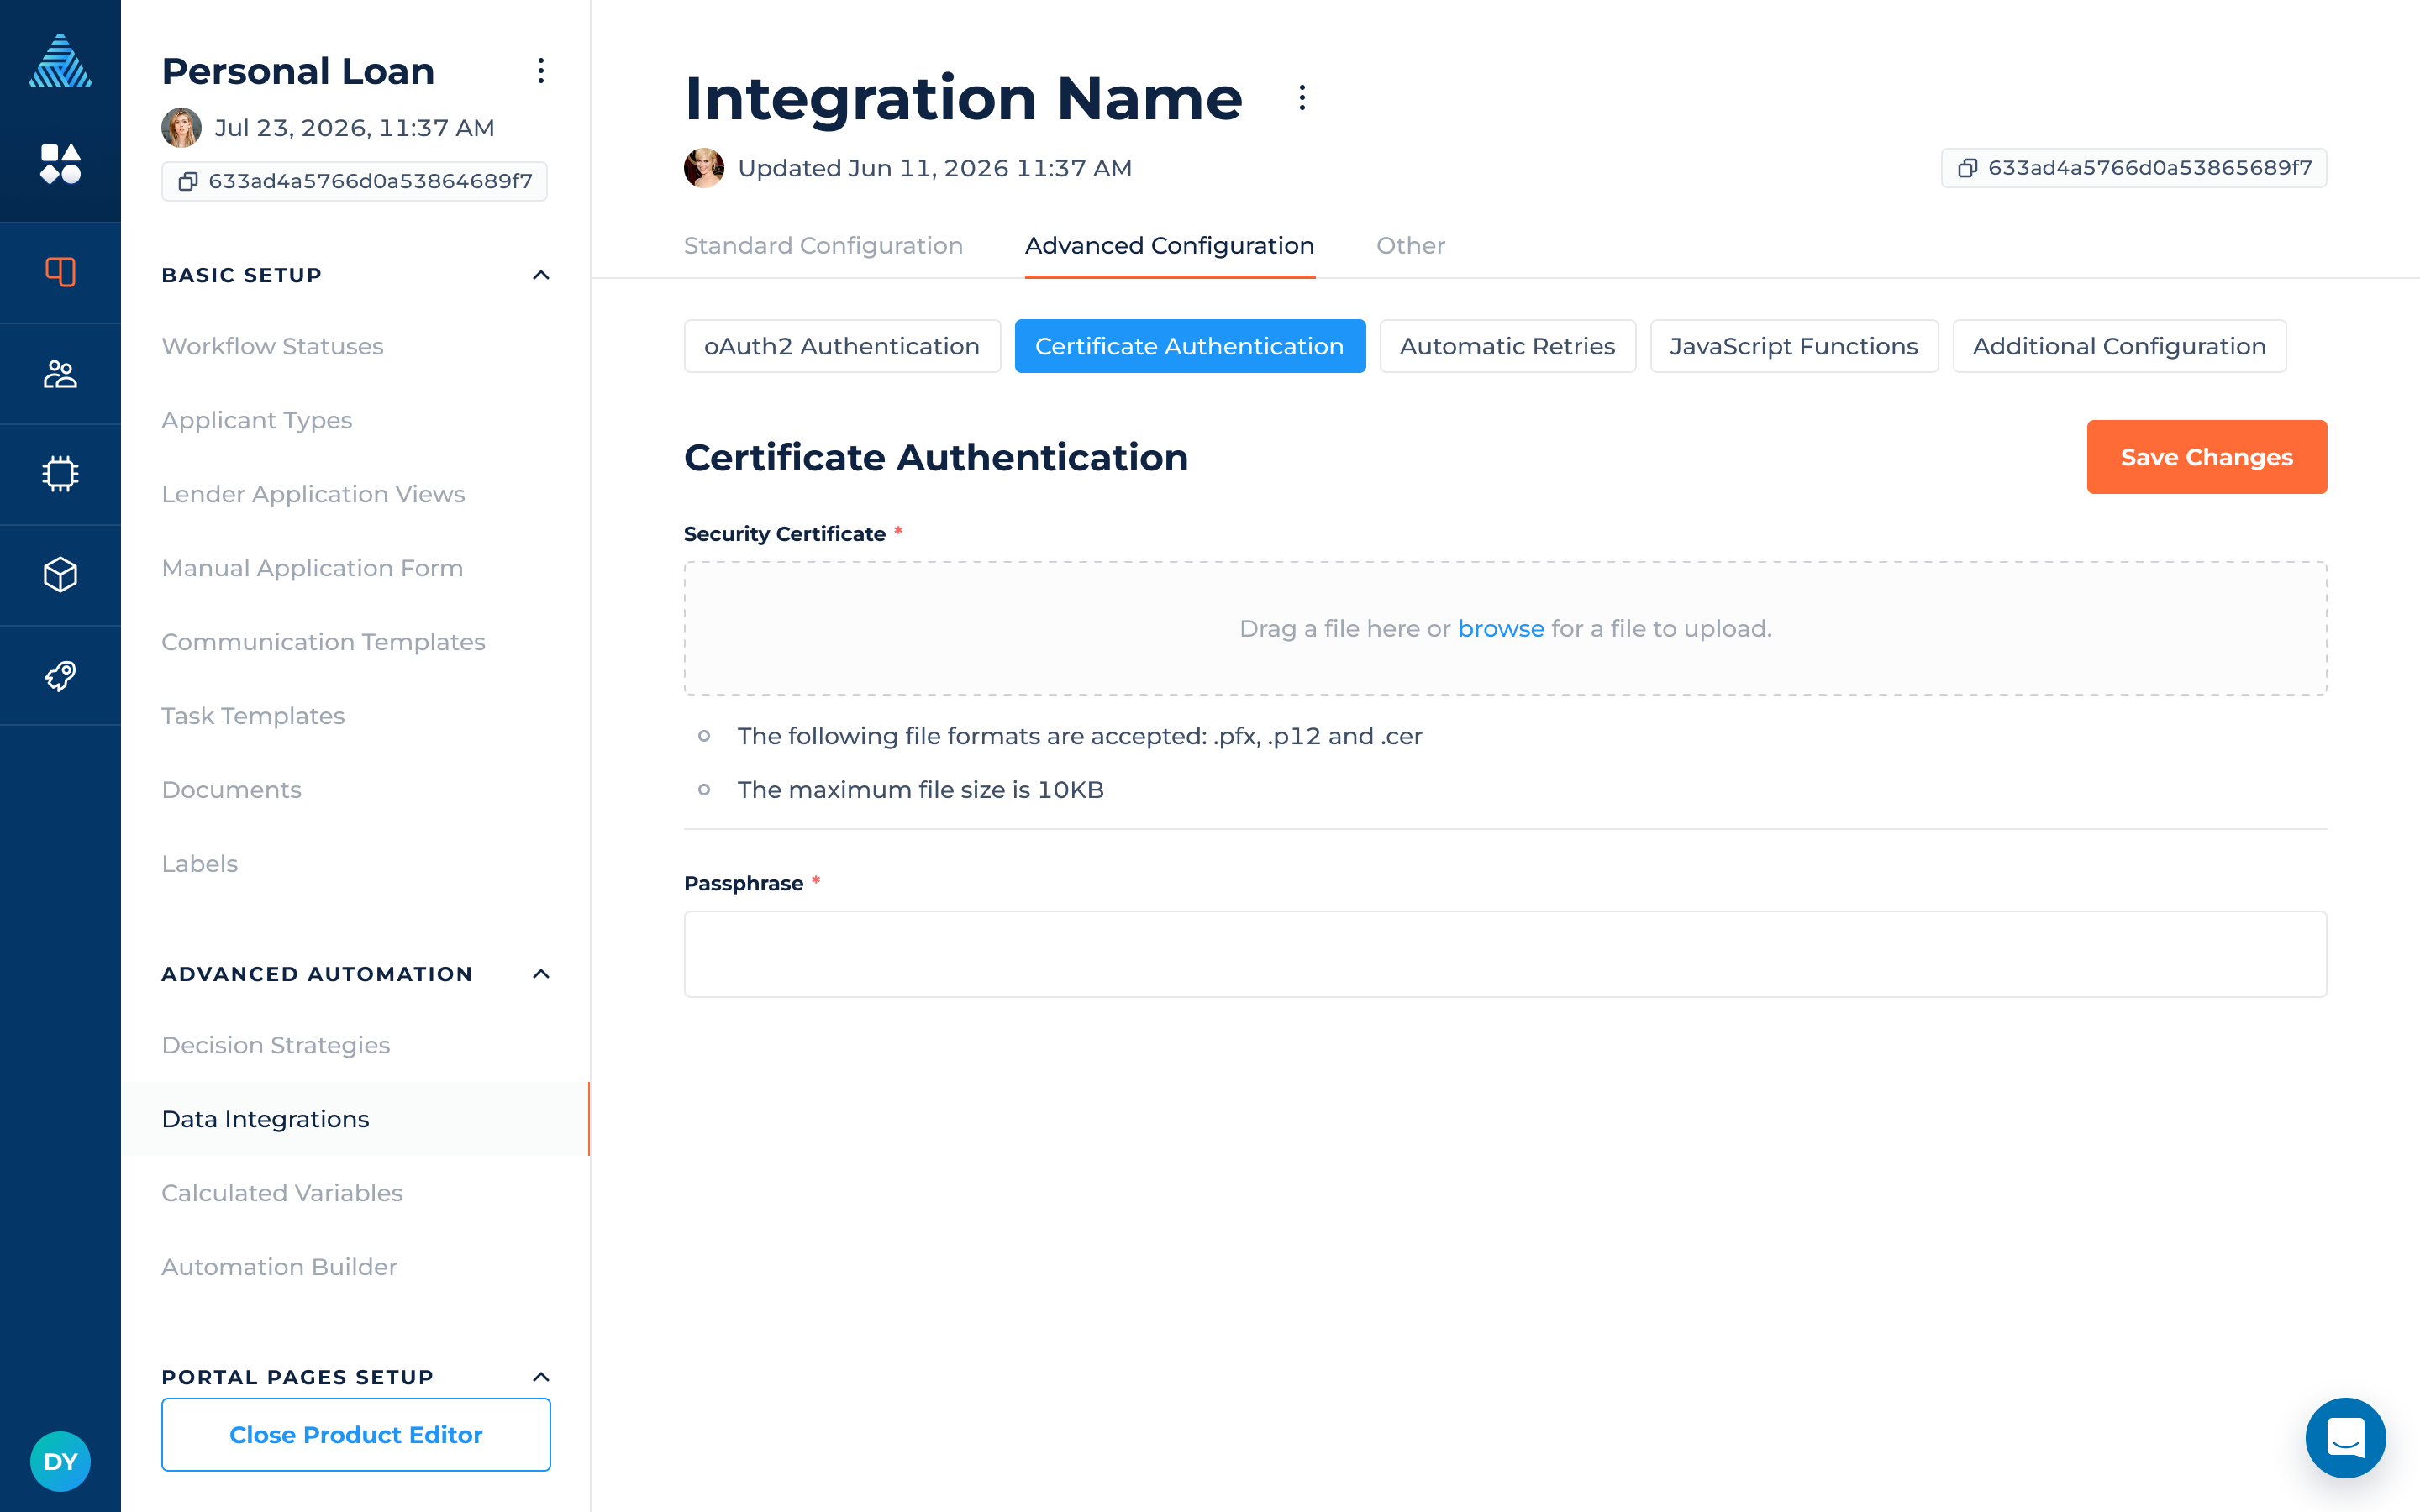
Once uploaded, "passphrase" needs to be added.

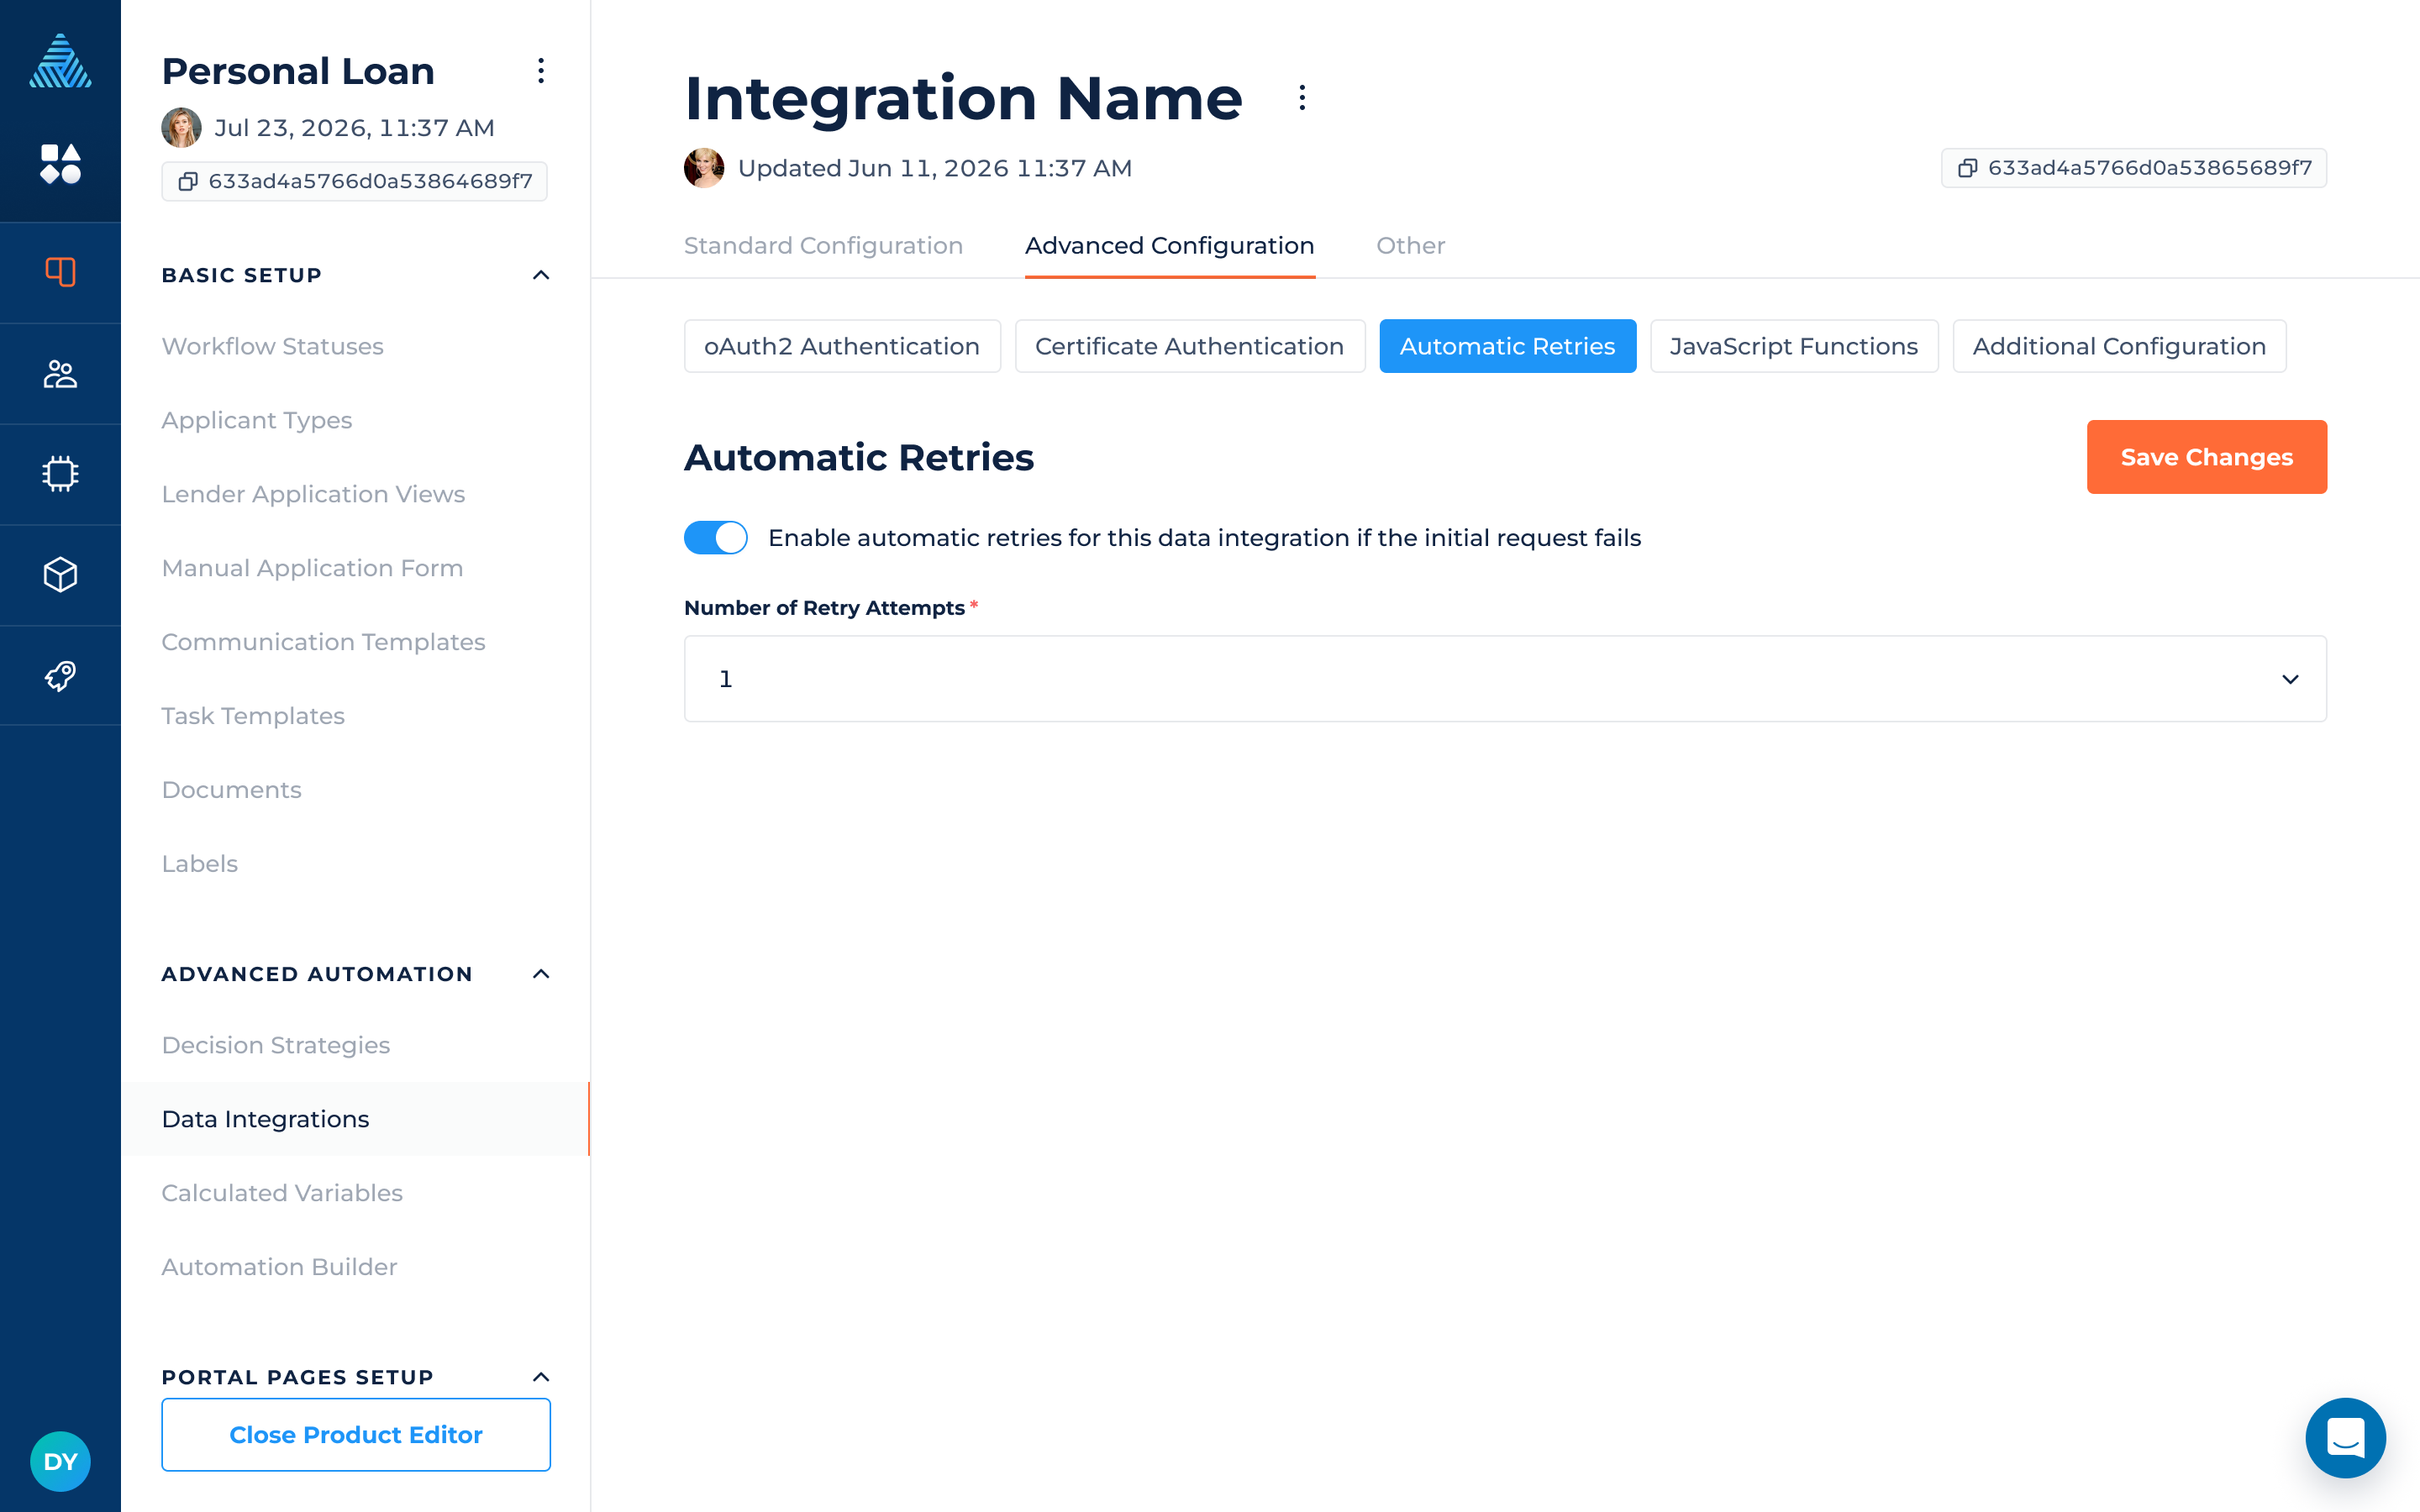
Automatic Retries
You can enable automatic retries for data integrations. If an initial request fails, it will be retried a set number of times. The integration will retry if the status code of the initial request is 500, 502, 503, or 504.
When toggled on, you can choose the number of retry attempts from a dropdown list. The maximum number of retry attempts is three.
All retry attempts and the initial request are logged in the request log, which is available in the integration results.
JavaScript Functions
JavaScript functions can be added to tell the integration what calculations to run on the underlying integration response when it is received.
For security reasons, data parsers can only be set up by DigiFi's professional services team. Please contact us if advanced calculations are required on the response.
Within the DigiFi platform, data parsers can be used to:
- Count the number of tradelines, inquiries and other things within a raw integration response.
- Sum the total amount of debt, payments and other things within a raw integration response.
- Perform complex loops and calculations using raw code before integration results are produced.
- ... and much more!
Parser function have access to the response data using the "json_data" variable. Outputs needs to be assigned to "_global.parsed_variables".
For example:
(function() {
  if (json_data.someValue) {
    _global.parsed_variables.someValuePlusOne = json_data.someValue + 1;
  }
})();
After the data parser is configured, additional mapping within Response Data step needs to be added:

Additional Configuration
The additional configuration consists of a single JSON input that defines options for fine-tuning requests and responses in data integrations.
All configurations are predefined and validated on DigiFi’s side to ensure correct usage and prevent errors. Multiple configurations can be combined within the same JSON, allowing them to be applied simultaneously and providing greater flexibility in adjusting integration processes.
XML Parser Configuration
The additional configuration can be used to customize how XML responses are transformed into JSON structures, making it easier to adjust how data is accessed within integration outputs.
An example configuration looks like this:
{
  "response": {
    "xmlParser": {
      "explicitArray": false,
      "attrkey": "@",
      "trim": false
    }
  }
}
Parameters
- explicitArray: When set to true, child nodes are always wrapped in arrays. If false, an array is created only when there are multiple child nodes. The default value is false.
- attrkey: Defines the prefix used to access XML attributes in the parsed JSON structure. The default value is "@".
- trim: If true, whitespace at the beginning and end of text nodes is removed. The default value is false.
Base64 Response Fields Decoding
You can use additional configuration for Base64 field decoding by specifying the response field paths that contain Base64-encoded data.
These fields may hold plain strings, XML, or JSON. Once decoded, the data becomes directly accessible in the integration outputs.
An example configuration looks like this:
{
  "response": {
    "fieldsToDecode": ["path.to.field1", "path.to.field2"]
  }
}
Base64 Response Files Decoding
You can use additional configuration for Base64 file decoding in responses. The decoded files will be available in Documents as well as in the integration results.
Up to 50 files (along with request/response files) can be processed in a single integration run.
If the total of decoded files exceed 25 MB, processing will stop and an error will be returned.
The configuration is a list of mappings, where each mapping defines:
- The path to the file content to decode
- The target filename
- The file extension
- Document Label IDs
Application variables can be interpolated in the filename using the {{ }} syntax supported in the request body for dynamic naming (e.g., {{borrower_first_name}}).
Only the file name can now be extracted from a response file using:
{{@response.path_of_response_with_a_file_name}}
The file name may also already include the extension (e.g., File Name.txt).
Alternatively, the file extension can be extracted separately and combined within the name field using:
{{@response.path_of_response_with_a_file_extension}}
An example configuration looks like this:
{
  "response": {
    "fileMappings": [
      {
        "field": "path.to.base64.decoded.file",
        "name": "name to save file with",
        "extension": "pdf",
        "labelIds": ["a936ce03ca882515fc193e2b"]
      },
      {
        "field": "path.to.base64.decoded.file",
        "name": "{{@response.path_of_response_with_a_file_name}}.{{@response.path_of_response_with_a_file_extension}}",
        "labelIds": ["6936ce03ca882515fc193e2a"]
      }
    ]
  }
}
Retrieved File Properties
You can configure document properties when retrieving files via a Data Integration. This applies when a file is retrieved directly from a URL (for example, via a GET request that returns the file itself), rather than when the file is returned as a Base64-encoded string in the response.
You can:
- Assign a custom document name (supports application variables using
{{variable_name}}) - Automatically assign document labels
An example configuration looks like this:
{
  "response": {
    "retrievedFileProperties": {
      "name": "{{borrower_first_name}} document",
      "labelIds": ["labelId1", "labelId2"]
    }
  }
}
Remove Empty Fields from Request
You can configure Data Integrations to automatically remove empty fields from outgoing requests.
This applies to both JSON and XML request bodies and is useful when external systems require null or empty values to be omitted.
By default, empty fields are not removed. An example configuration with omitted fields looks like this:
{
  "request": {
    "removeEmptyFields": true
  }
}
Custom OAuth2 Token Mapping
If the provider you’re integrating with does not use the standard access_token or expires_in fields in its JSON response, you can define custom paths for these values in the Additional Configuration section.
For example, if the provider returns a response like:
{
  "response": {
    "sid": "XYZ123",
    "ttl": 3600
  }
}
You can configure the custom token paths as follows:
{
  "oAuth": {
    "customTokenPaths": {
      "accessToken": "response.sid",
      "expiresIn": "response.ttl"
    }
  }
}
If no custom paths are specified, the system will automatically fall back to the default OAuth2 fields (access_token and expires_in).
Key-Pair JWT Authentication
If the provider you’re integrating with supports Key-Pair JWT authentication, you can configure it in the Additional Configuration section.
An example configuration is shown below:
{
  "auth": {
    "config": {
      "algorithm": "RS256",
      "issuer": "ISSUER",
      "subject": "NAME_API_SVC",
      "audience": "https://<account>.name.com",
      "tokenTtlSeconds": 3600,
      "privateKey": "-----BEGIN PRIVATE KEY-----\n{value of Private key}\n-----END PRIVATE KEY-----"
    },
    "type": "signed_jwt"
  }
}
Other
The "Other" section includes 2 sub-pages:
- Permissions
- Change Log
Permissions
This page allows you to set access for specific permission groups to view and download data integration files that are sent or received when the integration runs. To allow or limit access:
- Check or uncheck the boxes at group and files intersection.
- Click on the “Save Changes” button to apply the changes.
Updates will take effect immediately after they have been made.
Change Log
The Change Log shows the history of changes within the selected integration. You can see the changes, who made them and when they were made.
DigiFi Professional Services
Want help setting up an integration? DigiFi offers end-to-end implementation services, which are performed by our in-house professional services team of analysts and engineers.
Contact us to discuss our implementation services!
Updated about 2 months ago