E-Signature
How to import templates for Docusign E-Signature integration.
Overview of the DigiFi-Docusign Integration
The DigiFi platform includes a built-in integration with Docusign, a leading electronic signature provider.
You can set up this integration to use DigiFi's e-sign feature, which lets you trigger e-sign processes from the "Documents" tab of applications. This causes Docusign to start an email-based signature flow with the borrower. Once that flow is complete, the signed file is automatically retrieved and stored as a document in the DigiFi platform
Connect Docusign to DigiFi
To connect Docusign to DigiFi, follow the instructions in the User Manual. Templates can be imported once Docusign credentials are added to DigiFi.
Import Docusign Templates To DigiFi
Create Docusign Templates.
For this, open your Docusign account and navigate to “Templates” on the navigation bar. Customize a new template by adding recipients and fields you require for the e-signature process.
While working with templates in Docusign, you’ll be asked to provide recipients' details. Add the recipients' "Roles" details only and leave other fields ("Name", "Email") blank. Docusign's Roles ensure that recipients can be mapped to DigiFi’s entities (borrower/co-borrower/intermediary) on the platform.
Create fields within the Docusign template, and these fields will later be mapped to DigiFi values in the process. DigiFi supports various field types, including text, number, checkbox, radio button, dropdown, and note.
Text ValidationDigiFi supports validation for Docusign text fields. If you enable validation for text fields in Docusign, the system will recognize the validation, and you can assign DigiFi variables accordingly. The mapping works as follows:
- Text + No validation → Any variable type (except Table)
- Text + SSN validation → Text variables
- Text + Email validation → Text variables
- Text + Number validation → Number, Percentage, or Monetary variables
- Text + Letters validation → Any variable type (except Table)
- Text + Date validation → Date variables
- Text + Zip validation → Text variables
- Text + Zip+4 validation → Text variables
- Custom validation → Any variable type (except Table)
After you’ve created e-sign templates within your Docusign account, you can import them into DigiFi.
To import a template to DigiFi:
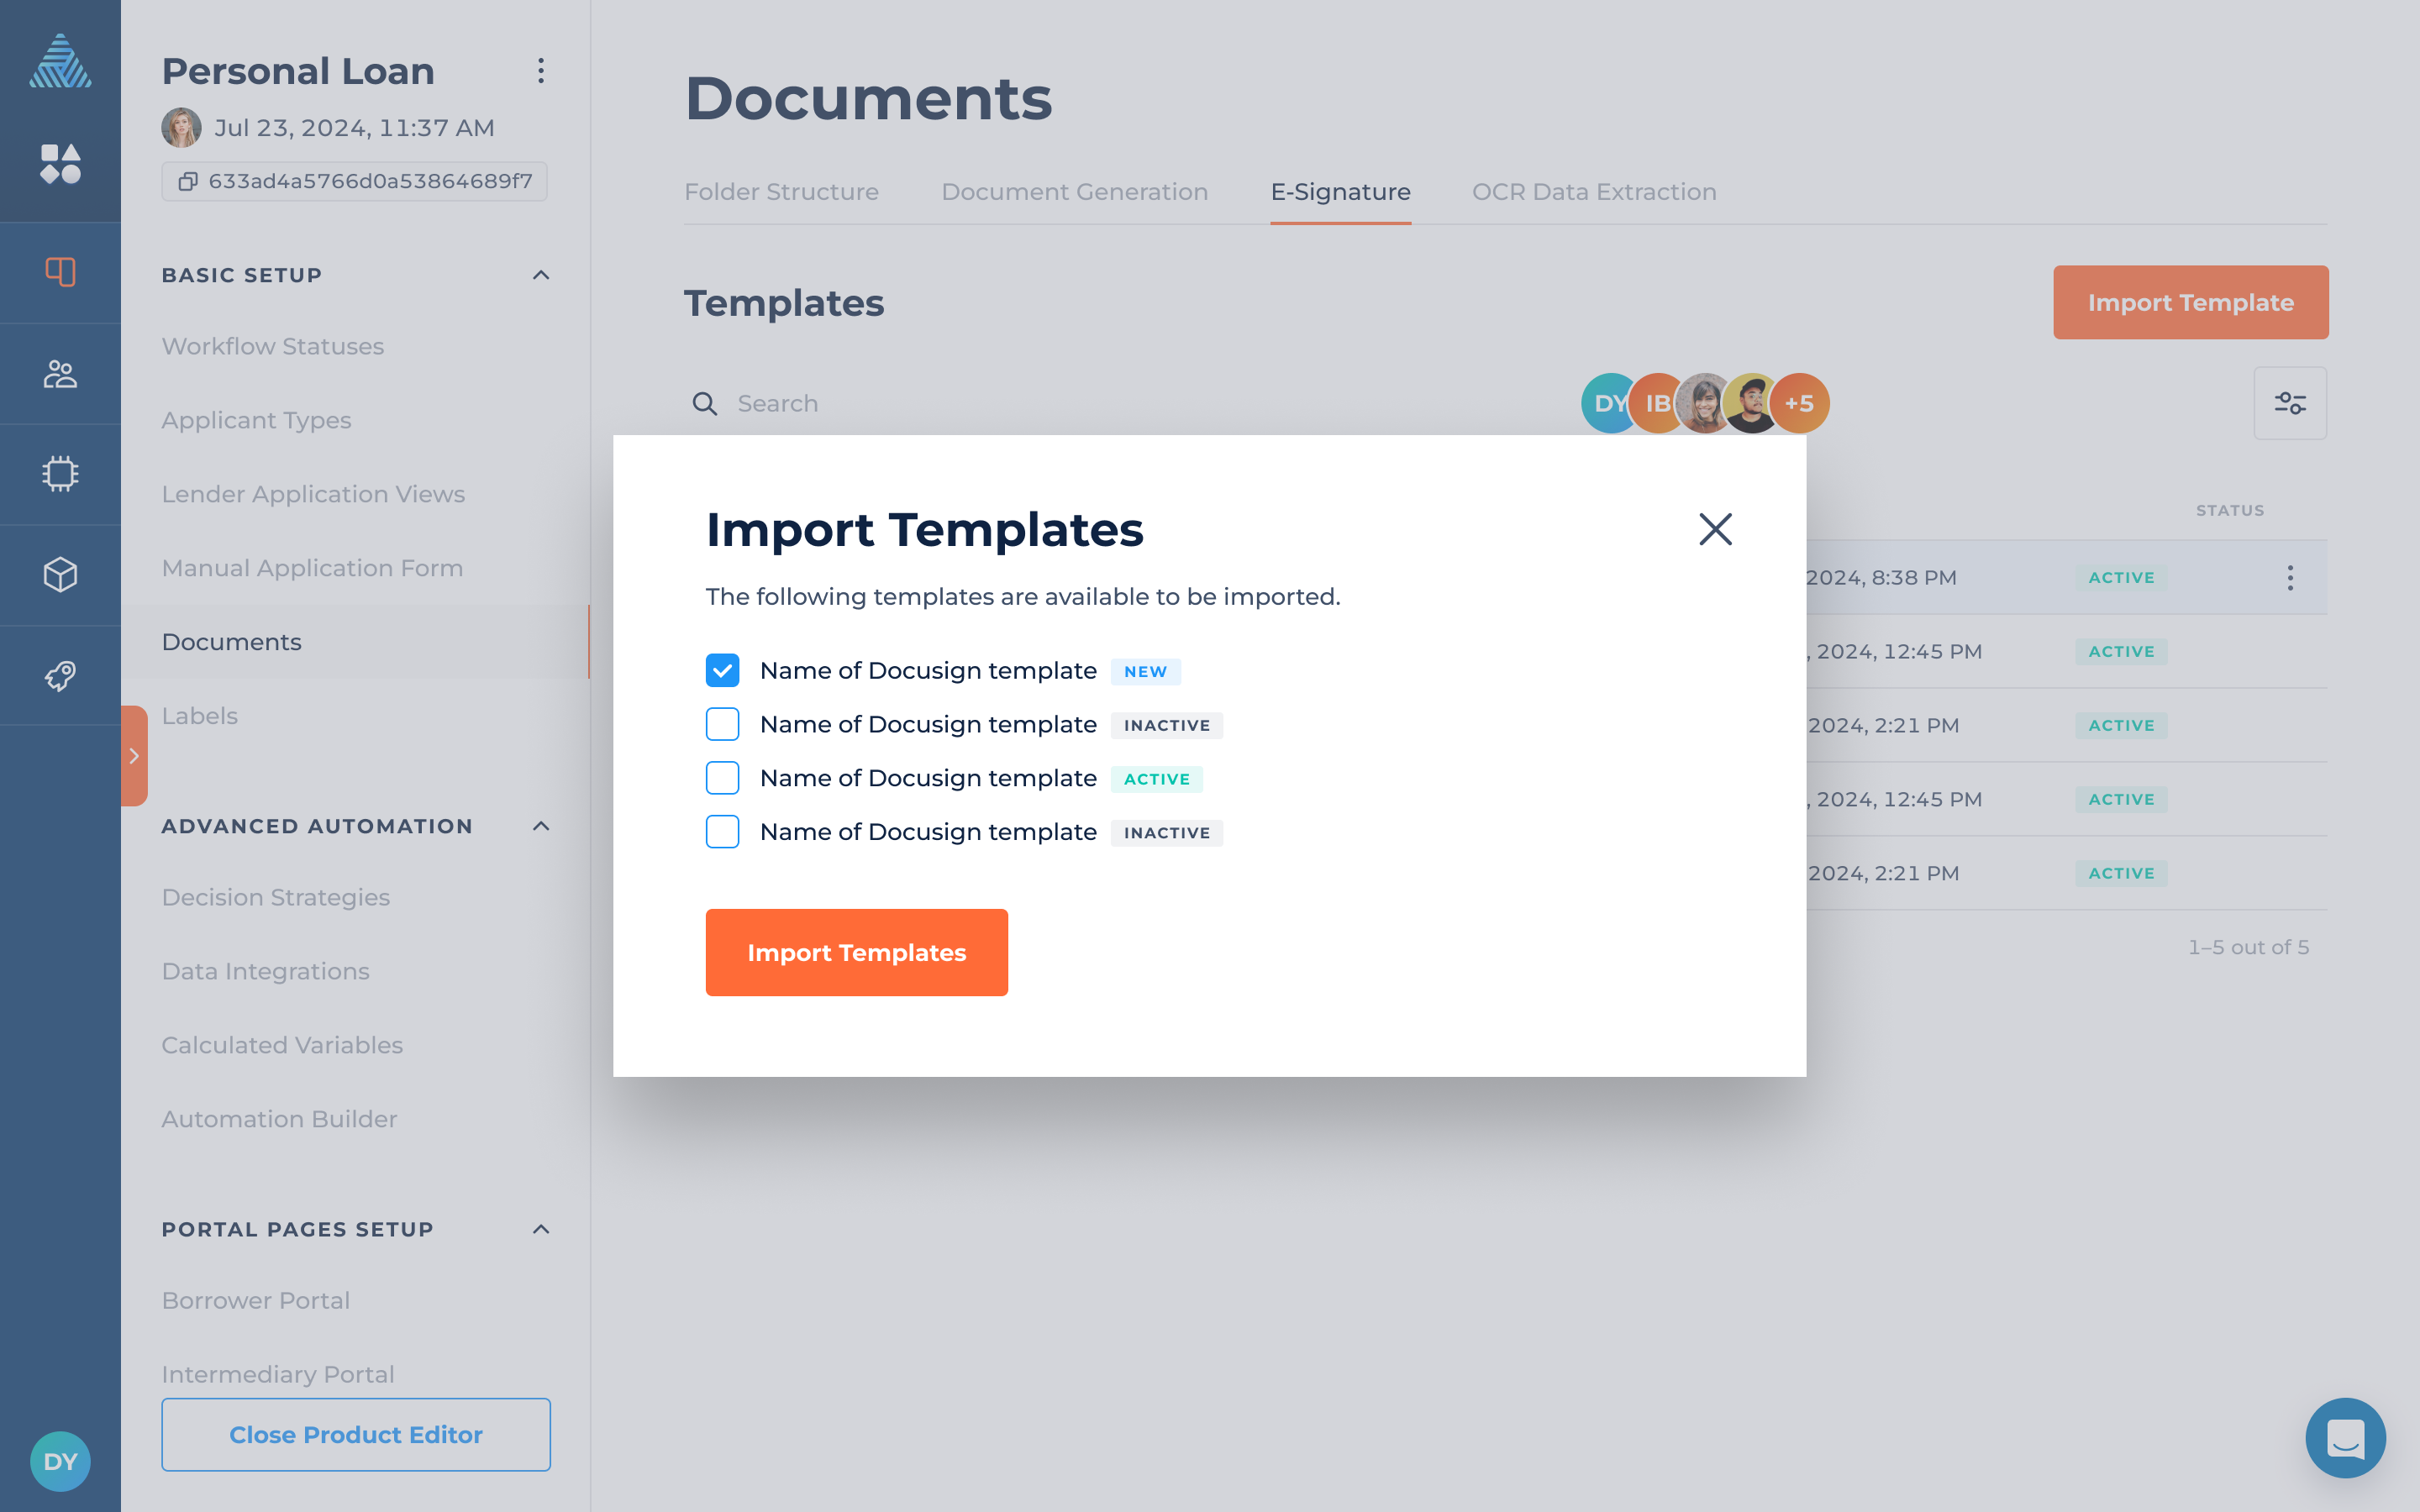
- Navigate to the Lending Setup > Your Loan Product > Documents > E-Signature
- Click the "Import Templates" button.
- Select which templates you want to import to DigiFi from Docusign.
- Click the "Import Templates" button.

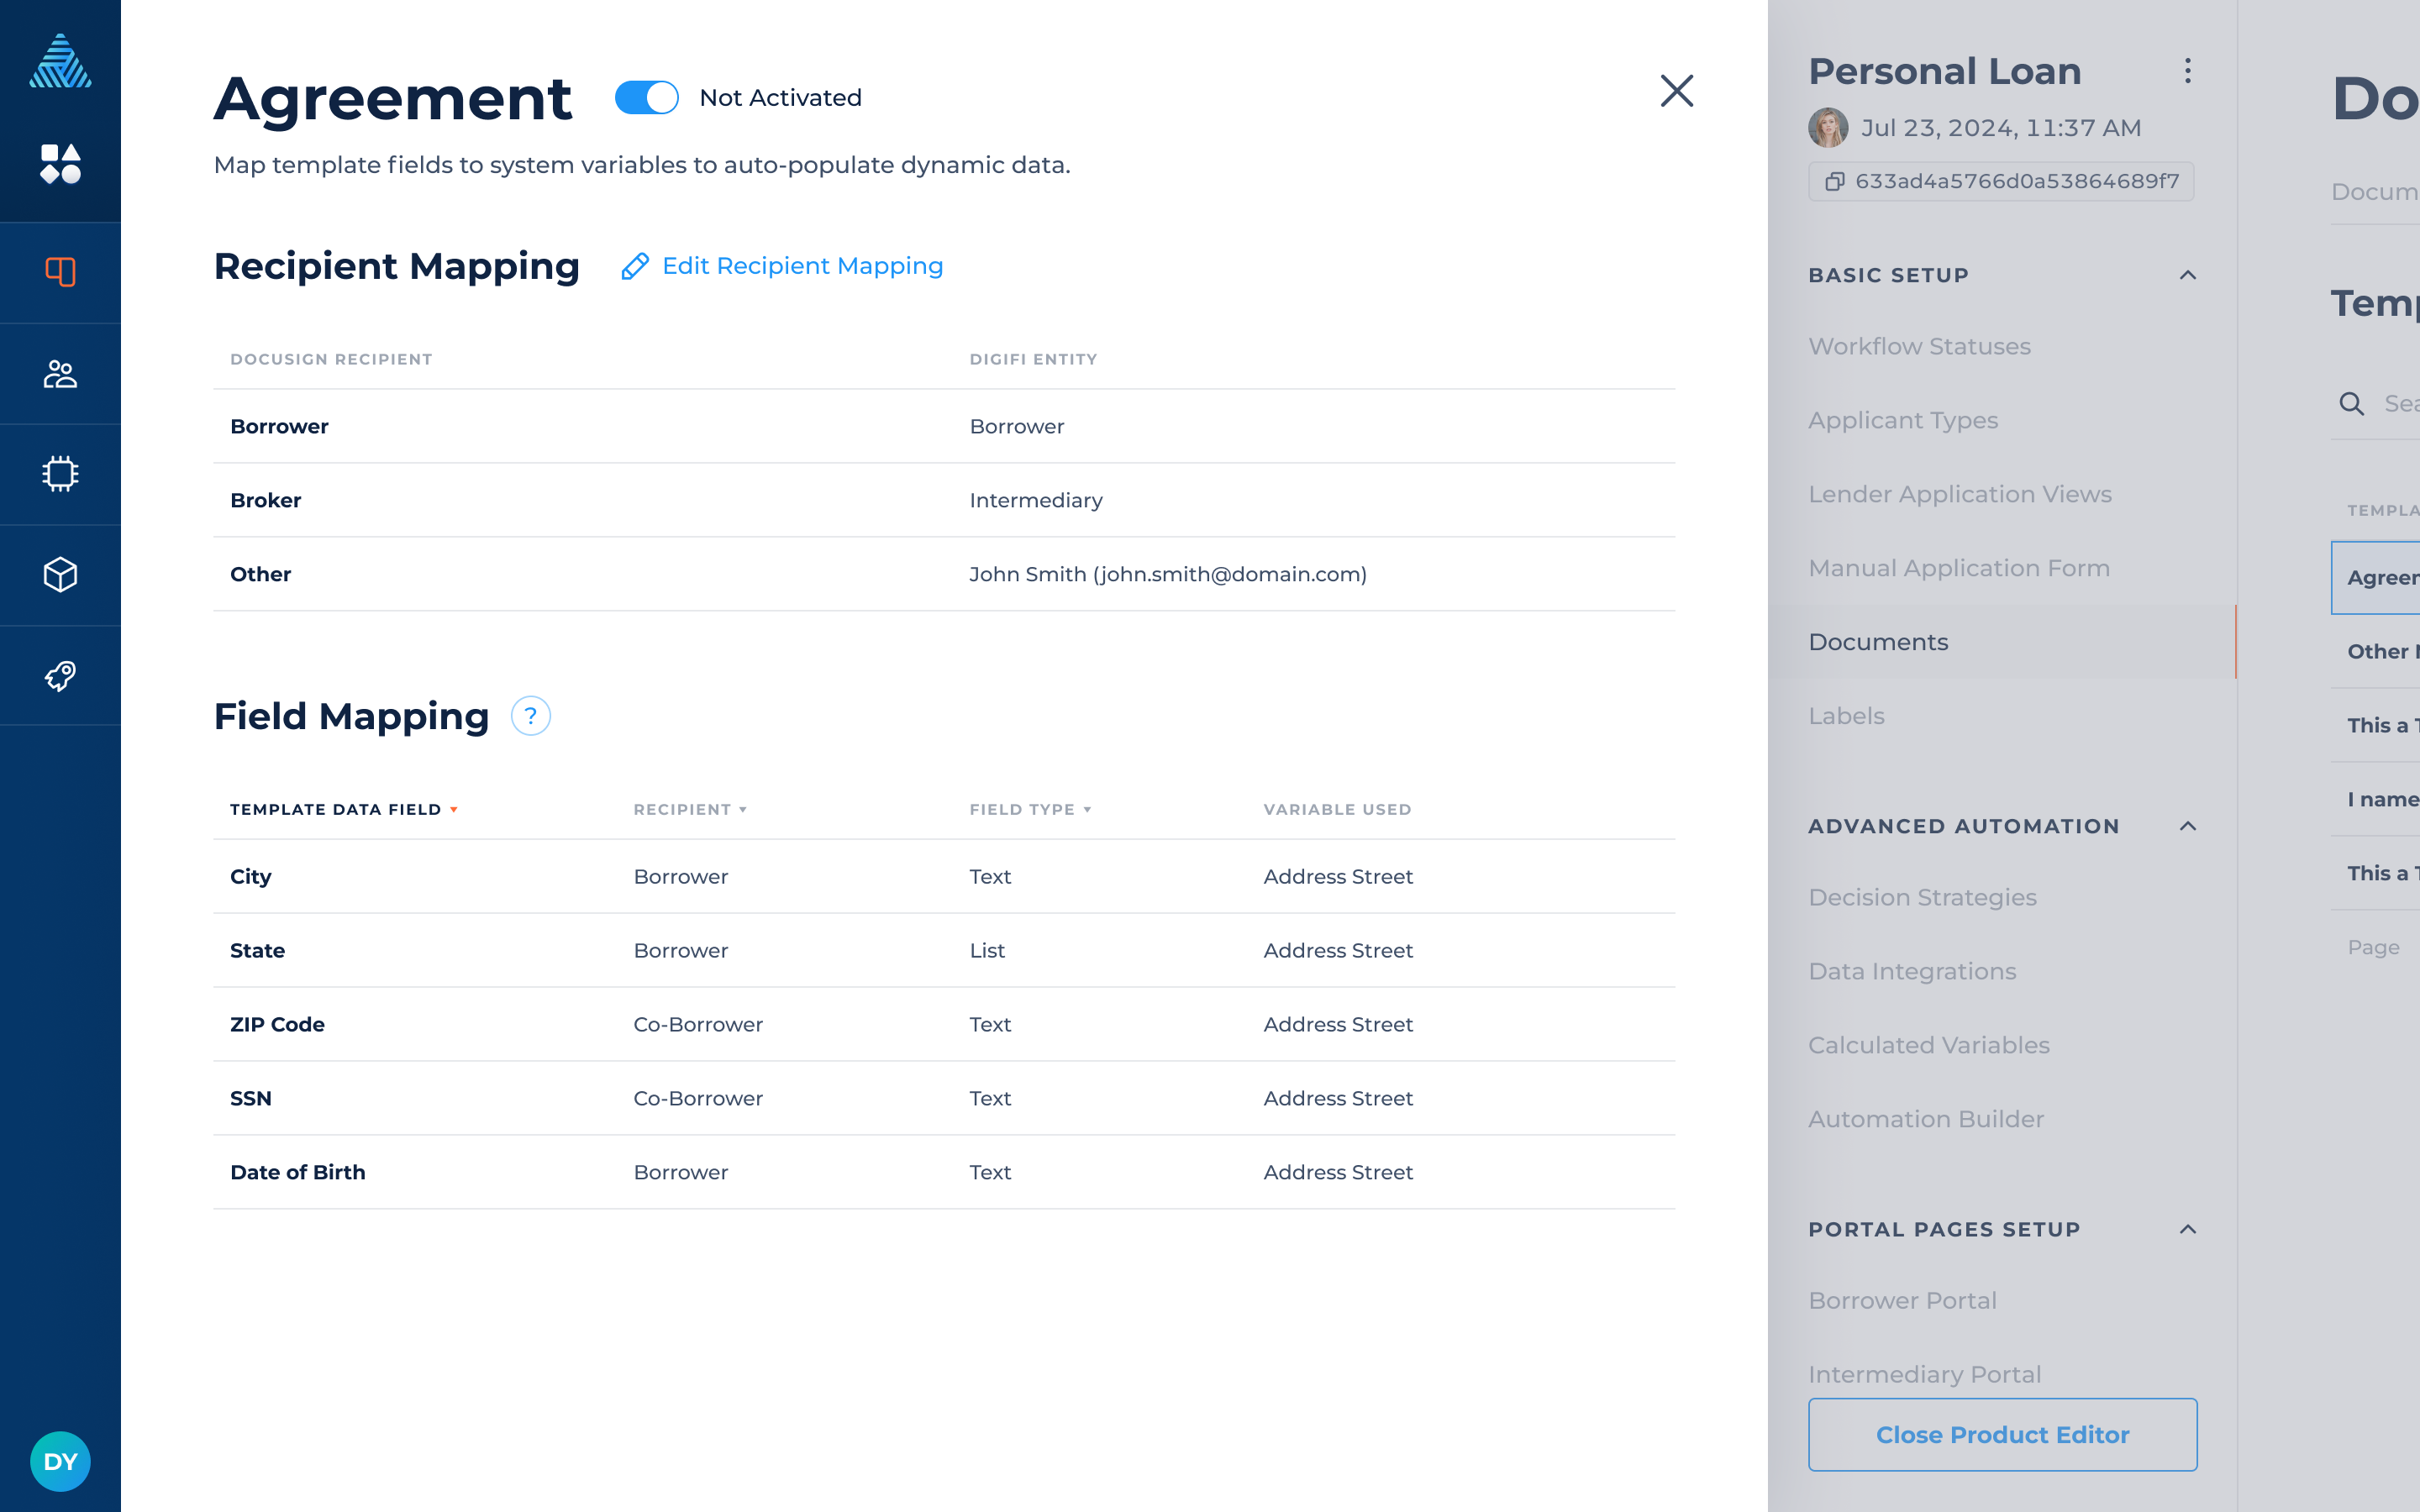
After you’ve imported templates, you need to map Docusign recipients to DigiFi entities and the Docusign data fields to variables (i.e. data fields). This lets the DigiFi platform know what data to pass into the Docusign integration when it runs.
For ExampleIf your Docusign integration requires the borrower's name, you can map the "Borrower First Name" and "Borrower Last Name" variables to the template.
To map your Docusign template, click on it in the table. You'll then see two sections:
- In the "Recipient Mapping" section, choose who should receive the e-signature request when it is sent. This section lets you map DigiFi entities (e.g. borrower, co-borrower, intermediary) to the recipients that you set up in Docusign.
- In the "Field Mapping" section, click on one of the template data fields and select an option from the list (variable, value, formula).
“Table” variable data type isn’t allowed to be selected for variable mapping.
If you want to add a formula, by clicking the "Gear" icon, you can use our rule-building tool to create a simple rule with a single comparative condition and convert the logic into a formula. You can also create a more complex formula using DigiFi’s formula language.
Once you have completed this mapping process, toggle the activation button (beside the page title) to "Activated" to make the template available for use in the DigiFi platform!

Testing Your Templates
After completing the previous steps, your Docusign integration should now be working (using your "developer" credentials).
Please refer to the How To Use Docusign E-Signature section for details on using Docusign once it is configured. This process can be followed to test Docusign for a specific loan application. Moreover, you can establish an automated e-signature process by creating a "Send Document for E-Signature" action in Automation Builder.
Updated 4 months ago
