Docusign E-Signature
How to connect your Docusign account to DigiFi for electronic signatures.
Overview of the DigiFi-Docusign Integration
The DigiFi platform includes a built-in integration with Docusign, a leading electronic signature provider.
You can set up this integration to use DigiFi's e-sign feature, which lets you trigger e-sign processes from the "Documents" tab of applications. This causes Docusign to start an email-based signature flow with the borrower. Once that flow is complete, the signed file is automatically retrieved and stored as a document in the DigiFi platform.
How to Create a Docusign Account
To integrate Docusign's API, you'll need both a production account and a developer account.
- Click here to create your developer account.
- Click here to select a plan for your production account.
Step 1: Generate Account Credentials
To generate your developer account credentials, start by signing in to your Docusign developer account.
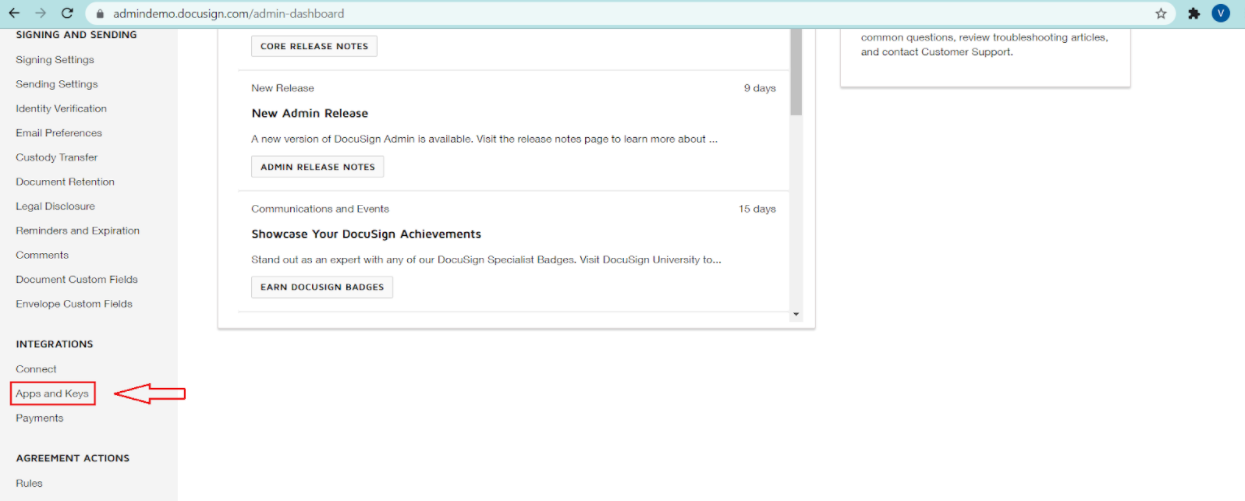
Select "Settings" from the top menu, scroll down until you see the "Integrations" section and then choose the "Apps and Keys" option. You'll be navigated to that page.
On the "Apps and Keys" page, click the "ADD APP AND INTEGRATION KEY" button. In the popup window that appears, enter "App Name" and click "CREATE APP".
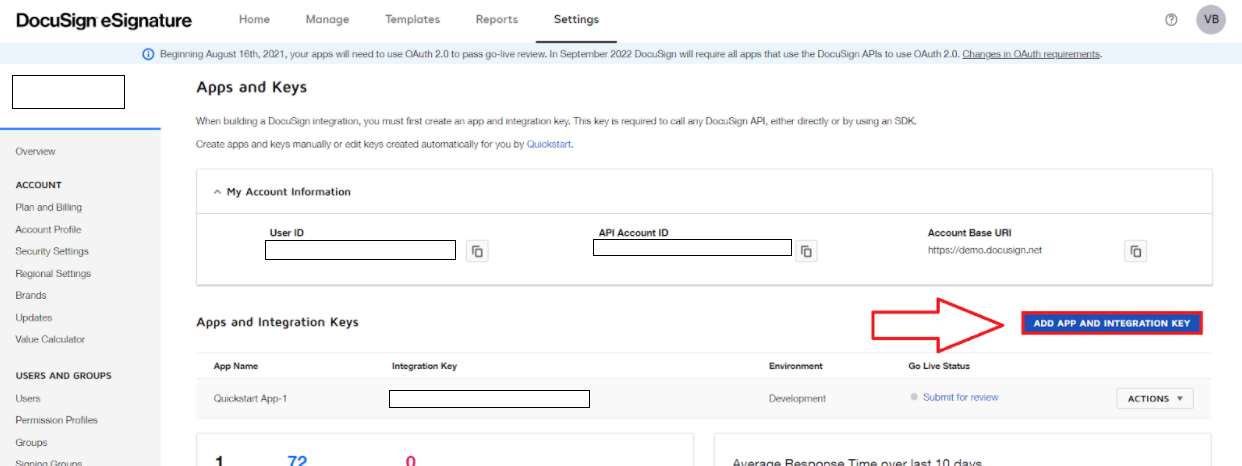
You should now be able to see your app with the generated Integration Key.
Step 2: Get User Consent
To do this, first construct a URL value matching the following syntax:
The text fields "UPDATE1" and "UPDATE2" should be updated by you per the instructions below.
- UPDATE1 (client_id): Put your integration key here (from Step 1).
- UPDATE2 (redirect_uri): The address you want Docusign to redirect your users for their e-signature consent.
You can check to make sure the the redirect_uri (from UPDATE2) is set up properly by:
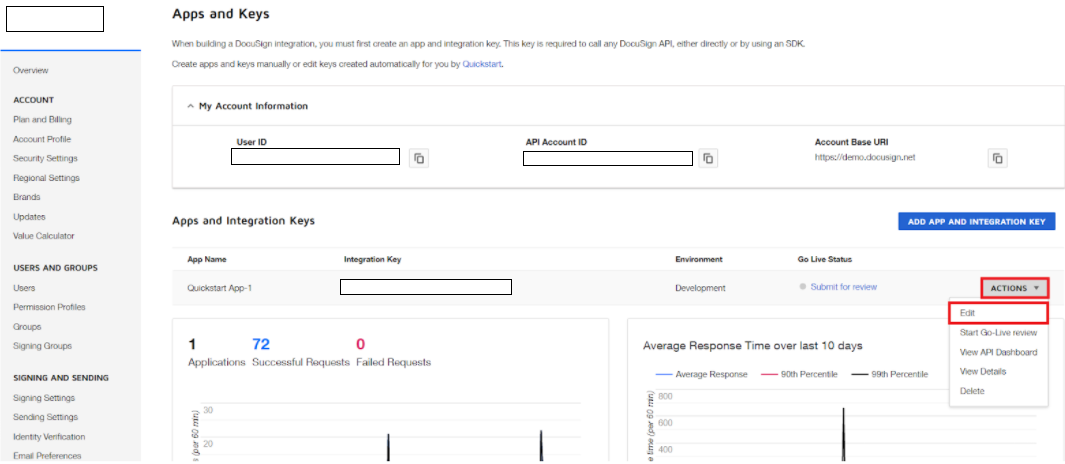
- Clicking "Actions" and choosing "Edit" from the dropdown list.
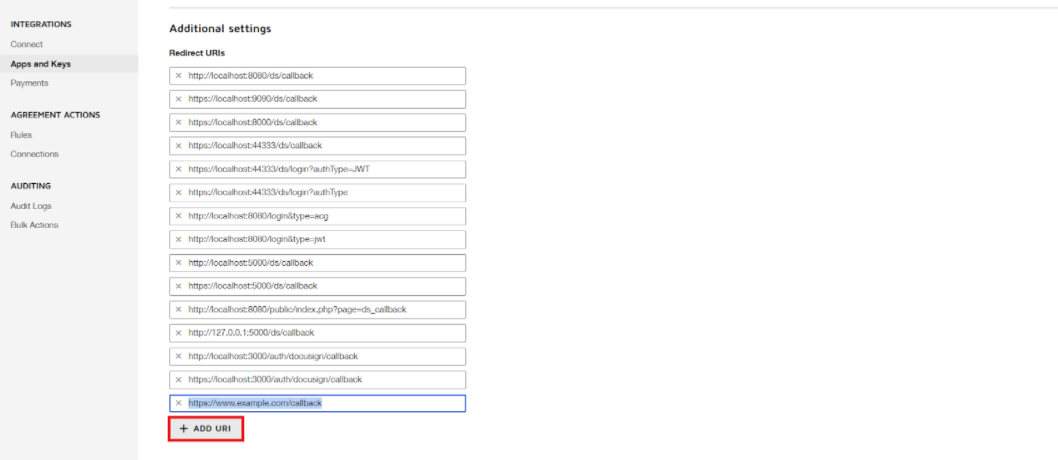
- Scrolling down and finding the "Additional Settings" section.
- Ensuring that you redirect_uri (above) is on the list of "Redirect URIs".
If it's not there, add it to the list using the "+ ADD URI" button.
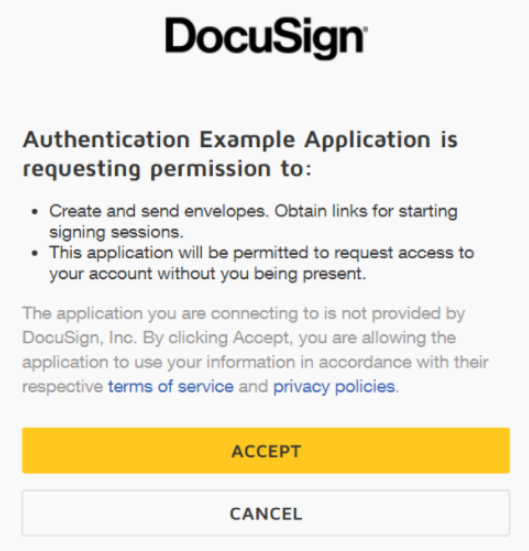
After you constructed the link with the corresponding values, copy it into your web browser's address bar and press "Enter" on your keyboard. You will see the page where you need to accept the consent. After pressing “Accept” the system redirects you to the "redirect_uri" address you put into the initial link.
Step 3: Connect DigiFi To Docusign
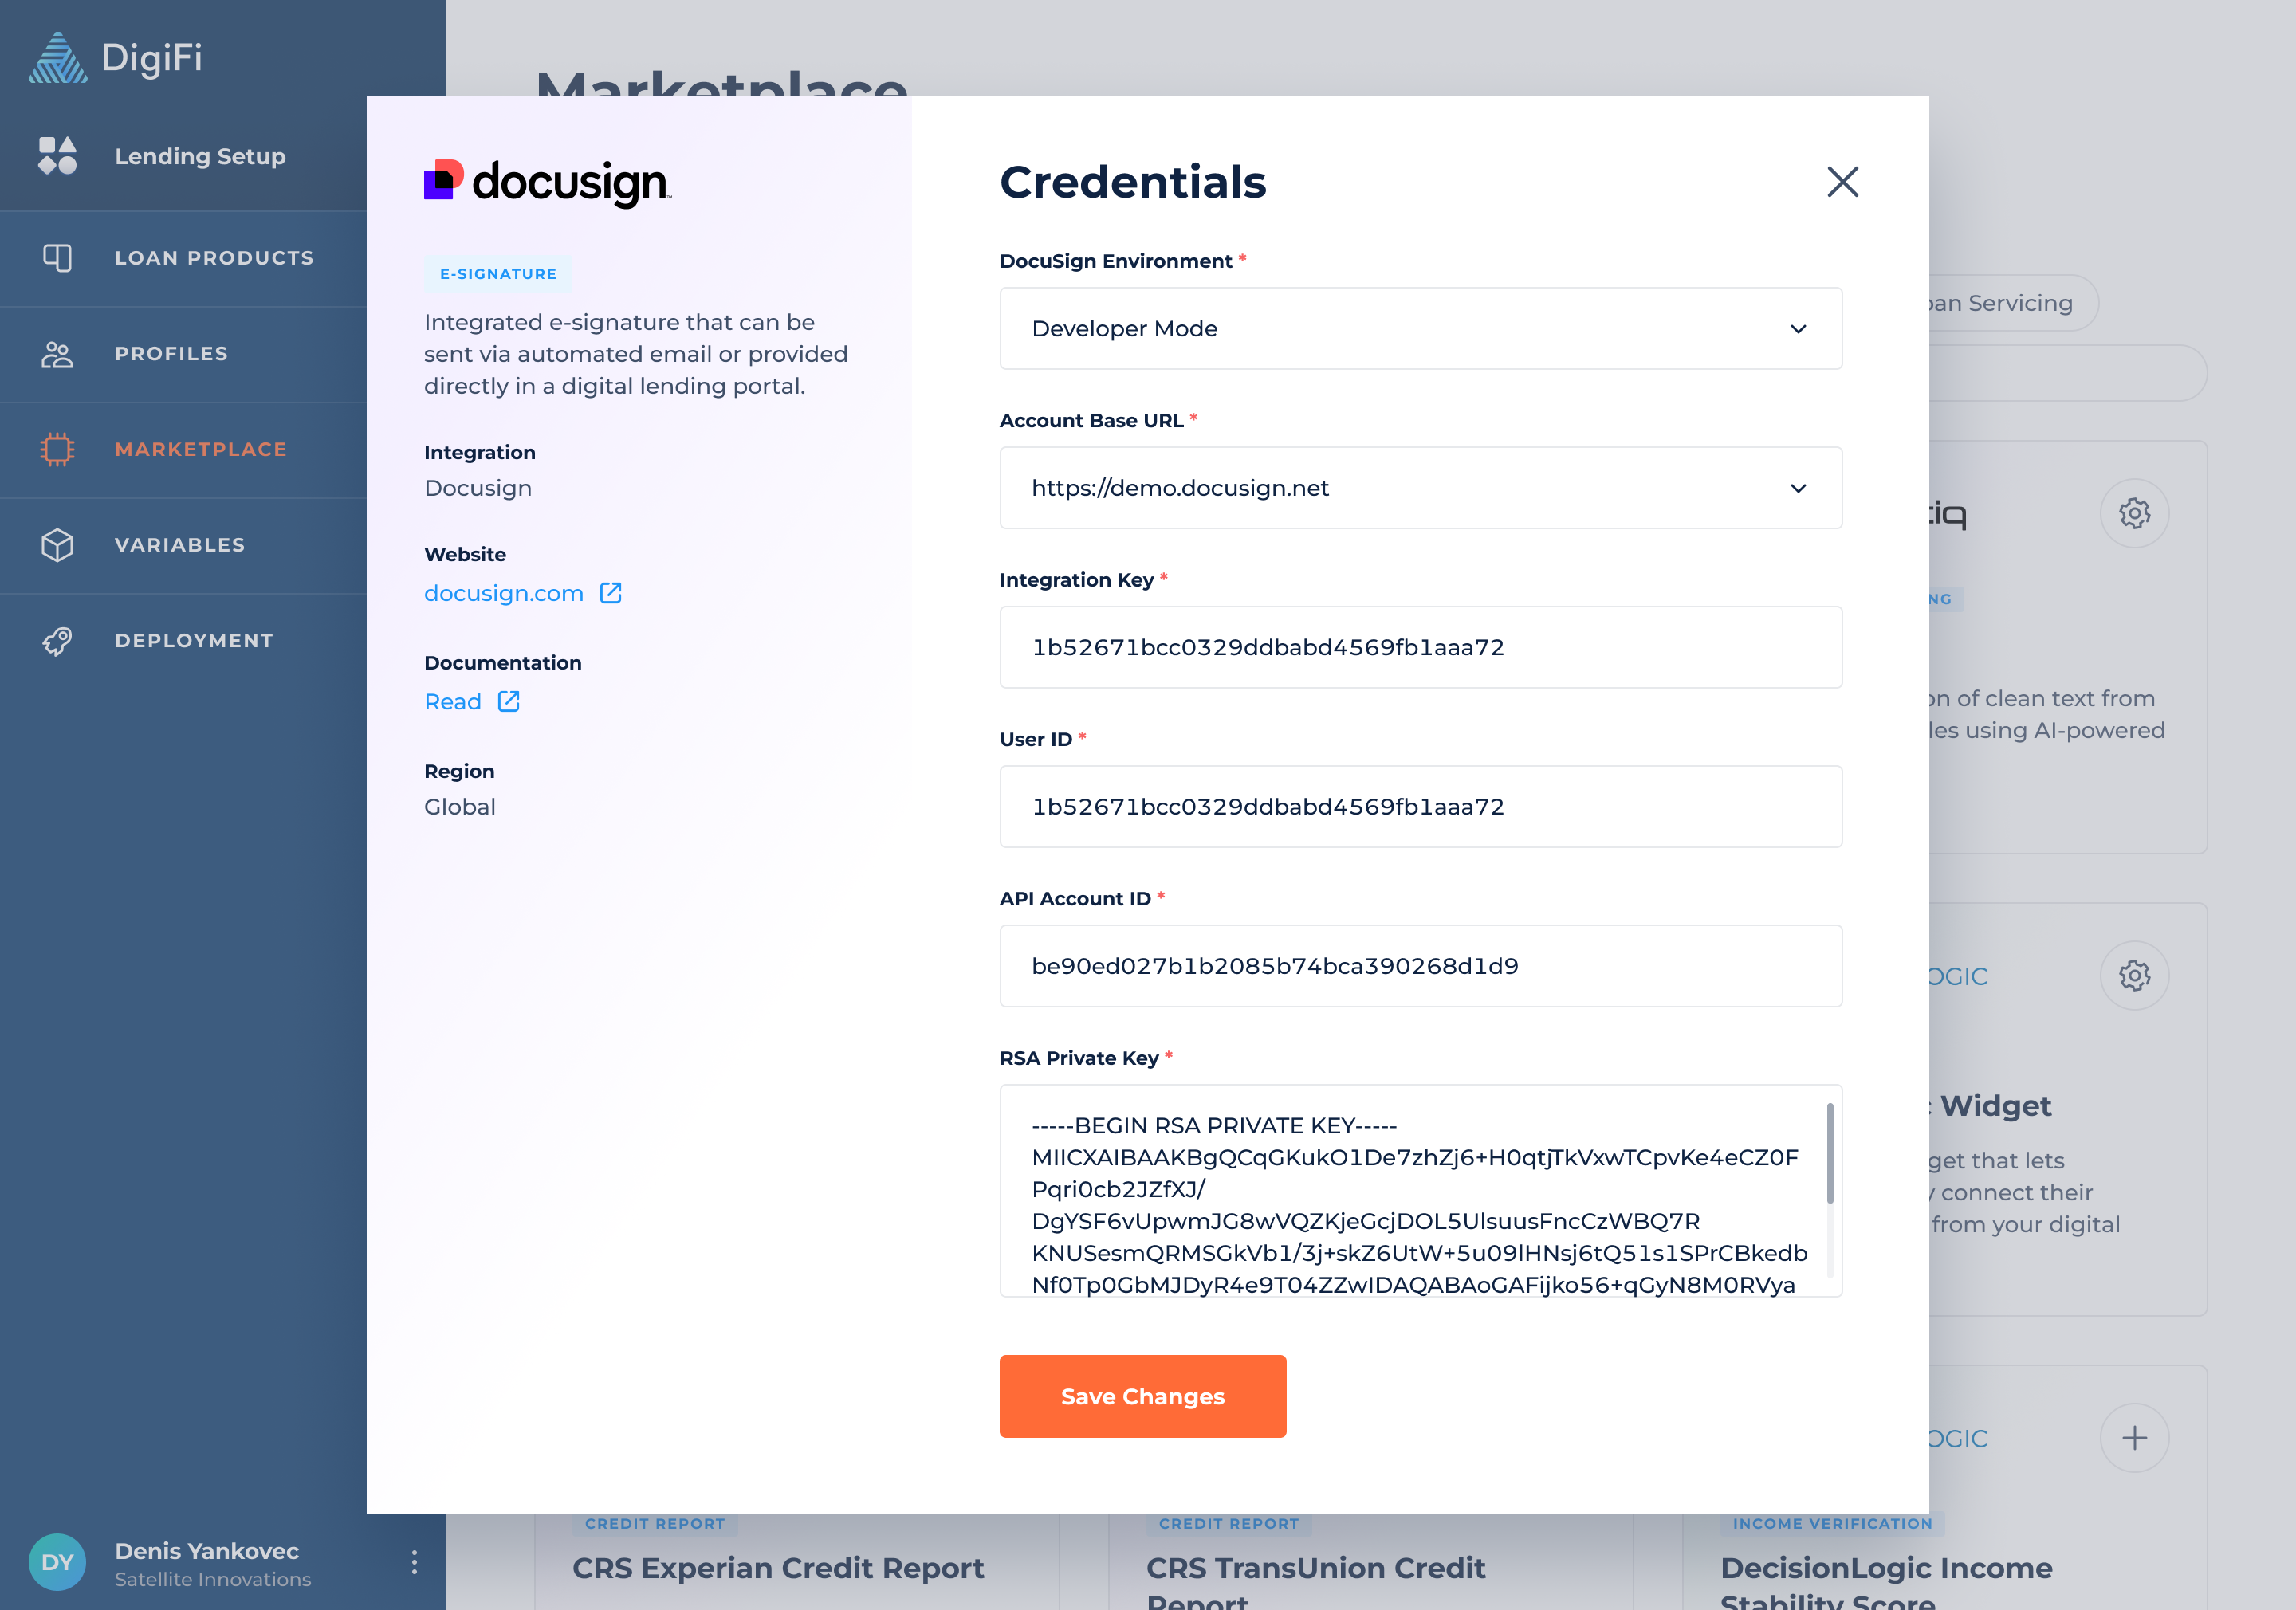
In this step, you'll add your Docusign credentials to the DigiFi platform. To get started, open DigiFi and navigate to Lending Setup > Marketplace > DocuSign.
To update your credentials:
- Click the "Edit Credentials" button.
- Add your Docusign credentials (details below).
- Click the "Save Changes" button.
Form fields details:
- "Docusign Environment" is either "Developer Mode" or "Production Mode". For now, select "Developer Mode".
- Account Base URL should be set to "https://demo.docusign.net" for testing.
- Integration Key should be from Docusign.
- User ID should be from Docusign.
- API Account ID should be from Docusign.
- RSA Private Key should be from Docusign.
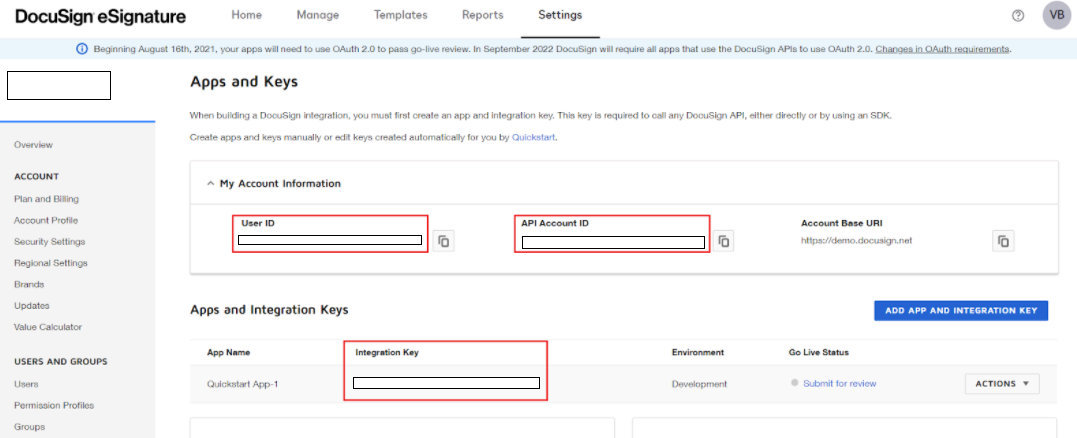
Your Docusign Integration Key, User ID and API Account ID can all be found from the "Apps and Keys" page.
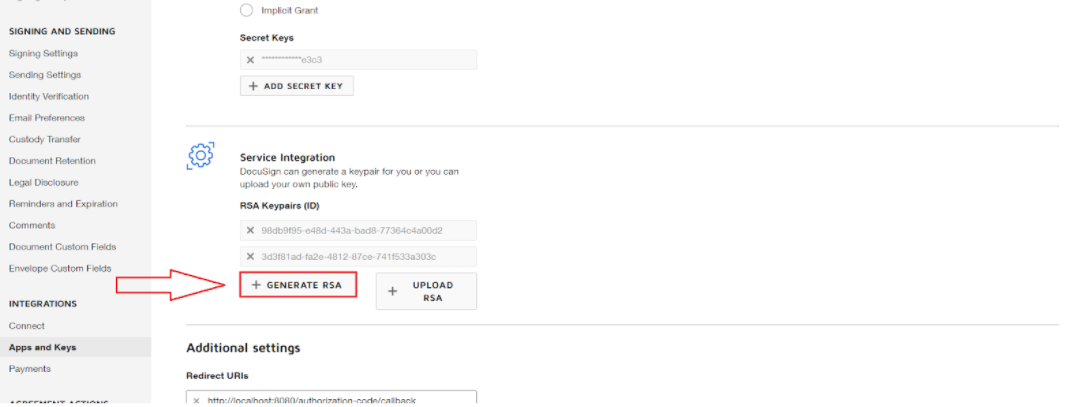
Your RSA Private Key must be generated. To generate it:
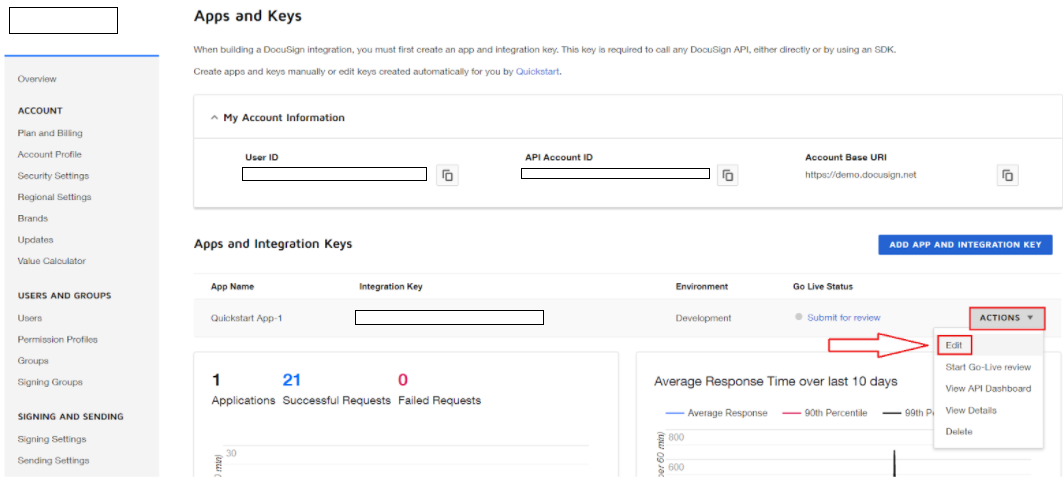
- Click the "Actions" button and select "Edit" from the list of options. You will be navigated to a new page.
- Scroll down until you find the "Service Integration" section and click on the "+ GENERATE RSA" button.
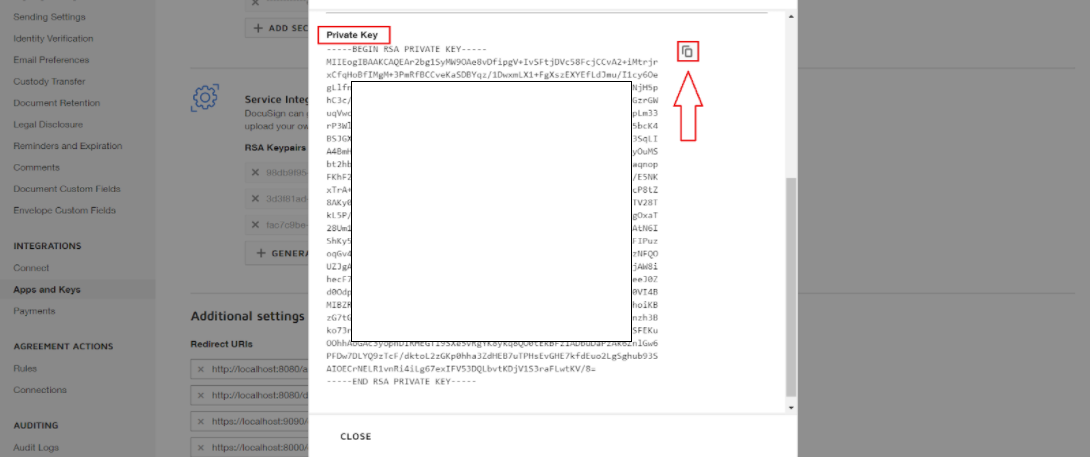
- A popup window will open that contains the RSA Private Key. Copy it into the DigiFi platform.
Step 4: Import Templates To DigiFi
To import Docusign templates to DigiFi, please follow the instructions in the User Manual. Templates can be imported once Docusign credentials are added to DigiFi.
Step 5: Activate Production Docusign
After you have successfully tested your DigiFi-Docusign integration, you need to go through the following steps to activate your production account:
- Log in to your full Docusign account.
- Complete the Docusign go-live process instructions, which you can find here. The built-in Docusign integration within DigiFi supports OAuth 2.0 authentication, so you can confirm this during the review process.
- After completing the promotion process, get user consent for the production account. To do this repeat Step 2 from the Test Environment section but replace the base URL with "https://account.docusign.com/oauth/auth".
- Once user consent for the production account is obtained, generate a new RSA private key and save it.
- Navigate back to the DigiFi platform and open the Docusign card in the marketplace. Set the "Docusign Environment" field to "Production Mode," then update the "Account Base URL," "User ID," and "API Account ID" with the values displayed on the "App and Keys" page of your Docusign production account. Finally, replace the RSA private key with the one you previously generated for production.
Updated 3 months ago
