Lender Application Views
How to set the data structure and visual layouts of applications.
Overview of Lender Application Views
The "Lender Application Views" section of a loan product lets you configure the data and information that each application will include, organize this information however you want your team to view it, and set permissions for each application section.
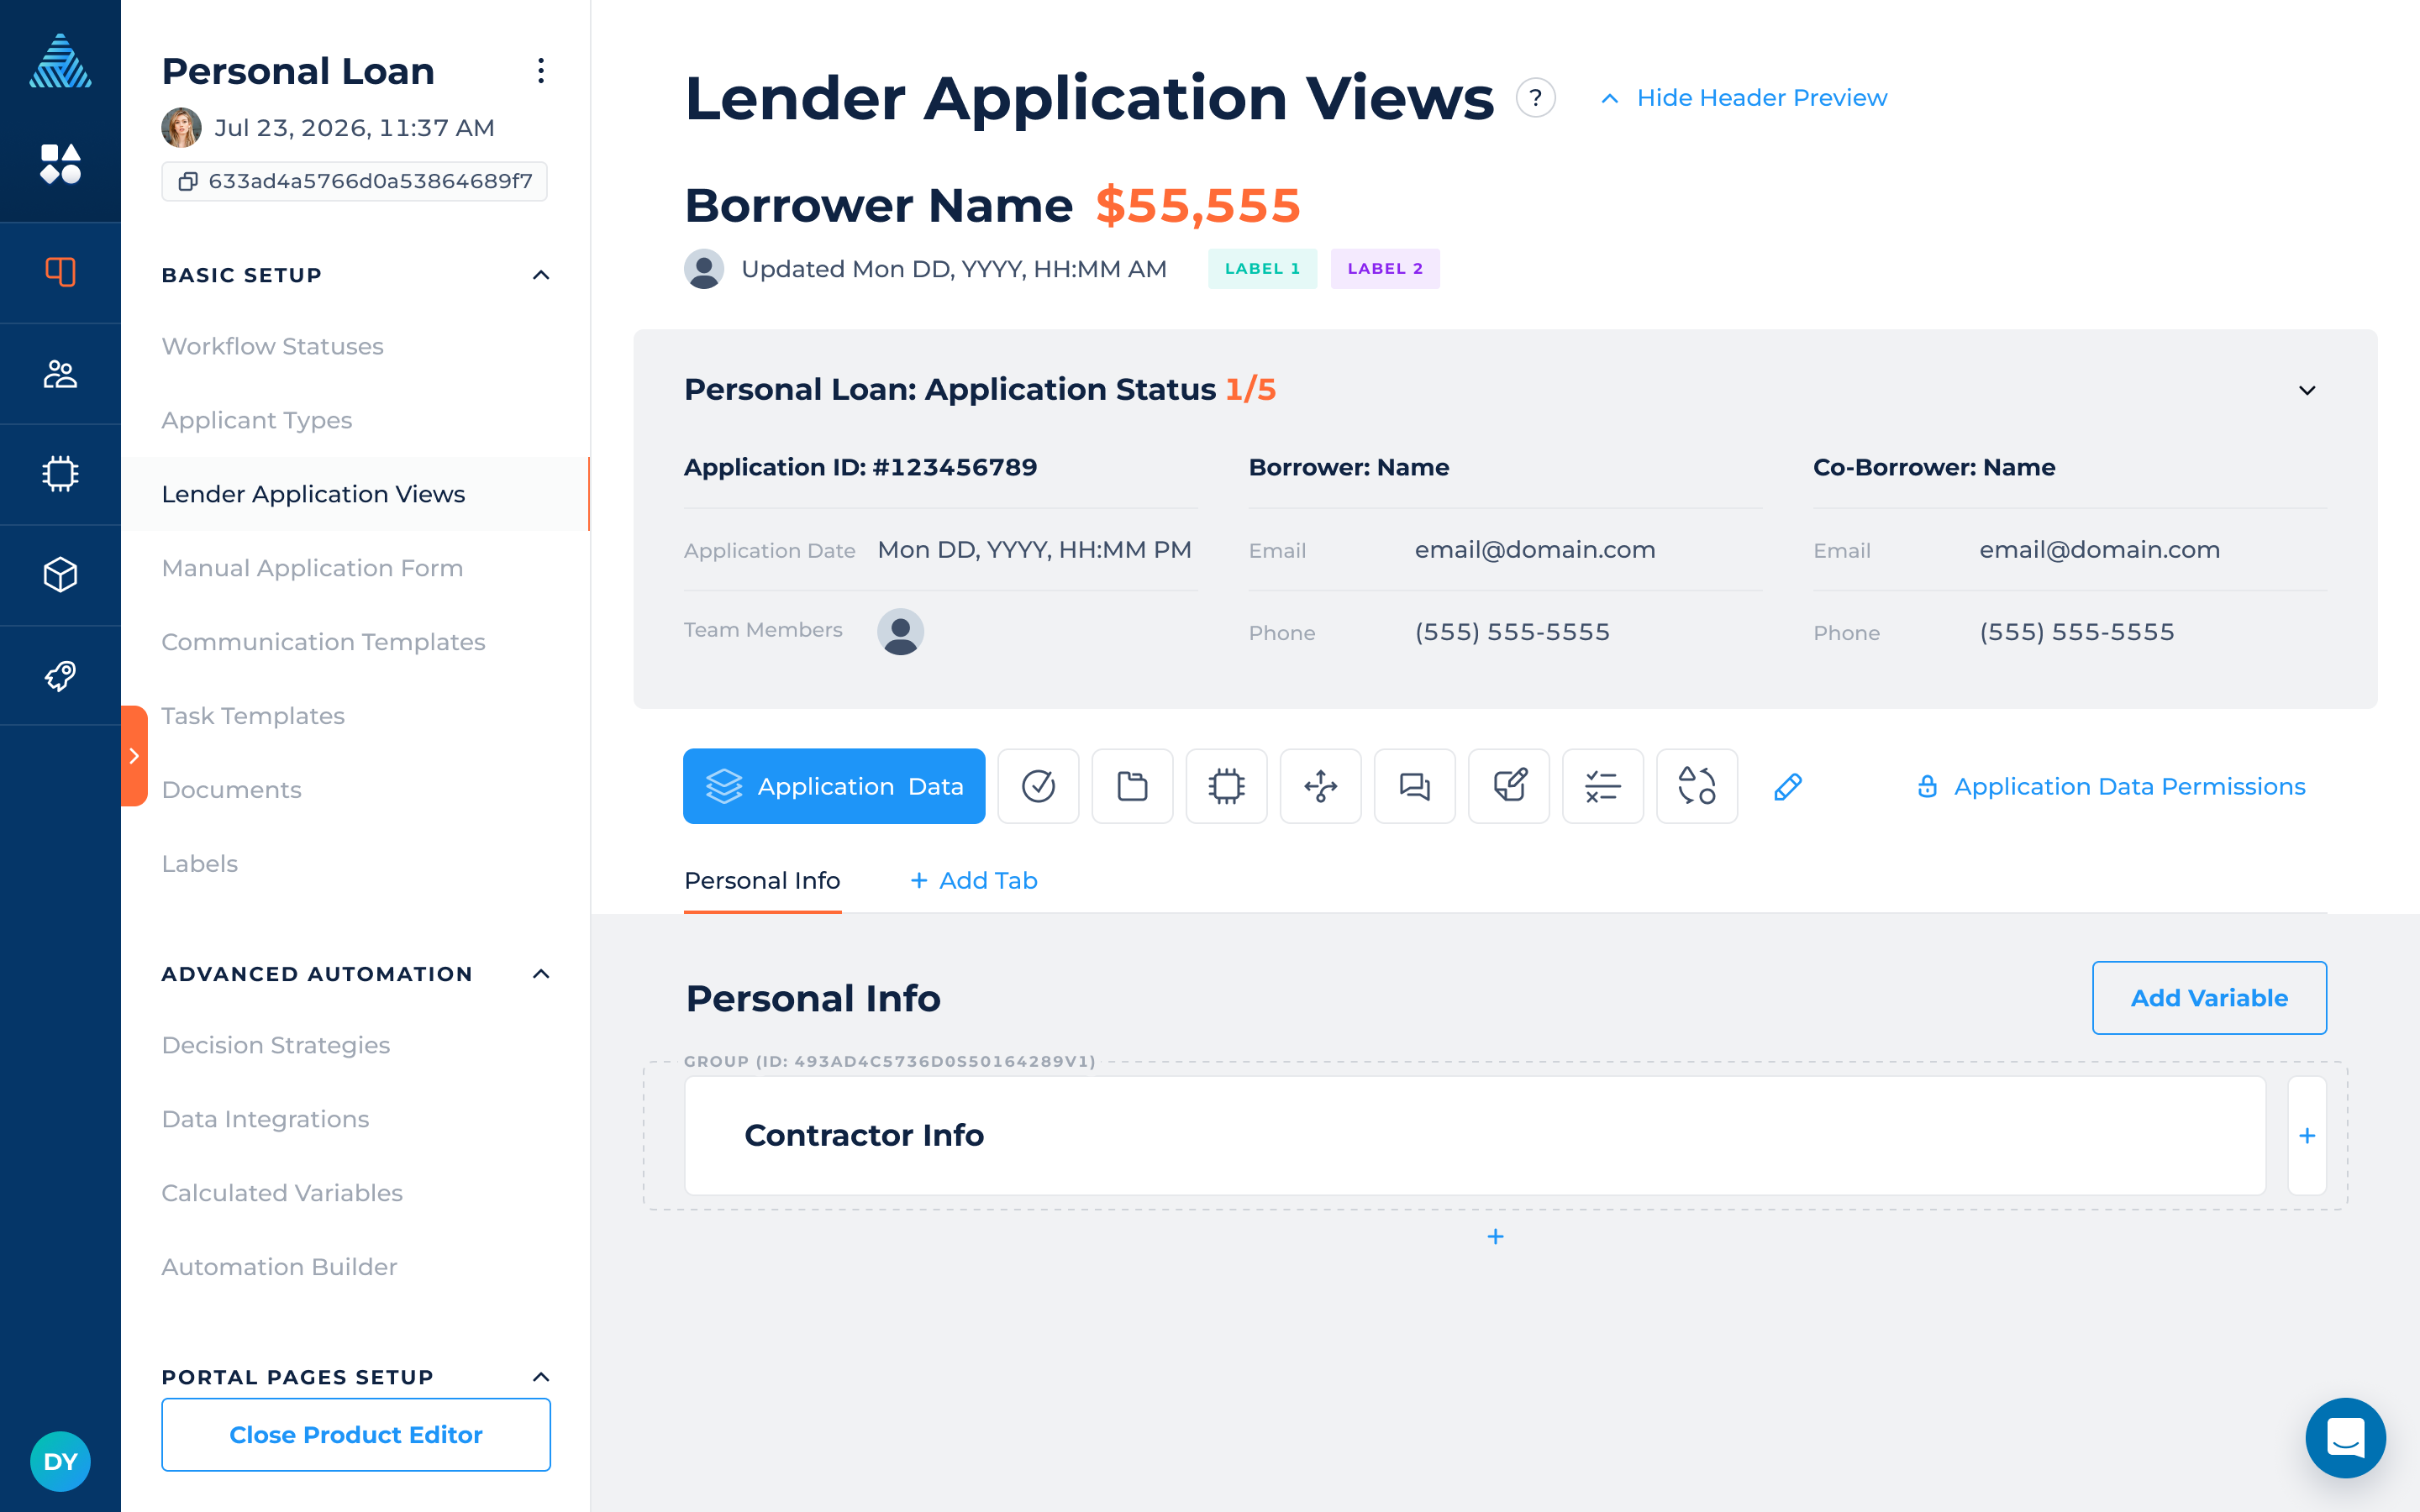
The "Lender Application Views" page includes four sections:
- Application Header: The standard layout at the top of every application. This cannot be changed but will automatically update based on your loan product's name, statuses, borrower types, etc.
- Application Sections: The sections of an application that your team will see when they view it. There are 9 section types: Application Data, Documents, Emails, Tasks , Notes, Decisions, Integrations, Status Rules and History.
- Application Section Permissions: Determines the level of access each team member has for the different application sections. Permissions include "Read and Edit," "Read Only," and "No Access," customized for each section.
- Section Details: A detailed view that differs by section type. For the "Application Data" section, it can be further configured (see below), however for other section types it is a static visual representation.
Section Types
When a new loan product is created, the "Lender Application View" will include all section types. You can configure the "Application Data" section and reorder other sections.
Below is a list of the types of sections.
| Section Type | Section Description |
|---|---|
| Application Data | Determines which variables (i.e. data) will be saved on applications as well as the the user interface that your day-to-day users will experience for viewing and editing application data. Add "Application Data" tabs, and configure the variables on the tab using DigiFi's built-in drag-and-drop tools. More information on "Application Data" tabs is below. |
| Documents | Allows your team members to upload, download and preview application documents, as well as initiate e-sign integrations, generate documents and request additional files from the borrower or intermediary. |
| Communications | Displays the communications that have been sent to or received from the borrower(s) on the application. Allows your team members to create, reply or forward emails and text messages to the borrower(s). |
| Tasks | Allows your team members to create, view and edit the tasks related to the application. Tasks can be assigned to your team members, the borrower or the intermediary to indicate what actions must be taken to advance the application. Tasks can also include instructions, labels, variables, documents and comments to streamline workflows. |
| Notes | Allows your team members to create, view and edit general notes related to the application. |
| Decisions | Displays the results of decisioning processes and integrations related to the application (for example, automated underwriting or verification decisions). Allows your team members to run additional decisions using application data and the decision strategies you set up. |
| Integrations | Displays the results of integrations related to the application (for example, credit reports). Allows your team members to run additional Data Integrations using the integrations you set up. |
| Status Rules | Displays all statuses and the rules that must pass for each (if any). |
| History | Displays the comprehensive history of each application, as well as the activity date and the user that performed the action. This history is preserved so that your team members can understand the steps that each application went through prior to approval or rejection. |
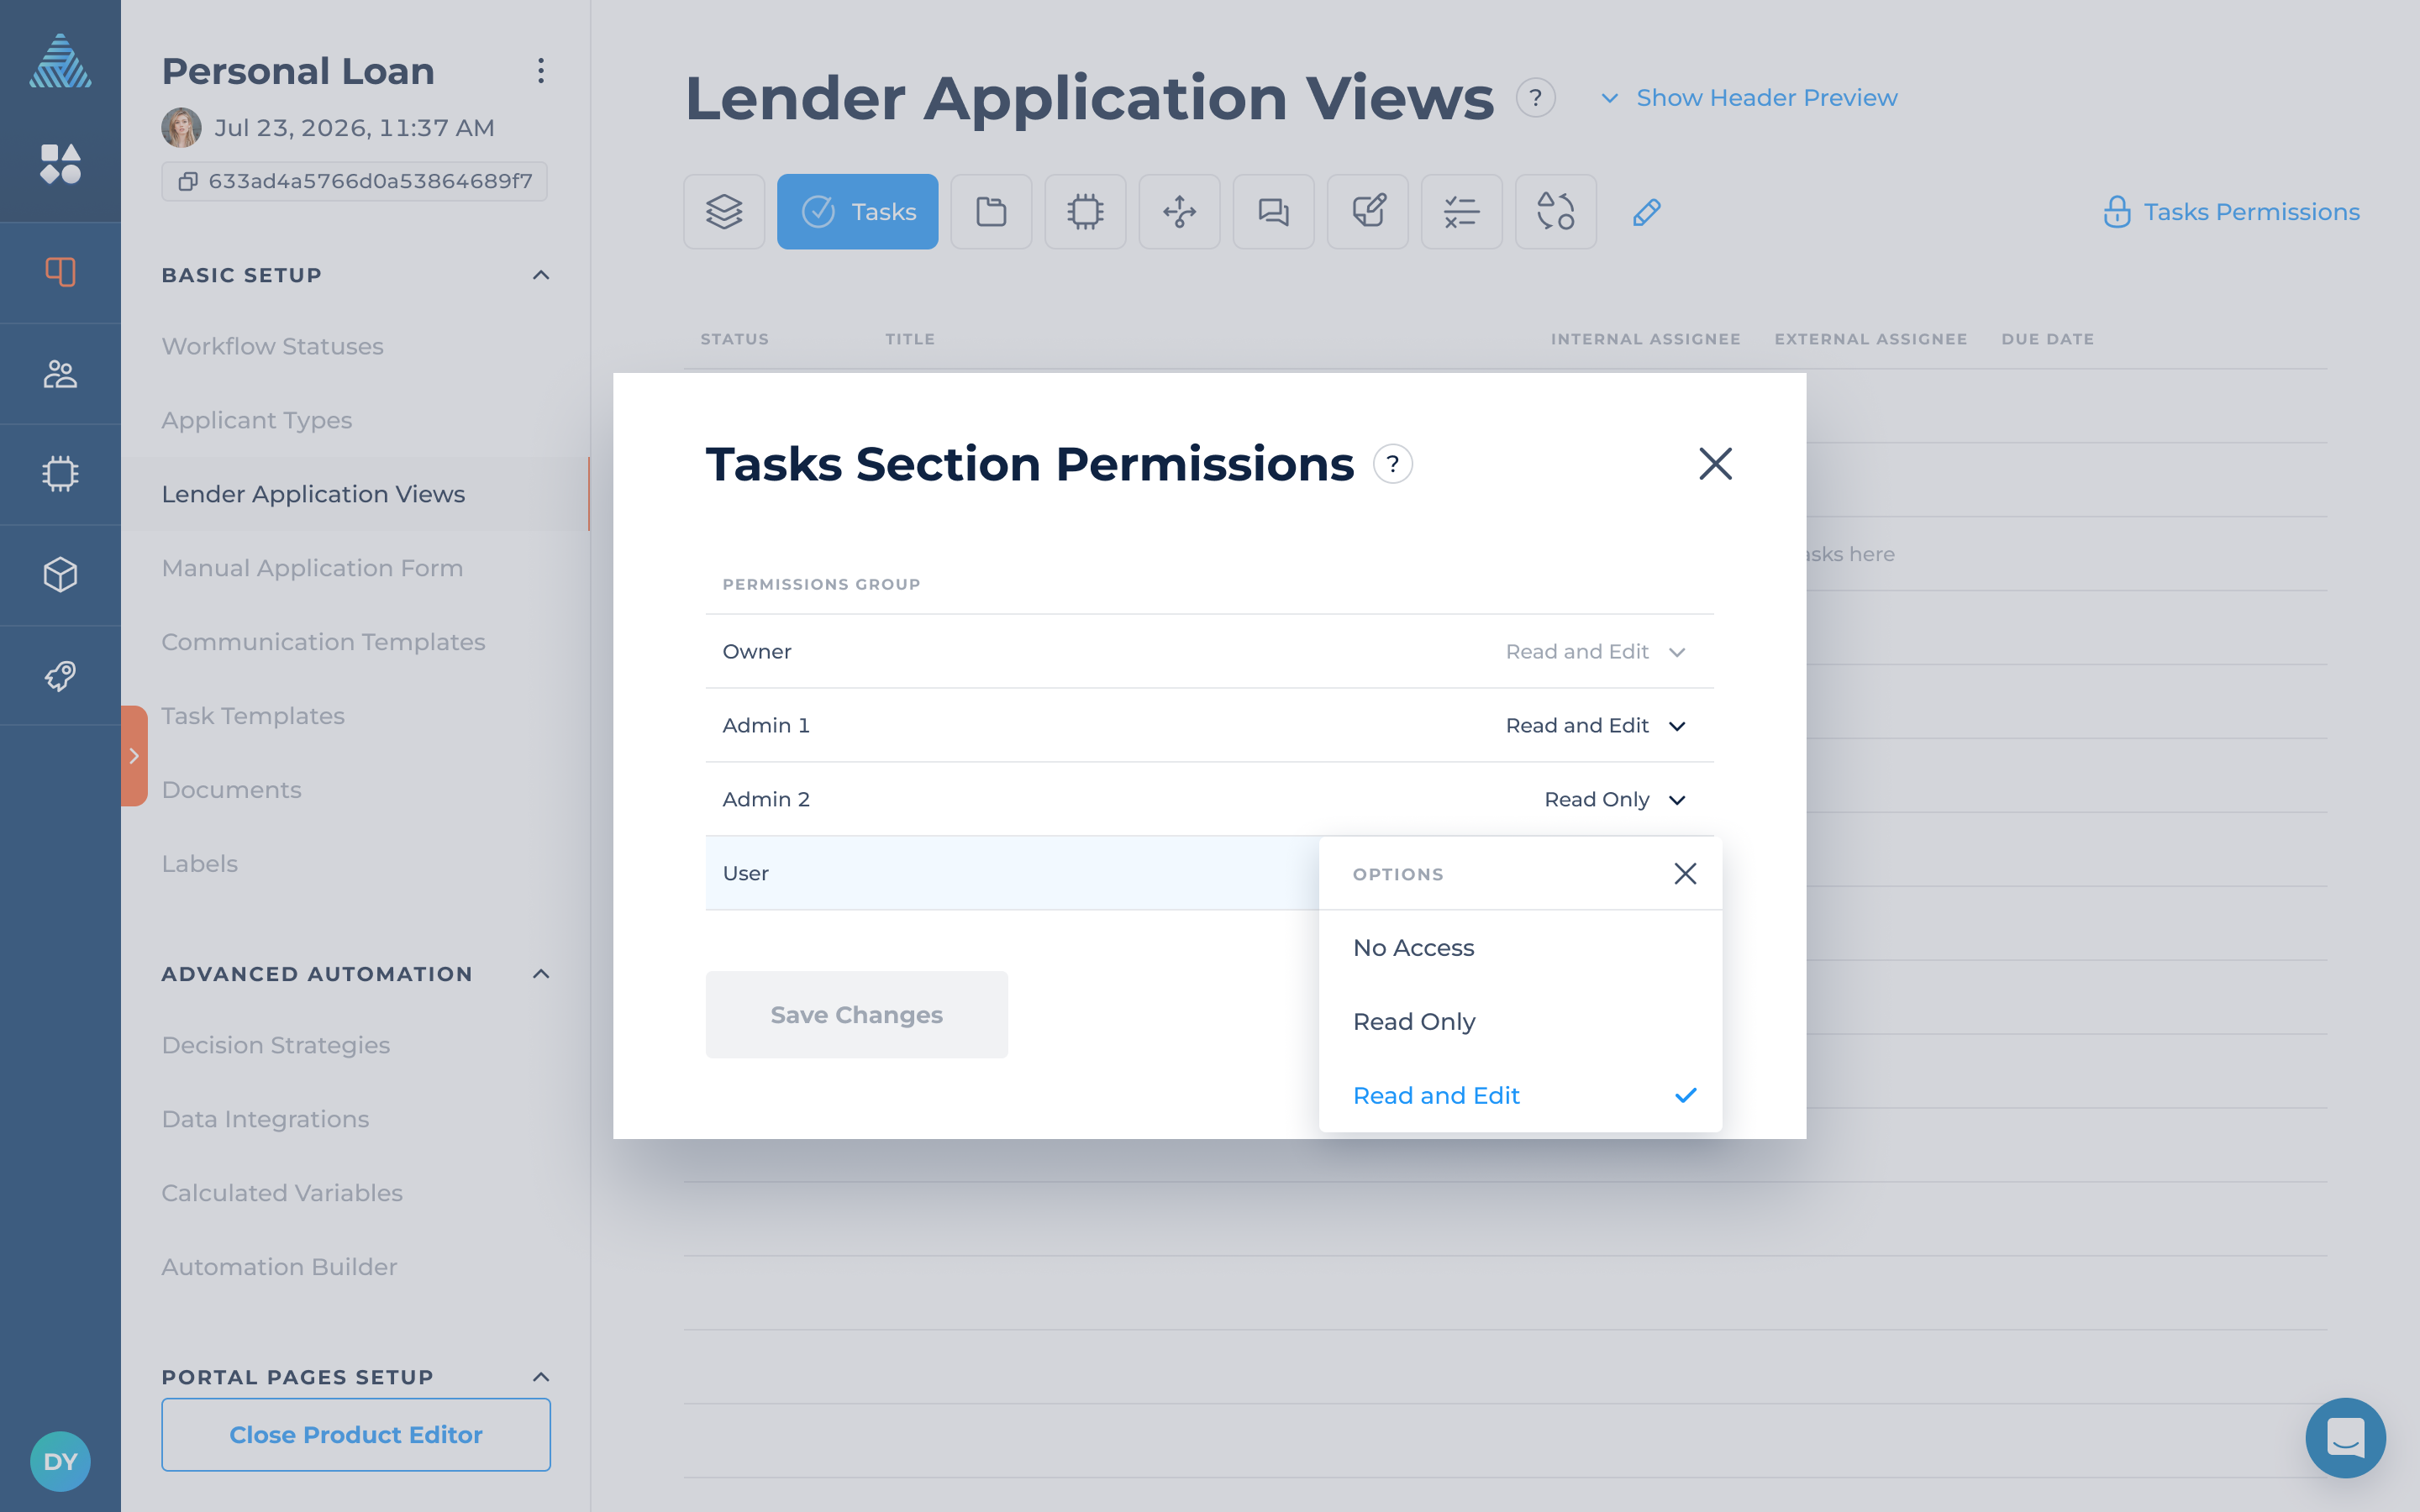
Application Section Permissions
When a loan product is created, all application sections default to "Read and Edit" access for all permission groups. Depending on the section, you can assign specific permission groups different levels of access, such as "Read Only" or "No access." The access level to the application section also determines the access to the corresponding main section within the loan product in the Lending System (e.g., Decisions).
To adjust permissions, open the tab, click on the lock icon on the right side of the page (e.g., Tasks Permissions), and select the level of access for each permission group (except for Owners):
- Read and Edit
- Read Only
- No Access
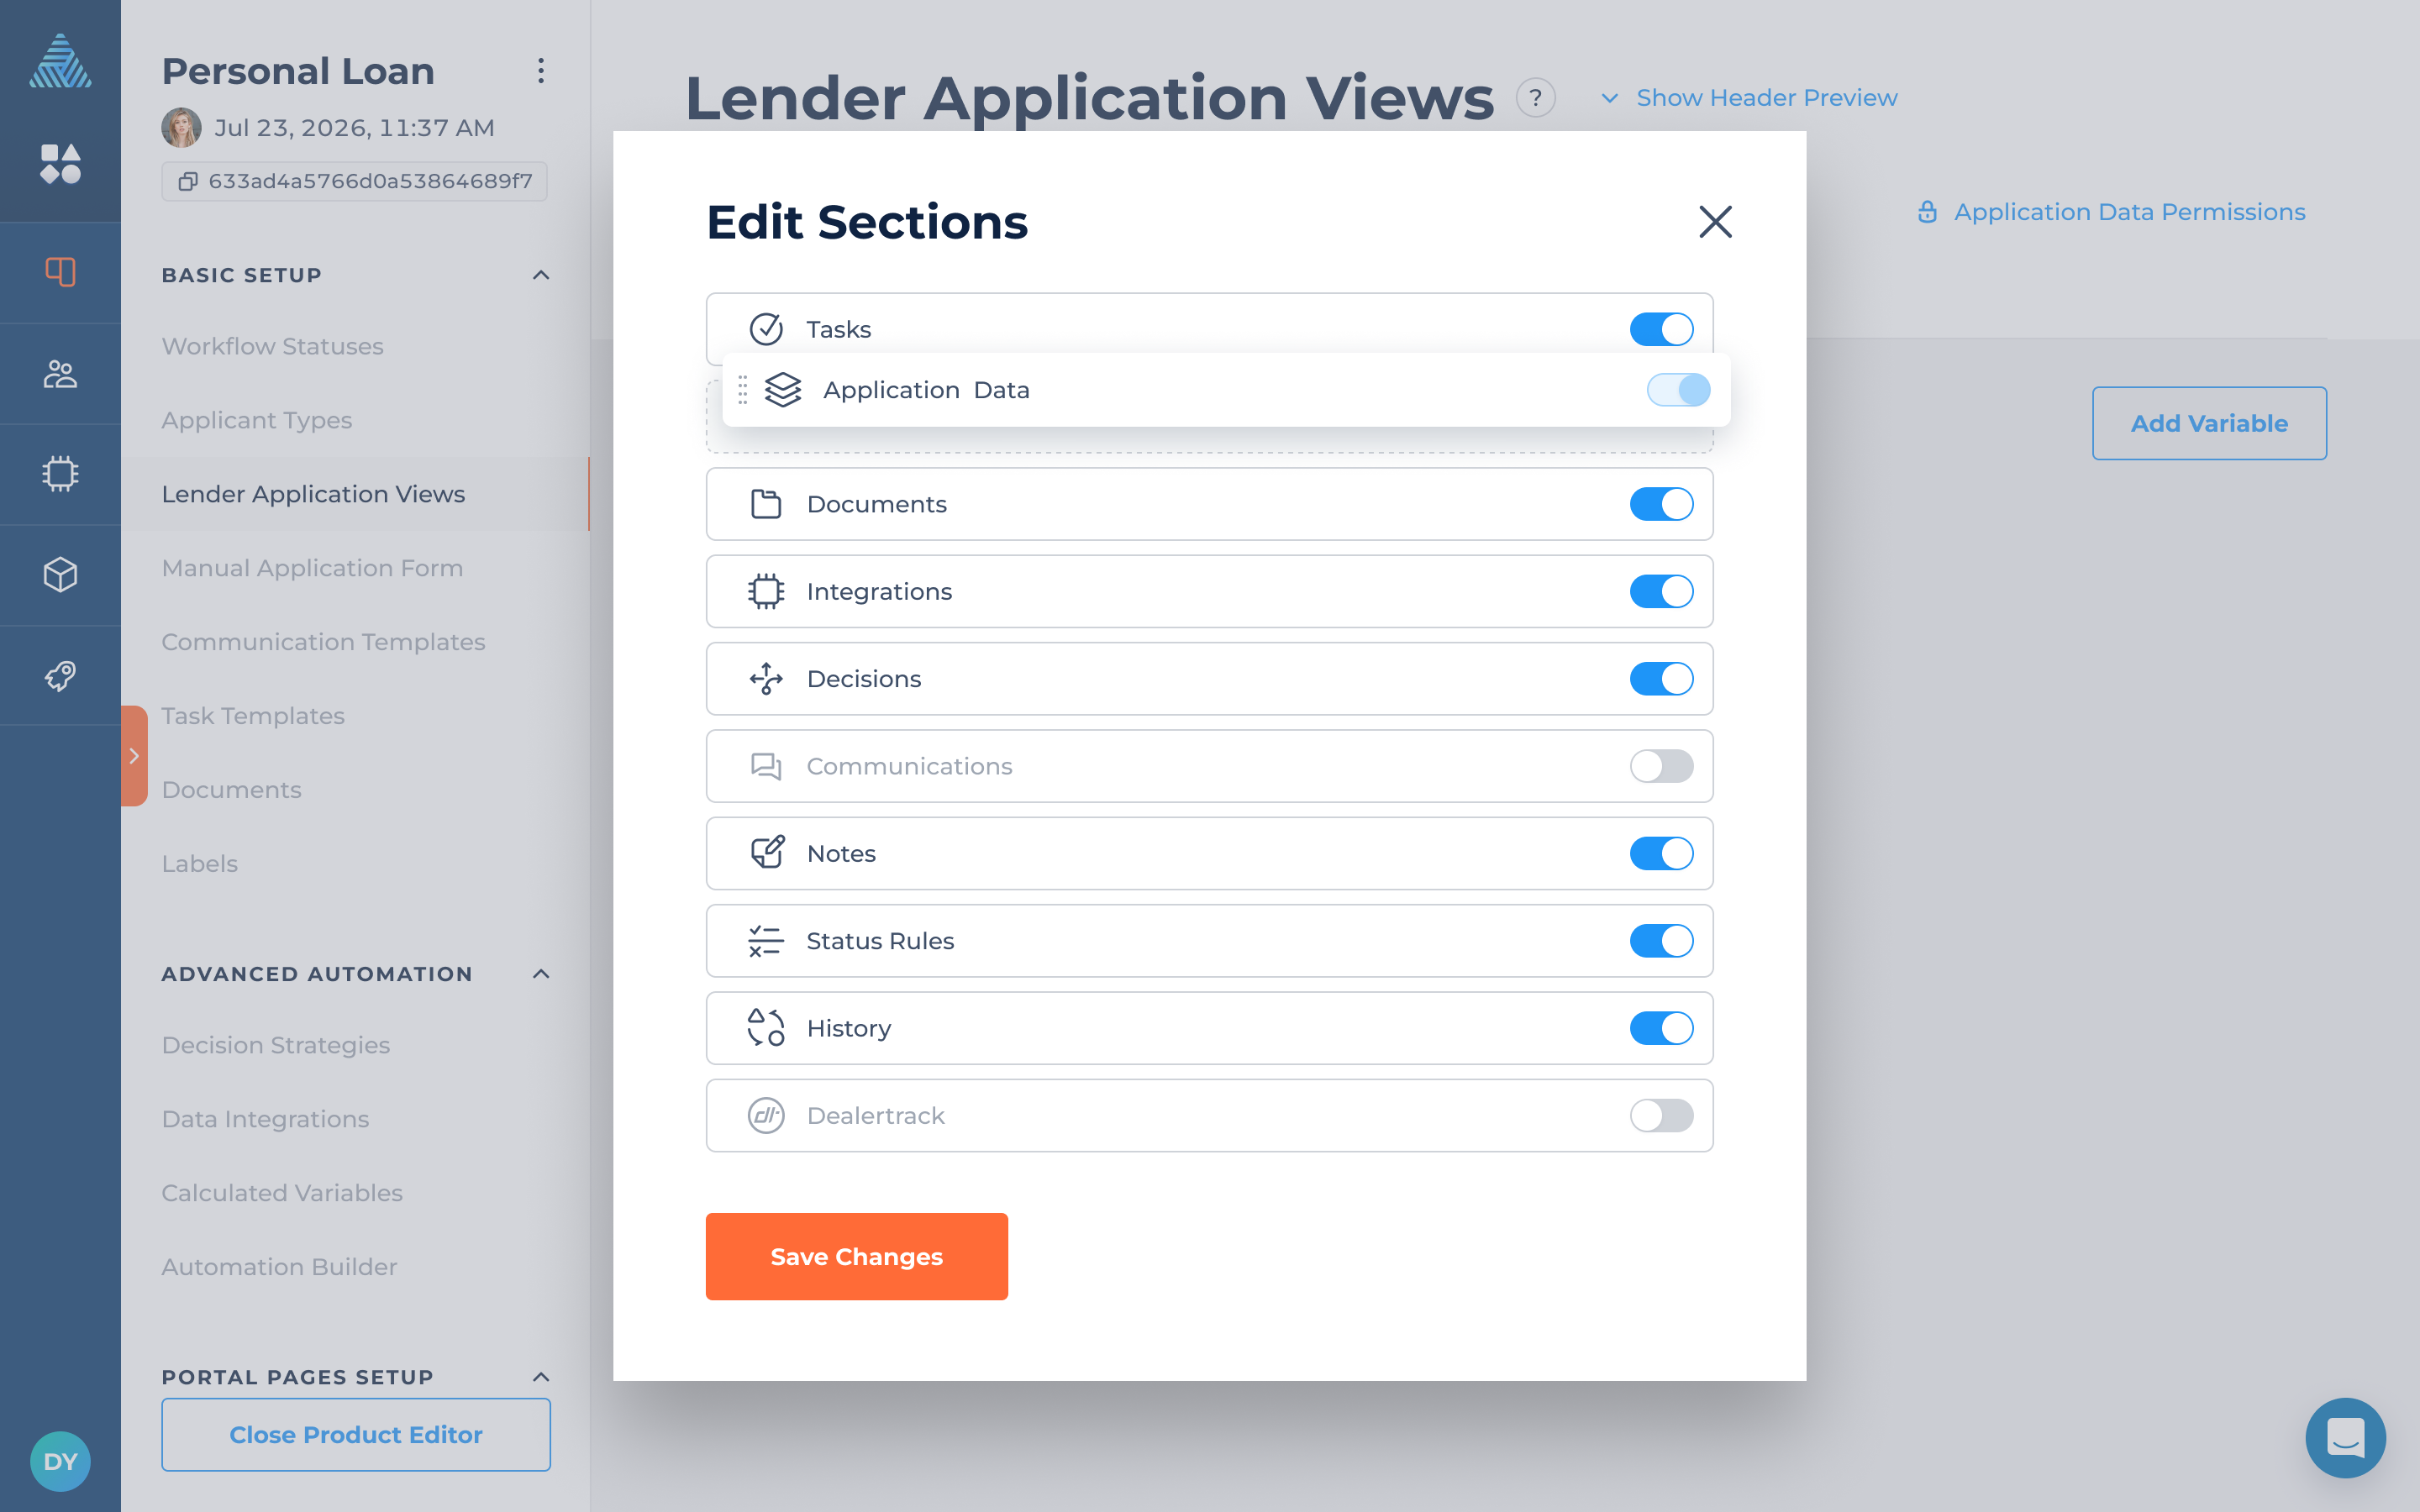
How To Reorder or Deactivate Sections
To edit the visibility or reorder the application sections:
- Click the blue "Pen" icon.
- Change the section order using drag-and-drop functionality.
- Change the visibility of sections by toggling them off (deactivated sections will be grayed out).
- Click "Save Changes."
Please note that "Application Data" tabs are reordered separately. To do that, navigate to the "Application Data" section, hover over the application data tab and use drag-and-drop functionality to change the order.
Application Data Section
The "Application Data" section can contain multiple "Application Data" tabs, each of which requires additional configuration. These tabs control which variables (i.e. data) will be saved on each application as well as the user interface that your team members will experience for viewing and editing application information.
On each "Application Data" tab, you can add groups, configure sections, and define variables.
- To add a new group, click on the "+" button located below the bottom section. You can add new groups below an existing group or between two existing groups, you can also rearrange the order of groups using drag-and-drop.
- To add a new section, click on the "+" button located on the right side of the section. Please note that sections can only be added across the group (with a maximum of 4 sections). You can drag-and-drop sections from one group to another (if it has fewer than 4 sections) and change the order of sections within the same group.
- To add a description to a section, hover over the section. Click on the 3-dots, and then select "Add Description."
- To add a variable, click on the "Add Variable" button. A pane will appear on the right side of the screen and you can drag-and-drop variables onto the page. To move a variable, click and hold down your cursor. The variable can then be dragged to another location.
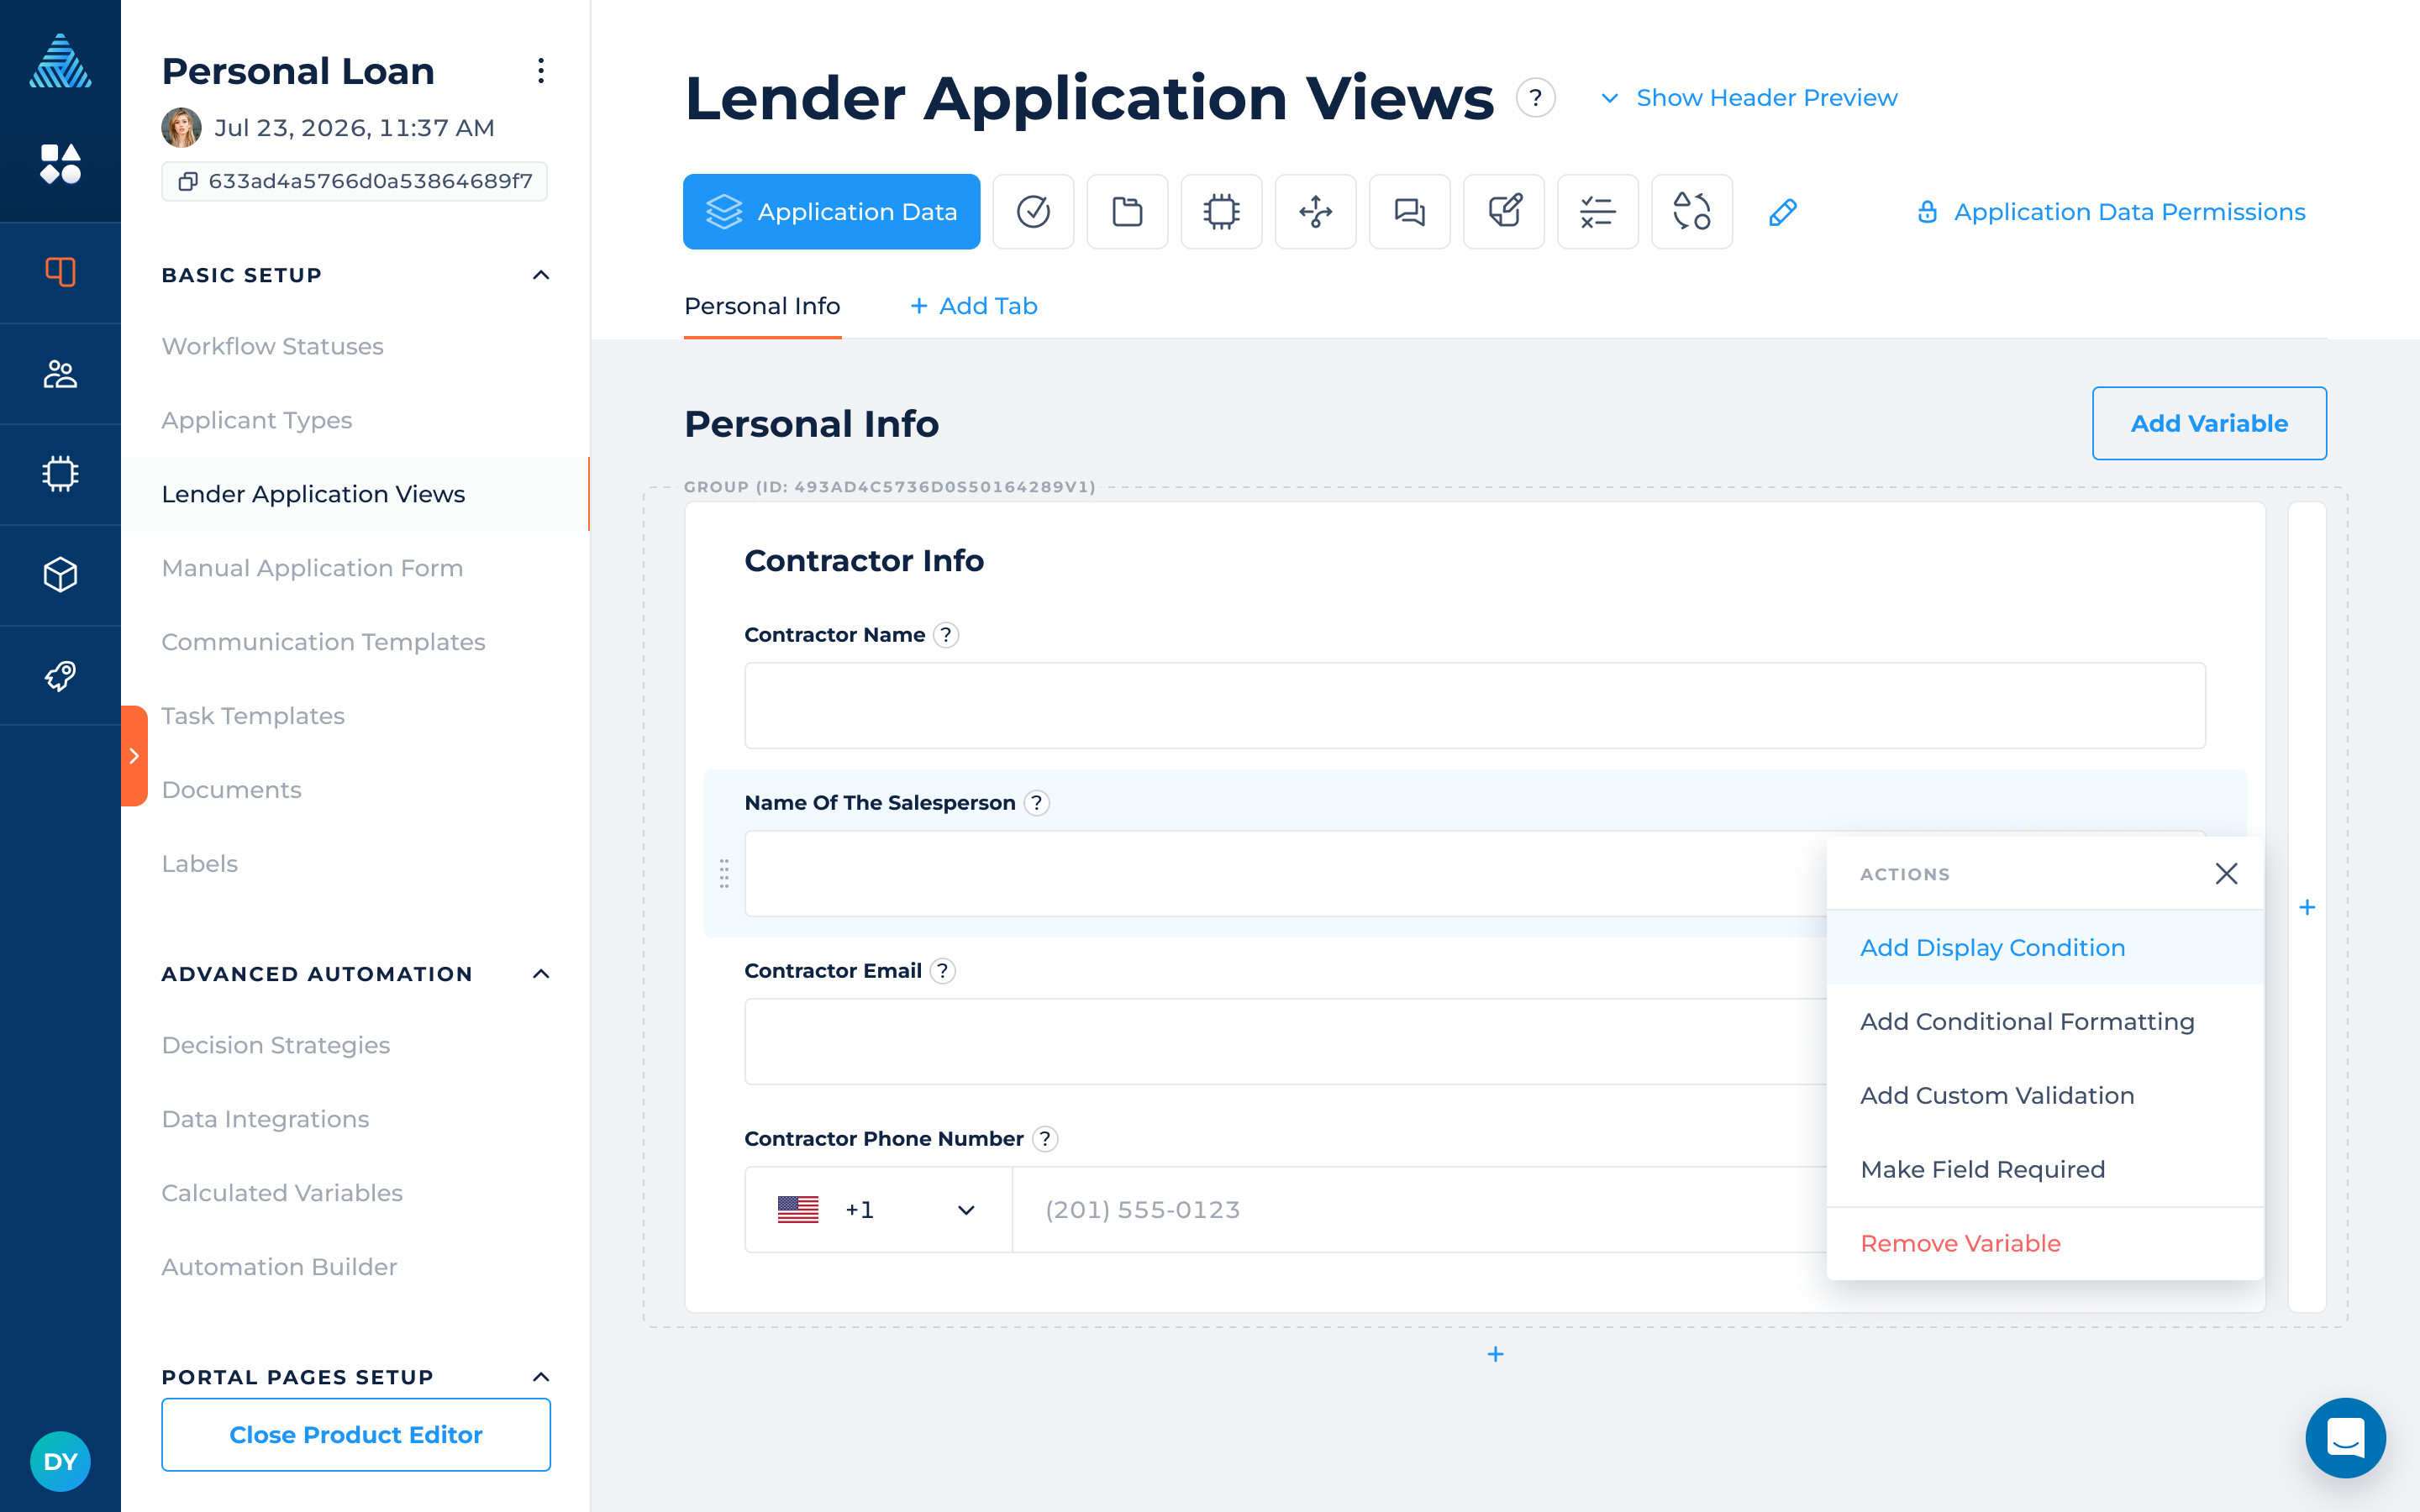
- To make a variable "required", hover over the variable, click on the 3-dots and then click "Make Field Required". It will receive a red asterisk to indicate the change. You can repeat the same process to remove the requirement.
- To add a "Display Condition" to a variable, hover over the variable, click on the 3-dots and select "Add Display Condition". This will let you set a condition (using DigiFi's formula language) to determine whether the variable should display. The condition must return TRUE (boolean) or "true" (string) for the variable to be displayed. Please remember that a variable with any value will always display.
- To add “Conditional Formatting” to a variable, hover over the variable, click on the 3-dots and click “Add Conditional Formatting”. Set condition(s) using DigiFi's formula language to determine what highlight color will be applied to a variable if its value passes a condition. You can choose the color from the color picker or add a HEX color code. The condition must return TRUE (boolean) or "true" (string) to pass and highlight the variable. Optionally you can click on a toggle and add a highlight color if all conditions fail.
- To add "Custom Validation" to a variable, hover over the variable, click on the 3-dots and select "Add Custom Validation". This will let you set a condition (using DigiFi's formula language) to determine whether the value entered into the variable is valid. Define a custom error message that will be displayed if the value does not meet the condition. The condition must return TRUE (boolean) or "true" (string) for the value to pass validation. If the condition fails, the error message will be shown and users will not be able to proceed until the value is corrected. Please note that validation is only applied to visible variables, variables hidden by display conditions are not validated, and calculated variables are excluded.
How to Add an Application Data Tab
To add an application data tab:
- Click "Application Data" section.
- Click the "+ Add Tab" button.
Your Loan Product can contain a maximum of 30 application data tabs.
How to Rename an Application Data Tab
To rename an application data tab:
- Click "Application Data" section.
- Navigate to the tab.
- Click directly on the sub-header with the tab's current name.
- Type in a new name.
The changes will automatically save.
How To Delete an Application Data Tab
To delete an application data tab:
- Click "Application Data" section.
- Navigate to any tab except the tab you want to delete.
- Hover over the tab that you want to delete.
- Click the "X" beside the tab's name.
You'll be prompted to confirm the deletion, after which the tab will be removed.
Updated about 2 months ago