Marketplace Overview
A brief overview of DigiFi's integration marketplace.
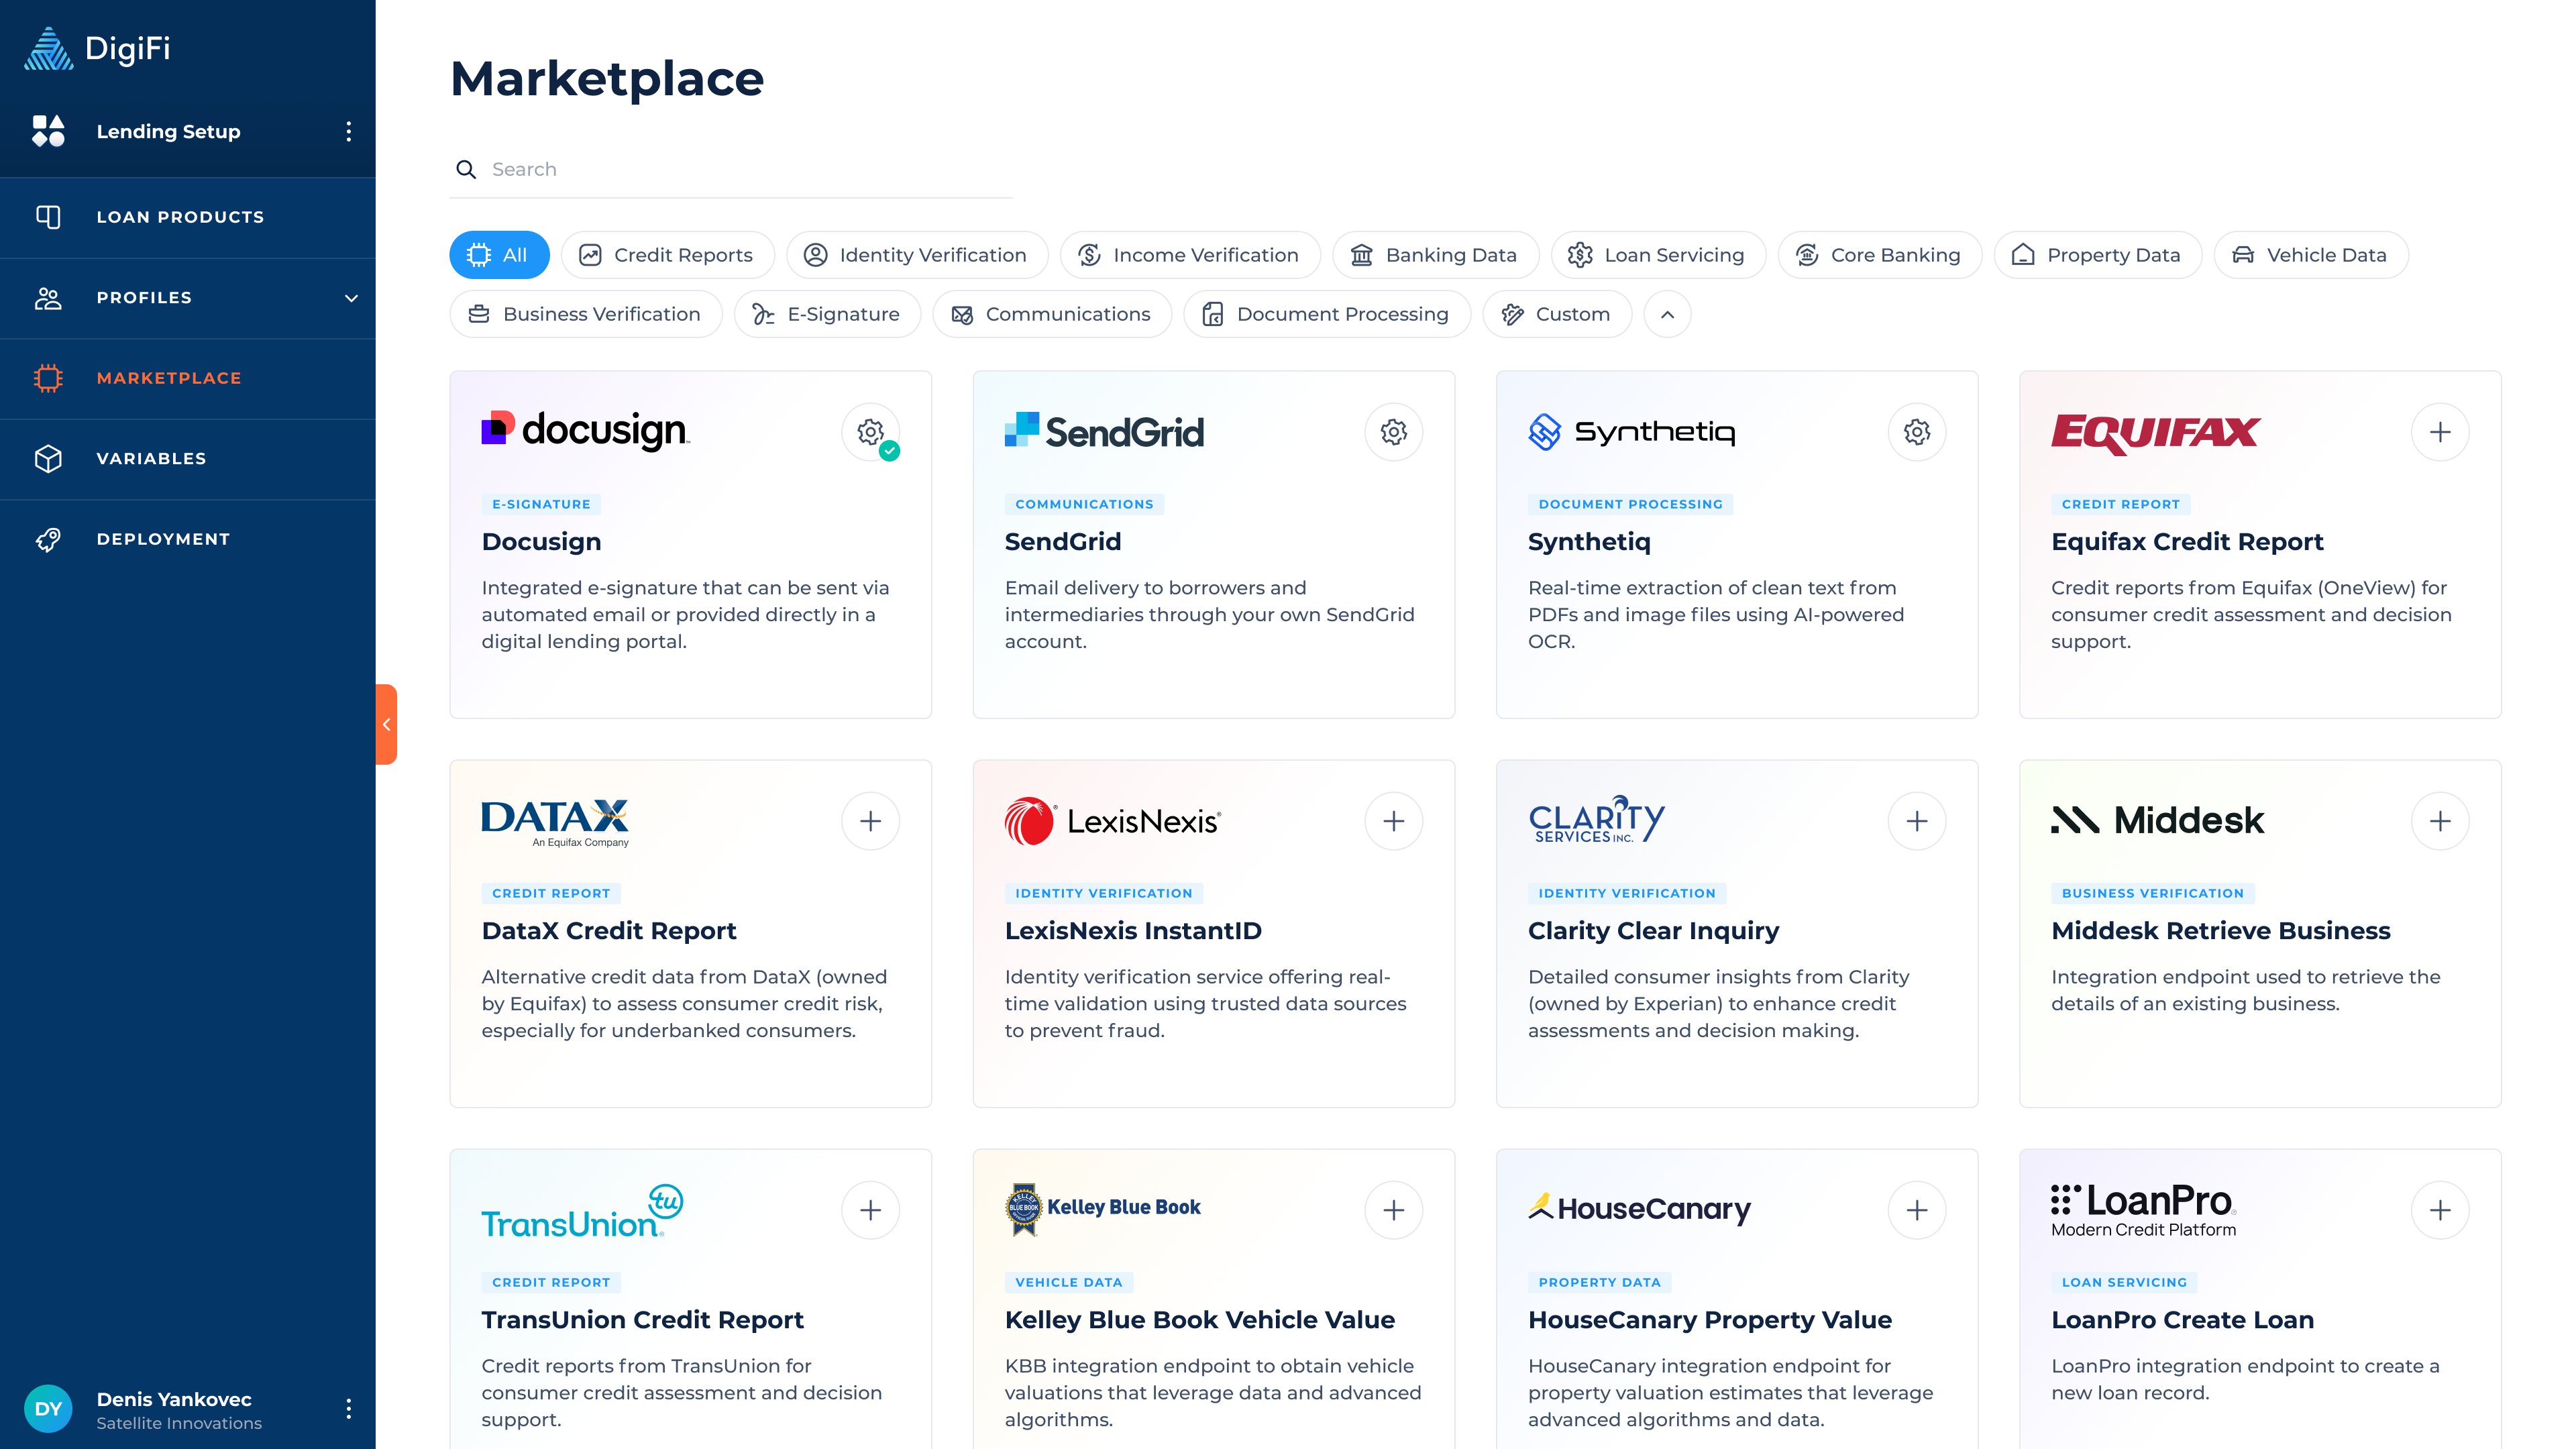
Overview of Marketplace
DigiFi provides out-of-the-box integrations through a marketplace, allowing you to easily connect and customize integrations for your lending process. The aim of the marketplace is to accelerate the implementation process, making it easier and less time-consuming.
It provides a wide range of integrations across various categories, including:
- Credit Reports
- Identity Verification
- Income Verification
- Banking Data
- Loan Servicing
- Core Banking
- Property Data
- Vehicle Data
- Business Verification
- E-Signature
- Communications
- Document Processing
- Portal Analytics
In addition, we offer documentation to assist in customizing and setting up the integrations for each vendor. If you have any questions or need assistance with using the marketplace, please contact DigiFi's Customer Support.
Updated 6 months ago