Borrower (Person)
How to customize borrower's profile (person) in the DigiFi platform.
General Information
DigiFi's platform allows you to add borrowers and track their history with your company. Each application includes one borrower and up to three co-borrowers.
When you create your DigiFi account, we install a standard borrower profile configuration. However, you can then modify this configuration to meet your own needs, including managing the variables (i.e. data fields) saved for each borrower as well as the visual layout of information.
To configure your own borrower profile (person) structure, navigate to Lending Setup > Profiles > Borrower (Person).
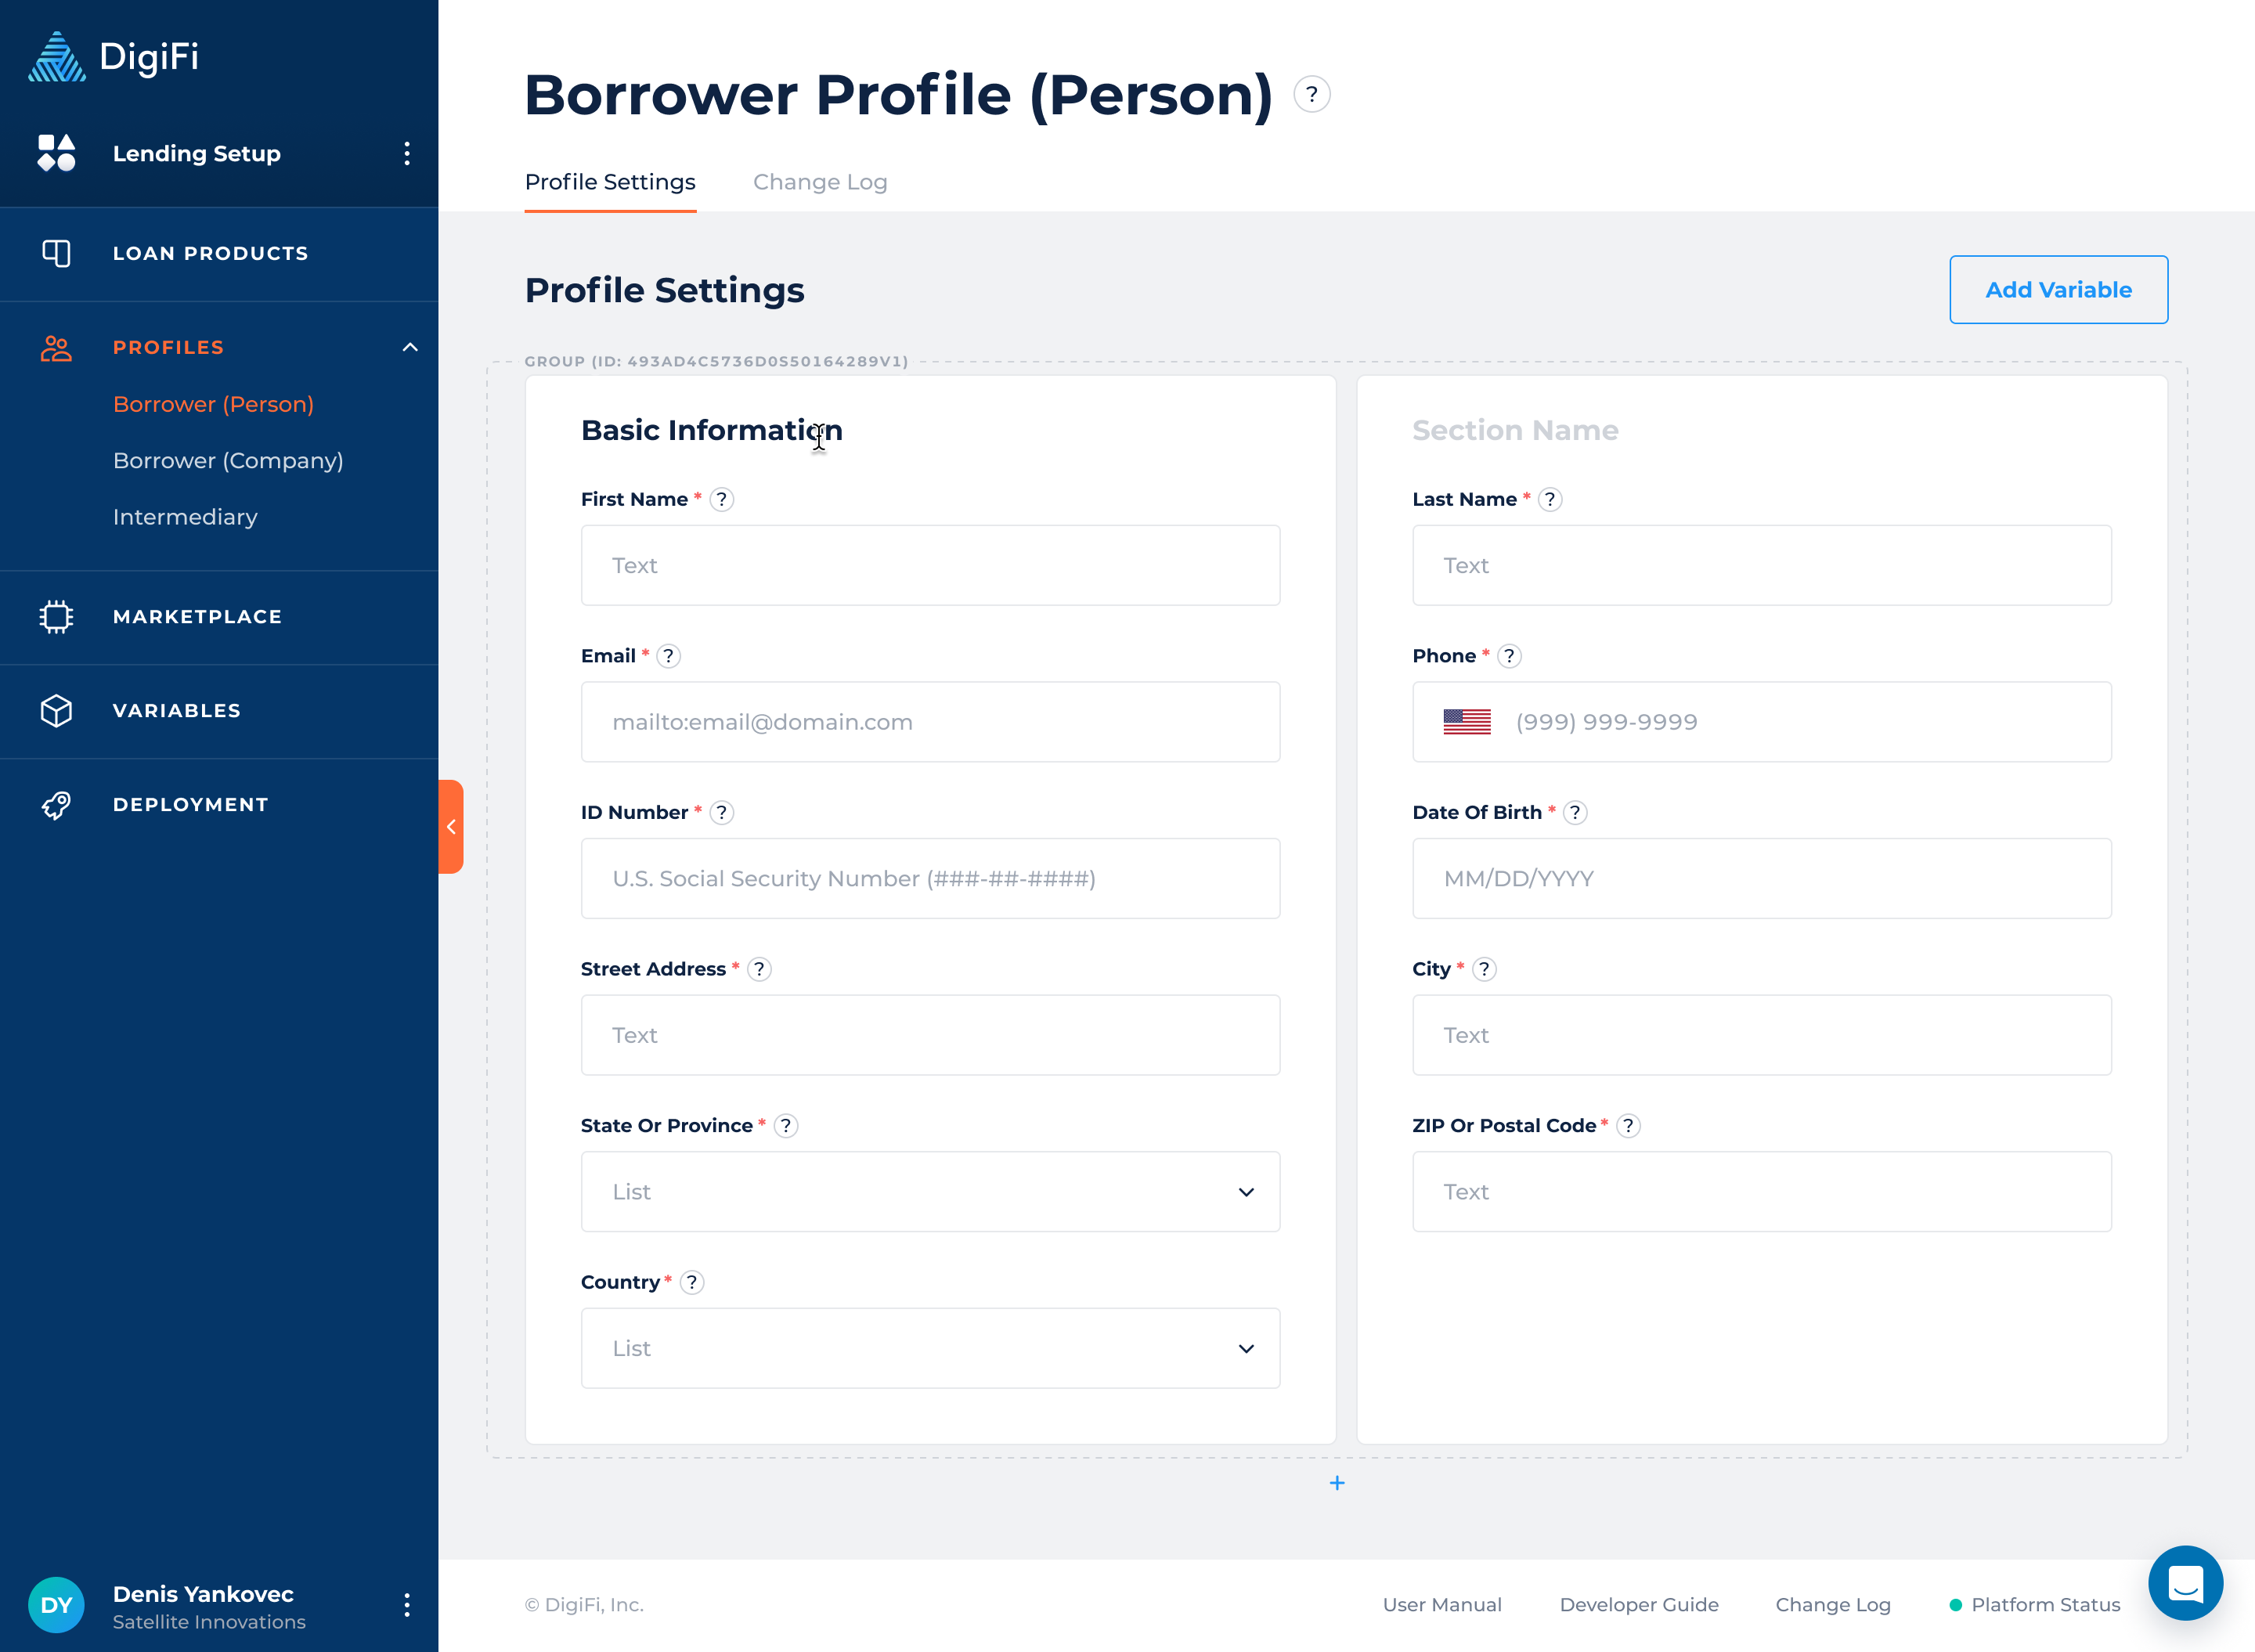
Borrower Profile Sections
Your borrower profile can include multiple sections to separate information logically.
For ExampleIf your borrower profile includes personal information and address information, you could make two sections:
- Personal Information, with variables like "Borrower First Name", "Borrower Last Name", "Borrower Email".
- Address Information with variables like "Borrower Street Address", "Borrower City", "Borrower Country".
To add a new group, click on the "+" button located under the existing group. You can add new groups below or between existing ones, and rearrange their order using drag-and-drop.
To add a new section, click on the "+" button located on the right side of the section. Please note that sections can only be added across the group (with a maximum of 2 sections). You can drag-and-drop sections from one group to another (if it has fewer than 2 sections) and change the order of sections within the same group.
To add a description to a section, click on the 3-dots icon (in the top-right corner of the section), and choose "Add Description." Enter the section's description, then save your changes.
Sections can be removed by clicking the 3-dots icon (in the top-right corner of the section) and then the "Remove Section" button.
Borrower Profile Variables
You can place variables in each section of the borrower profile. Adding variables to the borrower profile updates both the user interface display (i.e. how the profile looks) and the data structure (i.e. the data that is saved). Variables can be placed in two sections across and many rows downwards.
We recommend only storing information that should be kept up to date (e.g. contact details) on the borrower profile and putting most point-in-time information on the application (using Lender Application Views).
To add a variable:
- Click the "Add Variable" button.
- A pane will appear on the right side of the screen.
- You can drag-and-drop variables onto the page.
Please note the following:
- Variables can be placed in up to 2 sections.
- Only variables with the purpose set to "Borrower Profile" can be added to the borrower profile. The display will automatically hide the word "Borrower" for convenience.
- To update a specific variable (for example, to change a currency format or phone number format), navigate to variables and update it there.
To remove a variable from the borrower profile:
- Hover over the variable.
- Click the 3-dots.
- Select the "Remove Variable" option.
Managing Required Fields
On your borrower profile, you can choose which variables are required and optional when a new borrower is added. Required variables are indicated by the red asterisk beside the name of the variable.
Borrower profile variables can be made "required" by hovering over them, clicking the 3-dots and then clicking "Make Field Required". It will then receive a red asterisk to indicate the change. You can repeat the same process to remove the requirement.
Required Variable Example
Optional Variable Example

Variable Display Conditions
On your borrower profile, you can set "Display Conditions" for each variable. This allows you to hide a variable unless a condition passes (in which case the variable will be displayed).
To add a display condition to a variable:
- Hover over the variable.
- Click on the 3-dots and select "Add Display Condition".
- This will let you set a condition to determine whether the variable should display using the DigiFi formula language. The condition must return TRUE (boolean) or "true" (string) to pass and display the Variable.
You can edit or remove the display condition by clicking the 3-dots and selecting "Edit Display Condition" or "Remove Display Condition".
Conditional Formatting
On your Borrower Profile, you can set “Conditional Formatting” for each variable. This allows you to apply a color based on a variable’s value, to highlight it similarly to how formatting can be applied in Excel.
To add conditional formatting to a variable:
- Hover over the variable.
- Click on the 3-dots and select "Add Conditional Formatting".
- Set condition(s) using DigiFi's formula language to determine what highlight color will be applied to a variable if its value passes a condition. You can choose the color from the color picker or add a HEX color code. The condition must return TRUE (boolean) or "true" (string) to pass and highlight the variable.
- Optionally you can click on a toggle and add a highlight color if all conditions fail.
You can edit or remove the conditional formatting by clicking the 3-dots and selecting "Edit Conditional Formatting" or "Remove Conditional Formatting".
Custom Validation
On your borrower profile, you can set "Custom Validation" for each variable. This allows you to control what values can be entered into a variable by defining validation rules.
To add custom validation to a variable:
- Hover over the variable.
- Click on the 3-dots and select "Add Custom Validation".
- Define a condition to determine whether the value entered into the variable is valid using DigiFi's formula language.
- Enter a custom error message that will be displayed if the value does not meet the condition. The condition must return TRUE (boolean) or "true" (string) to pass validation. If the condition fails, the error message will be shown and users will not be able to proceed until the value is corrected.
You can edit or remove the custom validation by clicking the 3-dots and selecting "Edit Custom Validation" or "Remove Custom Validation".
Please note that validation is only applied to visible variables, variables hidden by display conditions are not validated.
Duplicating Data to Applications
When new applications are created, the data from the borrower profile are duplicated onto the application. This duplication ensures that historical application data is preserved even if changes are made to the borrower profile.
Please note that the views for historical applications will be updated if you change the borrower profile setup (even though the underlying data is unchanged).
Change Log
Tracking updates helps users understand historical changes and ensure compliance. Every time a change is made to the person's borrower profile, DigiFi records what change was made, when and by whom. A record of historical changes can be viewed on the Change Log tab.
You can sort changes from Newest to Oldest or vice versa by clicking on the ⇵ button on the right side.

Updated 4 months ago